Creating a drum centerpiece is a fun and creative project. It adds a unique touch to any event.
Drum centerpieces are perfect for music-themed parties, weddings, or even home decor. This project allows you to express your personality and creativity. Whether you are a seasoned crafter or a beginner, making a drum centerpiece is both enjoyable and rewarding.
You do not need to spend a lot of money or have special skills. With a few materials and some imagination, you can create a stunning centerpiece that will impress your guests. This guide will show you the steps to make a drum centerpiece that is sure to be a conversation starter. So, let’s get started on this exciting DIY adventure!
Choosing The Right Drum
Creating a stunning drum centerpiece starts with choosing the right drum. The right drum sets the tone and theme for your centerpiece. Here’s how to select the perfect one.
Size Considerations
Size matters when selecting a drum for your centerpiece. A drum that’s too big can overwhelm the space. Conversely, a small drum might not stand out. Measure the area where the centerpiece will be placed. This ensures the drum fits well.
| Space | Drum Size |
|---|---|
| Small Table | 8-12 inches |
| Medium Table | 12-16 inches |
| Large Table | 16-20 inches |
Material Options
Drums come in various materials, each offering a unique look. Common options include wood, metal, and synthetic materials.
- Wood: Provides a rustic and natural feel. Great for vintage or boho themes.
- Metal: Offers a sleek and modern look. Ideal for contemporary settings.
- Synthetic: Lightweight and versatile. Available in many colors and patterns.
Selecting the right material complements your event’s theme. Wooden drums work well for earthy tones. Metal drums suit minimalist designs. Synthetics provide flexibility with vibrant colors.

Credit: www.drumeo.com
Preparing The Drum
Creating a unique drum centerpiece starts with preparing the drum. This step is crucial. It helps ensure a smooth, polished finish. Proper preparation includes cleaning, sanding, and priming the drum. These steps will make your drum centerpiece stand out.
Cleaning The Surface
The first step is to clean the drum’s surface. Use a damp cloth to remove dust and dirt. A mild soap solution can help with stubborn grime. Rinse the drum with water and let it dry completely. A clean surface ensures better adhesion of paint and primer.
Sanding And Priming
Once the drum is clean, the next step is sanding. Sanding smooths out any rough spots. It also helps the primer adhere better. Use fine-grit sandpaper for best results. Sand the entire surface evenly.
After sanding, it’s time to apply primer. Primer helps the paint stick to the drum. It also gives a uniform base color. Apply a thin, even coat of primer. Let it dry completely before moving on to painting.
Selecting A Theme
Creating a drum centerpiece can be a fun and creative activity. One key step is Selecting a Theme. The theme sets the mood and ensures all elements complement each other. Here are some ideas to get you started.
Color Scheme Ideas
Choosing the right color scheme is crucial. It ties everything together. Here are a few suggestions:
- Classic Black and White: Timeless and elegant.
- Vibrant Rainbow: Fun and eye-catching.
- Earth Tones: Natural and soothing.
- Metallics: Modern and chic.
Think about the event’s purpose. A wedding might prefer soft pastels. A birthday party could use bold, bright colors.
Matching Decor Styles
Once you have a color scheme, match it with the decor style. This ensures harmony.
Consider these styles:
| Style | Description |
|---|---|
| Rustic | Wood elements, burlap, and natural colors. |
| Modern | Sleek lines, metallics, and minimalism. |
| Boho | Bright colors, mixed patterns, and eclectic items. |
| Vintage | Antique pieces, lace, and muted tones. |
For a rustic theme, use wooden sticks and twine. For a modern look, try metallic accents and clean lines.
Painting The Drum
Painting the drum is a fun and creative part of making your centerpiece. It allows you to personalize and add a splash of color. This section will guide you on choosing the right paint and painting your drum step-by-step.
Choosing Paint Types
There are different paints you can use. Acrylic paint is popular. It’s easy to use and dries quickly. Spray paint is another option. It gives a smooth finish and covers large areas fast. You may also consider enamel paint. It provides a glossy finish and is very durable. Choose the type that fits your needs best.
Step-by-step Painting
First, clean the drum. Remove any dirt and grease. Use a damp cloth. Let it dry completely.
Next, apply a primer. This helps the paint stick better. Let the primer dry. Follow the instructions on the can for drying time.
Now, start painting. Use a brush for acrylic and enamel paint. For spray paint, shake the can well. Hold it about 12 inches away. Apply light, even coats. Avoid drips by not holding the can too close.
Let the first coat dry. Apply a second coat if needed. Two coats usually give the best coverage.
Finally, let the drum dry completely. This may take a few hours. Once dry, your drum is ready to be part of your beautiful centerpiece.
Adding Decorative Elements
Adding decorative elements to your drum centerpiece can make it stand out. Simple additions can transform it into a stunning focal point. Let’s explore a few creative ideas to enhance your drum centerpiece.
Using Stencils And Patterns
Stencils and patterns can add a unique touch. Choose a design that matches your theme. Place the stencil on the drum’s surface. Use paint or markers to fill in the pattern. Let it dry completely before removing the stencil. This method creates clean, professional-looking designs.
Attaching Accessories
Accessories can elevate your drum centerpiece. Attach ribbons, flowers, or beads for added flair. Use hot glue or double-sided tape to secure them. Ensure the accessories match your color scheme. This creates a cohesive look. You can also add small lights for a sparkling effect. Wrap the lights around the drum carefully. Turn them on to see your masterpiece shine.
Creating The Base
Creating the base of your drum centerpiece is a crucial step. A solid base ensures stability and ease of use. This section will guide you through stabilizing the drum and adding feet or wheels. Let’s get started!
Stabilizing The Drum
First, make sure the drum is clean and dry. A stable drum is key to a sturdy base. Use a level to check the drum’s balance. If the drum wobbles, adjust it by placing small pieces of wood or cardboard under the unsteady side. For extra stability, consider using sandbags or weights inside the drum. Ensure the drum remains level and secure.
Adding Feet Or Wheels
Adding feet or wheels can enhance the base’s functionality. Feet provide a stationary setup, while wheels allow easy movement. To add feet, use rubber or metal feet that screw into the drum’s bottom. Mark and drill holes where the feet will go. Secure the feet with screws and washers.
If you prefer wheels, purchase caster wheels with locking mechanisms. Mark and drill holes at the bottom of the drum. Attach the wheels using screws and washers. Lock the wheels to keep the drum in place. Ensure all feet or wheels are evenly spaced and securely attached.
| Component | Purpose |
|---|---|
| Feet | Provide stability |
| Wheels | Enable mobility |
With these steps, your drum centerpiece will have a strong and functional base.
Incorporating Lighting
Incorporating Lighting is a great way to make your drum centerpiece shine. The right lighting adds a magical touch. It can turn your drum centerpiece into a stunning focal point. This section will guide you on types of lights and placement tips to enhance your drum centerpiece.
Types Of Lights
Choosing the right lights is essential. Here are some types of lights that work well:
- LED Strips: These are flexible and come in various colors.
- Fairy Lights: Small, twinkling lights that add a whimsical touch.
- Spotlights: Direct light to highlight specific areas of the drum.
- Battery-operated Candles: Safe and add a warm, cozy glow.
Placement Tips
Placement of lights is crucial for the desired effect. Here are some tips:
- Under the Drum: Place LED strips or fairy lights under the drum for an ethereal glow.
- Inside the Drum: Put battery-operated candles inside to create a warm light coming through any openings.
- Around the Base: Wrap fairy lights around the base for a sparkling effect.
- Highlight Details: Use spotlights to focus on unique features of the drum.
By selecting the right lights and placing them strategically, your drum centerpiece will look amazing. This simple addition can transform your drum into a captivating piece of decor.
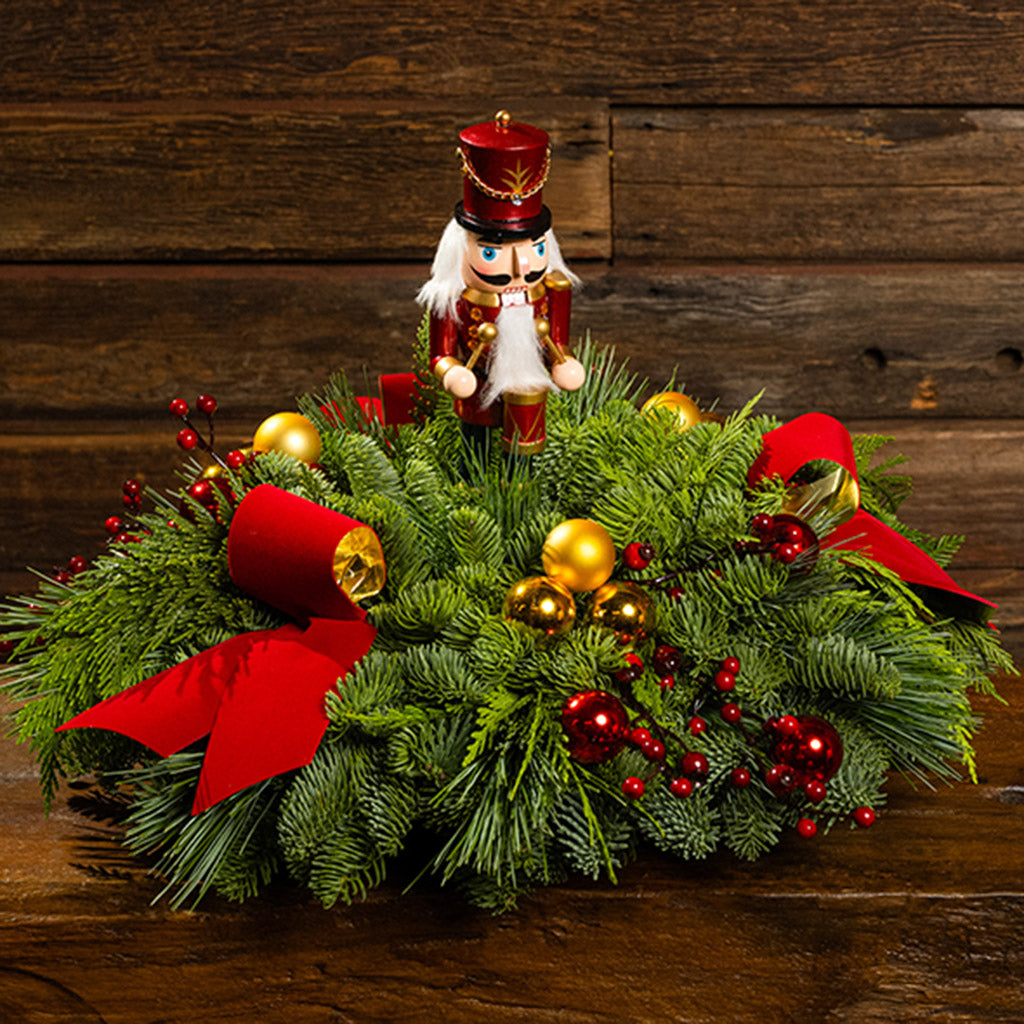
Credit: lynchcreekwreaths.com
Final Touches
Adding the final touches to your drum centerpiece can elevate its overall look. This section will guide you through the sealing and protecting process. It will also give tips on how to display your centerpiece for maximum impact.
Sealing And Protecting
Sealing your drum centerpiece ensures its longevity. Use a clear sealant spray to protect the drum’s surface. This will guard against dust and minor scratches. Make sure to apply the sealant in a well-ventilated area. Follow the instructions on the can for the best results.
Allow the sealant to dry completely before moving the centerpiece. This will prevent smudges or fingerprints. A fully dried sealant will give your drum a polished look. It will also make cleaning the centerpiece easier in the future.
Displaying Your Centerpiece
Now that your drum centerpiece is ready, think about where to display it. Place it in a location where it can be a focal point. A coffee table or dining table works well. Make sure the spot has good lighting to highlight the centerpiece’s details.
Consider the surrounding décor when choosing a display area. The drum should complement the room’s theme. Use a simple stand to elevate the drum if needed. This can add height and make the piece more noticeable.
Rotate the drum occasionally to show different angles. This keeps the display fresh and interesting. Your drum centerpiece is now ready to impress your guests.
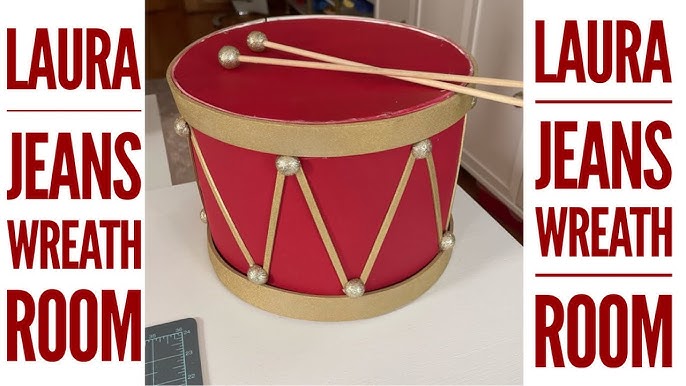
Credit: www.youtube.com
Frequently Asked Questions
How Do I Start Making A Drum Centerpiece?
To start making a drum centerpiece, gather materials like a small drum, flowers, and decorative elements. Follow a step-by-step guide to assemble and decorate your centerpiece.
What Materials Do I Need For A Drum Centerpiece?
You need a small drum, floral foam, flowers, greenery, ribbon, and decorative elements. These materials help create an attractive and themed centerpiece.
Can I Use Artificial Flowers For My Centerpiece?
Yes, artificial flowers are a great choice. They last longer and require less maintenance than fresh flowers, making them ideal for drum centerpieces.
How Do I Secure Flowers On The Drum?
Use floral foam to secure the flowers. Place the foam inside the drum and insert the flowers into the foam for stability.
Conclusion
Creating a drum centerpiece is simple and fun. Follow these easy steps to add a unique touch to any event. Your guests will love the creativity and effort. Remember, personalization is key. Choose colors and materials that match your theme.

Enjoy the process and let your creativity shine. This project not only decorates but also impresses. Try making your own drum centerpiece today. It’s a great way to add a personal touch. Happy crafting!
As an Amazon Associate, Cleanestor earns from qualifying purchases at no additional cost to you.