Miking a snare drum might seem tricky at first. But with the right tips, it can be straightforward.
The snare drum is crucial for any drum kit, providing the sharp, crisp sound that drives many songs. Capturing this sound accurately is essential for both live performances and studio recordings. In this guide, you’ll learn the basics of how to mic a snare drum effectively.
From selecting the right microphone to positioning it correctly, we’ll cover the essential steps. This knowledge ensures your snare drum sounds great, whether you’re playing on stage or recording in the studio. Ready to dive in and get that perfect snare sound? Let’s get started!

Credit: www.sweetwater.com
Introduction To Snare Drum Miking
The snare drum plays a crucial role in any drum kit. Its sharp and distinct sound can define a song’s rhythm. Proper miking of the snare drum is essential to capture its true essence. This guide will help you understand the basics of snare drum miking.
Importance Of Snare Drum Sound
The snare drum sound can make or break a recording. A clear and crisp snare can elevate the entire track. It provides the foundation for the song’s beat. The snare’s tone and texture are vital for any music genre. A well-miked snare can add depth and clarity to your recordings.
Common Techniques
There are several techniques to mic a snare drum. Each method offers a unique sound profile. One common technique is using a dynamic microphone. Place the mic an inch above the drum head. Angle it towards the center for a balanced sound.
Another popular method is using a condenser microphone. This mic captures more detail and nuance. Place it a few inches above the snare. Adjust the angle for the desired tone.
Some engineers use a combination of both mics. This method provides a blend of detail and punch. Experiment with mic placement to find the best sound for your snare drum.
Choosing The Right Microphone
Choosing the right microphone for micing a snare drum is crucial. The mic influences the sound quality and clarity. Different mics capture different sound characteristics. This section will help you understand the best microphone options.
Dynamic Vs Condenser Mics
Dynamic mics are durable and handle high sound pressure levels. They are great for live performances. They can capture the punch and attack of the snare. They are less sensitive to ambient noise.
Condenser mics are more sensitive and capture more detail. They are ideal for studio recordings. They can pick up the subtle nuances of the snare. They require phantom power to operate.
Popular Mic Models
Several mic models are popular for snare drums. The Shure SM57 is a top choice. It is a dynamic mic with a cardioid pattern. It handles high sound pressure levels well.
The AKG C414 is a popular condenser mic. It offers multiple polar patterns. It captures detailed and crisp snare sounds. Another option is the Audix i5. It is a dynamic mic known for its durability. It delivers clear and punchy snare sound.
The Sennheiser e604 is another reliable dynamic mic. It has a compact design. It is easy to position and handles high sound pressure levels. These mics are all excellent choices for micing a snare drum.
Mic Placement Techniques
Mic placement is crucial for capturing the best sound from a snare drum. Different techniques yield different results. Proper placement enhances sound quality. It also reduces unwanted noise. Let’s explore some effective mic placement techniques.
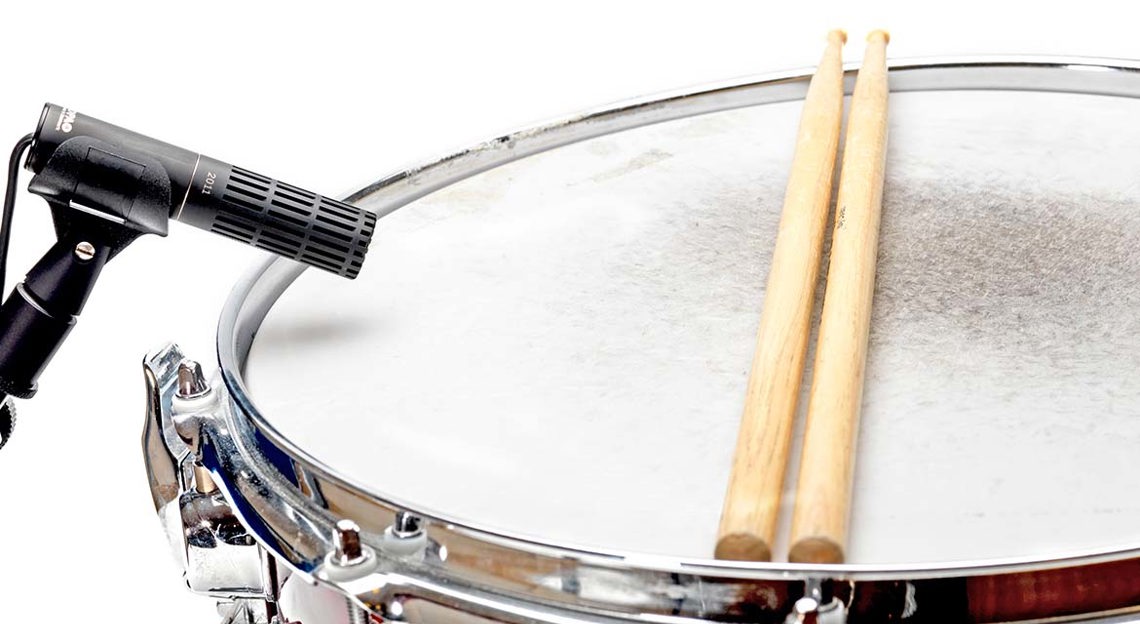
Top Mic Positioning
Place the mic about two inches above the drumhead. Angle it towards the center of the drum. This captures the main sound of the hit. Position the mic at a 45-degree angle. This helps reduce bleed from other drums. Avoid placing the mic too close. It can cause distortion and unwanted noise.
Bottom Mic Positioning
Place a mic under the snare drum. This captures the snare wires’ sound. Position it about two inches from the drumhead. Angle it slightly towards the center. This helps capture the crisp, rattling sound. Balance the levels of both mics. This ensures a fuller, richer snare sound.
Credit: www.dpamicrophones.com
Dealing With Phase Issues
Dealing with phase issues is crucial when micing a snare drum. Phase problems can ruin the sound quality, making your snare drum recordings weak and thin. Understanding phase issues and knowing how to correct them will ensure your snare drum sounds strong and full.
Identifying Phase Problems
Phase problems occur when two microphones capture the same sound at slightly different times. This can cause the signals to interfere with each other. To identify phase issues, listen carefully to the snare drum recording. If it sounds hollow or lacks punch, phase problems might be the cause.
Another way to identify phase problems is by zooming in on the waveforms in your DAW. Check if the peaks and troughs of the waveforms align. If they don’t, you likely have phase issues.
Correcting Phase Issues
To correct phase issues, start by checking the position of your microphones. Ensure they are placed correctly around the snare drum. Small adjustments can make a big difference.
Next, use the phase invert button on your mixer or audio interface. This button flips the phase of one of the signals, helping to align the waveforms. Listen to the recording again to see if it sounds fuller.
For more precise adjustments, use a phase alignment plugin. These plugins allow you to manually adjust the timing of the signals. Align the waveforms so that their peaks and troughs match up.
Finally, experiment with different mic placements and techniques. Sometimes, simply moving a mic an inch or two can solve phase problems. Trust your ears and make adjustments until the snare drum sounds right.
Enhancing The Snare Sound
Enhancing the snare sound is crucial for any drum mix. A well-mic’d snare can transform a track, providing punch and clarity. Let’s dive into how you can enhance your snare sound.
Using Eq
Equalization (EQ) helps shape the snare’s tone. Start by cutting unwanted frequencies. Use a high-pass filter to remove low rumble below 100 Hz. Boost around 200 Hz for body and warmth. Add a slight boost at 5 kHz for attack. Finally, enhance the crispness at 10 kHz for more snap.
| Frequency Range | Adjustment |
|---|---|
| Below 100 Hz | Cut |
| 200 Hz | Boost |
| 5 kHz | Boost |
| 10 kHz | Boost |
Applying Compression
Compression controls the snare’s dynamics. Set a fast attack to catch the initial hit. Use a medium release to maintain the natural decay. Start with a 4:1 ratio and adjust the threshold until you see 3-6 dB of gain reduction. Increase the makeup gain to compensate for lost volume.
- Attack: Fast
- Release: Medium
- Ratio: 4:1
- Gain Reduction: 3-6 dB
Recording Tips
Recording the perfect snare drum sound can be challenging. The snare drum is crucial in a recording. Its sound can define the entire track. To capture its essence, several recording tips can help. Let’s explore key aspects of micing a snare drum, focusing on room acoustics and isolation techniques.
Room Acoustics
The room’s acoustics impact the snare drum’s sound. Record in a room with good acoustics. Avoid rooms with reflective surfaces. These can cause unwanted echoes. Soft furnishings help absorb sound. Rugs, curtains, and foam panels work well. Experiment with the room’s setup. Move items around to find the best sound.
Isolation Techniques
Isolating the snare drum reduces bleed from other instruments. Use a drum shield or isolation booth. These barriers help focus the microphone on the snare. You can also use close micing. Place the mic close to the snare drum head. This captures the direct sound and minimizes bleed. Try using a dynamic microphone. It rejects background noise better than condensers. Properly isolating the snare drum ensures a clean, crisp recording.
Live Sound Considerations
Miking a snare drum in a live setting requires careful planning. Each aspect of the setup can affect the overall sound. Ensuring clarity and avoiding feedback is crucial. Attention to detail ensures the best live performance.
Feedback Control
Controlling feedback is essential in live sound environments. Proper microphone placement can help. Position the mic to capture the snare’s sound directly. Avoid placing it too close to monitors. This reduces the risk of feedback.
- Use a cardioid microphone to focus on the snare.
- Adjust the gain to an appropriate level.
- Use EQ settings to cut problematic frequencies.
A good rule is to keep the mic at least a few inches from the snare. Angling the mic can also help. Point it slightly away from other loud sources. This minimizes unwanted noise.
Monitor Mixing
Monitor mixing ensures the drummer hears the snare clearly. Balance the snare level in the monitor mix. Too loud, and it could cause issues. Too soft, and the drummer may struggle.
| Action | Result |
|---|---|
| Increase snare volume in monitor | Better drummer clarity |
| Reduce other instruments’ volume | Less distraction for drummer |
| Use in-ear monitors | More precise sound control |
In-ear monitors can offer precise control. They isolate the snare sound for the drummer. This can be beneficial in loud environments.
Proper monitor mixing keeps the performance tight. It helps the drummer stay in sync. This ensures a smooth, professional sound.
Advanced Miking Techniques
Advanced miking techniques can elevate the sound of a snare drum. These methods require more precision and creativity. Let’s delve into some advanced techniques.
Using Multiple Mics
Using multiple mics can capture a fuller snare sound. It involves placing different microphones in strategic positions.
- Top mic: Place a dynamic mic above the snare. Aim it at the center of the drumhead.
- Bottom mic: Position a condenser mic below the snare. This captures the snare wires’ rattle.
Here is a simple table to illustrate the setup:
| Mic Position | Mic Type | Purpose |
|---|---|---|
| Top | Dynamic | Capture the attack |
| Bottom | Condenser | Capture the sizzle |
Blend these two sources for a balanced sound. Adjust the levels to find the sweet spot.
Creative Mic Placement
Creative mic placement can add unique characteristics to your snare sound. Experiment with different positions.
- Side mic: Place a mic at the side of the snare. Aim it towards the drum’s edge.
- Overhead: Use an overhead mic to capture the drum kit’s overall sound. This includes the snare.
- Room mic: Set up a mic a few feet away from the kit. This captures the room’s natural reverb.
Each position adds a different flavor to the snare sound. Combine them to create a rich, layered tone.
Troubleshooting Common Issues
Mic’ing a snare drum can be tricky. Common issues can ruin your sound. Here, we address these problems with practical solutions.
Buzzing And Rattling
Buzzing and rattling sounds are common. They can be annoying and affect your recording quality. To fix this, try the following steps:
- Check the drum’s tuning. Loose lugs can cause vibrations.
- Inspect the snare wires. They should be tight and even.
- Use dampening materials. Moongel or gaffer tape can reduce unwanted noise.
These steps can help reduce buzzing. A well-tuned drum is less likely to rattle.
Unwanted Noise
Unwanted noise can come from many sources. It can be tricky to pinpoint. Here are some tips to help:
- Isolate your drum. Use a drum rug to minimize vibrations.
- Check your mic placement. Ensure it is not picking up other instruments.
- Use a noise gate. This can help cut out background noise.
Proper mic placement and isolation are key. They help in reducing unwanted noise.
In summary, addressing buzzing, rattling, and unwanted noise ensures a cleaner sound. Happy recording!

Credit: www.youtube.com
Frequently Asked Questions
What Is The Best Mic For Snare Drum?
A dynamic mic like the Shure SM57 is popular for snare drums. It captures clear, detailed sound and handles high SPL.
Where Should I Place The Snare Drum Mic?
Place the mic about 1-2 inches above the drum head. Angle it towards the center for balanced sound capture.
How To Avoid Snare Drum Mic Bleed?
Use a cardioid mic to minimize bleed. Position the mic to reject unwanted sounds from other drums or instruments.
Should I Use A Second Mic On The Snare?
Using a second mic below the snare captures the snare wires’ sound. This adds more depth and texture.
Conclusion
Achieving the perfect snare drum sound is simpler than it seems. Use the right mic and placement techniques. Experiment with angles and positions to find your unique sound. Remember to trust your ears and make adjustments as needed. With patience and practice, you’ll capture the snare drum’s true essence.

Don’t hesitate to revisit and tweak your setup. Consistency and attention to detail are key. Happy miking!
As an Amazon Associate, Cleanestor earns from qualifying purchases at no additional cost to you.