Want to make your own Native flute? It’s easier than you think.
With some basic tools and materials, you can create a beautiful, traditional instrument. Native flutes have a rich history. They are known for their soothing sounds and cultural significance. Making a Native flute allows you to connect with this heritage.
Plus, it’s a rewarding craft that anyone can learn. In this blog, we’ll guide you through each step of the process. From selecting the right wood to tuning your flute, you’ll find everything you need to know. Ready to start your journey into flute-making? Let’s dive in and explore this fascinating craft together.
Materials Needed
Creating a native flute requires specific materials. These materials ensure the flute sounds beautiful and authentic. This section covers the essential materials needed to make your own native flute.
Wood Selection
Choosing the right wood is crucial. The type of wood affects the flute’s sound quality. Softwoods like cedar and pine are popular choices. They are easier to carve and produce a warm tone. Hardwoods like maple and oak are also used. They are durable and give a brighter sound. Ensure the wood is straight and free of knots.
Tools Required
Several tools are necessary for making a native flute. A saw is needed to cut the wood to the desired length. A chisel helps in hollowing out the wood. Sandpaper smooths the surface and refines the shape. A drill creates the finger holes. A tuning stick helps in adjusting the pitch. Glue is used to join the two halves of the flute. Lastly, a finish like varnish or oil protects the wood and adds a beautiful shine.
Preparing The Wood
Creating a native flute is an art that begins with preparing the wood. This step is crucial for ensuring the flute sounds beautiful and lasts a long time. The wood must be carefully chosen, cut to the right length, and sanded until smooth. Let’s dive into the details of each of these steps.
Cutting To Length
First, select a piece of wood. This is usually cedar, but other softwoods can work too. Measure the desired length of your flute. Typically, a native flute ranges between 18 to 24 inches.
- Mark the wood at the chosen length.
- Use a fine-toothed saw to cut the wood carefully.
- Ensure the cut is straight to avoid any issues later.
A straight cut helps maintain the flute’s structure and sound quality. Double-check your measurements before cutting.
Sanding And Smoothing
Once the wood is cut to the right length, the next step is sanding. This process removes rough edges and prepares the wood for further shaping.
- Start with coarse sandpaper (around 80-grit).
- Sand the entire surface of the wood.
- Gradually move to finer grits (120, 220).
Ensure all surfaces are smooth to the touch. Smooth wood is easier to carve and shape, and it feels better in your hands.
After sanding, wipe the wood with a damp cloth to remove any dust. This helps you see any rough spots you may have missed.
Hollowing The Flute
Creating a native flute is a rewarding and creative process. One of the most crucial steps is hollowing the flute. This ensures the flute produces a beautiful, resonant sound. Let’s explore how to hollow the flute efficiently.
Drilling The Bore
Start by marking the center of the wooden blank. Use a drill press to drill a straight bore through the length of the flute. It’s important to use a drill bit that matches the desired diameter of the flute bore.
- Secure the wooden blank firmly.
- Ensure the drill bit is sharp.
- Drill at a slow, steady pace.
Be cautious to drill straight. A crooked bore can affect the flute’s sound quality.
Shaping The Inner Chamber
After drilling the bore, it’s time to shape the inner chamber. This step refines the inside of the flute to improve airflow and sound.
Use a long, thin chisel or a specialized tool called a reamer. Carefully scrape the inner walls to smooth out any rough spots.
- Insert the chisel or reamer into the bore.
- Gently rotate and scrape the inner walls.
- Check for smoothness by feeling with your fingers.
A smooth inner chamber enhances the flute’s tonal quality. Take your time and ensure even shaping throughout.

Credit: www.youtube.com
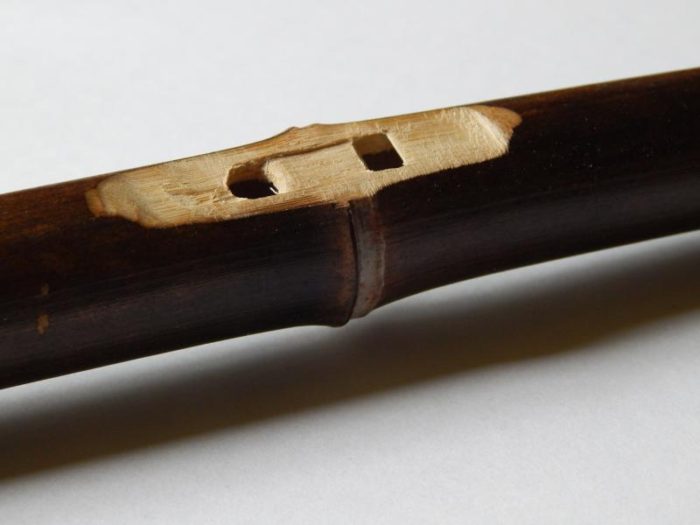
Creating The Sound Hole
Creating the sound hole is a vital step in making a native flute. This hole shapes the flute’s sound and its quality. It needs careful attention and precise work. Here’s how to create it:
Marking The Placement
First, choose the spot for your sound hole. This hole is often near the top of the flute. Measure the distance from the top of the flute to the desired spot. Use a pencil to mark this spot clearly. Be sure the mark is straight and centered.
| Step | Action |
|---|---|
| 1 | Choose the spot for the sound hole |
| 2 | Measure the distance from the top |
| 3 | Mark the spot with a pencil |
Carving The Hole
Once marked, begin carving the hole. Use a small, sharp tool for precision. Carefully carve out the marked spot, keeping the edges smooth. It’s essential to make the hole clean and even. A rough hole affects the sound quality.
Test the flute as you carve. Blow through it to check the sound. Adjust the hole size as needed. Make small changes to avoid over-carving. The goal is a clear, pleasant sound.
- Use a small, sharp tool
- Carve carefully around the marked spot
- Ensure the edges are smooth
- Test the flute’s sound regularly
- Adjust the hole size as needed
Creating the sound hole requires patience and precision. But with care, your flute will produce beautiful music.
Adding Finger Holes
Adding finger holes is a crucial step in making a native flute. These holes define the notes the flute can play. Carefully measuring and drilling the holes will ensure your flute produces beautiful music. Let’s break down the process into manageable steps.
Measuring Distances
First, you need to measure the distances for the finger holes. Use a ruler or measuring tape. Ensure equal spacing between each hole. Here’s a simple guide:
- First Hole: Measure 1 inch from the end of the flute.
- Second Hole: Measure 2 inches from the first hole.
- Third Hole: Measure 2 inches from the second hole.
- Fourth Hole: Measure 2 inches from the third hole.
- Fifth Hole: Measure 2 inches from the fourth hole.
- Sixth Hole: Measure 2 inches from the fifth hole.
Mark each spot with a pencil. These marks will guide your drilling.
Drilling Holes
Now, it’s time to drill the holes. Follow these steps:
- Secure the flute on a stable surface.
- Use a small drill bit to start. This prevents cracking.
- Drill slowly and steadily on each marked spot.
- Once all holes are drilled, switch to a larger bit if needed.
- Smooth the edges of each hole with sandpaper.
Ensure the holes are clean and round. This will affect the sound quality.
Test the flute by covering the holes and blowing into it. Adjust if necessary.
Tuning The Flute
After crafting your native flute, the next step is tuning. Proper tuning ensures your flute produces beautiful, harmonious sounds. This involves adjusting the hole sizes and fine-tuning for pitch.
Adjusting Hole Sizes
The size of each hole affects the sound. If a note is too high, the hole might be too large. If it’s too low, the hole might be too small. Adjusting hole sizes is a delicate process.
- Check the pitch: Play each note and listen carefully.
- Enlarge holes: Use a small file or drill bit. Make tiny adjustments.
- Test frequently: Play the note after each adjustment.
Remember, it’s easier to enlarge a hole than to make it smaller. Proceed with caution and patience.
Fine-tuning For Pitch
Once the holes are the correct size, fine-tuning for pitch is the final step. This ensures each note is accurate and in harmony.
- Use a tuner: A digital tuner helps you find the exact pitch.
- Adjust the block: Slightly move the block to change the pitch.
- Modify the air flow: Adjust your breath to fine-tune the sound.
Fine-tuning requires a good ear and practice. Consistent testing and adjustments lead to a well-tuned flute.
Tip: Record your flute sounds. Compare them to standard notes to identify areas needing adjustments.
| Step | Description |
|---|---|
| Check the pitch | Play each note and listen for accuracy. |
| Adjust holes | Enlarge or reduce hole size as needed. |
| Use a tuner | Ensure each note matches the correct pitch. |
| Adjust the block | Move the block to fine-tune. |
| Modify air flow | Use your breath to make small adjustments. |
Finishing Touches
The final step in making a native flute is all about the finishing touches. These touches ensure your flute looks beautiful and sounds perfect. This part of the process involves careful sanding and applying a finish to protect and enhance the wood.
Sanding The Surface
Start by sanding the surface of your flute. Use a fine-grit sandpaper. Sand the entire flute gently and evenly. This will remove any rough spots. Make sure to sand the finger holes and the mouthpiece carefully. Smooth edges are essential for comfort and playability.
Check your work by running your fingers over the flute. It should feel smooth all over. If you find any rough areas, sand them again. Repeat this process until the flute feels silky to the touch.
Applying A Finish
The next step is applying a finish. This protects the wood and gives it a polished look. Choose a finish that is safe and suitable for musical instruments. You can use oil, wax, or a clear varnish.
Here’s a simple way to apply a finish:
- Clean the flute with a soft cloth.
- Apply a thin layer of your chosen finish using a brush or cloth.
- Let it dry completely.
- Lightly sand the flute with very fine sandpaper.
- Apply a second coat of finish.
Repeat these steps for a third coat if necessary. Make sure each layer is fully dry before applying the next. This ensures a smooth and even finish.
Once done, your flute will not only look stunning but also be protected from wear and tear.
| Step | Action |
|---|---|
| 1 | Sand the entire flute evenly. |
| 2 | Apply the first layer of finish. |
| 3 | Let the finish dry completely. |
| 4 | Lightly sand the flute again. |
| 5 | Apply the second layer of finish. |
| 6 | Repeat for a third coat if needed. |
These finishing touches are crucial for the final product. They ensure your native flute is both beautiful and durable. Enjoy the process and the beautiful music your flute will create!
Credit: flutecraft.org
Playing Your Flute
Learning to play your homemade native flute can be a rewarding experience. The process is simple, and you can start creating beautiful sounds quickly. Let’s dive into the basic techniques and some useful practice tips to get you started.
Basic Techniques
Understanding the basic techniques is crucial for playing the native flute. Start with the right posture. Sit or stand straight. Hold the flute horizontally. Place your fingers on the holes gently. Use your thumbs to support the flute.
Place the flute against your lips. Blow gently into the mouthpiece. Cover the holes completely to produce clear tones. Experiment with different breath pressures to control the volume and pitch. Here is a simple table to help you understand finger placements:
| Hole Number | Finger |
|---|---|
| 1 | Index Finger (Left Hand) |
| 2 | Middle Finger (Left Hand) |
| 3 | Ring Finger (Left Hand) |
| 4 | Index Finger (Right Hand) |
| 5 | Middle Finger (Right Hand) |
| 6 | Ring Finger (Right Hand) |
Practice Tips
Consistent practice is key to improving your skills. Start with simple notes. Play each note slowly. Gradually increase your speed. Here are some tips to help you practice effectively:
- Set aside 15 minutes daily for practice.
- Warm up with simple scales.
- Focus on breath control.
- Play along with recordings.
- Record yourself to track progress.
- Join a community of flute players for feedback.
Remember, patience is crucial. Your skills will improve with time and dedication.
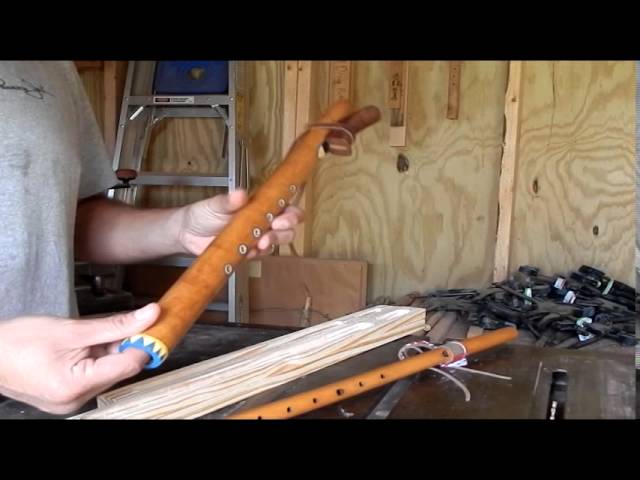
Credit: www.youtube.com
Frequently Asked Questions
What Materials Are Needed For A Native Flute?
To make a native flute, you need wood, a drill, a saw, sandpaper, and finish. These materials help craft a beautiful and functional flute.
How Long Does It Take To Make A Native Flute?
Making a native flute can take a few hours to a few days. The time depends on your skill level and the tools available.
Can Beginners Make A Native Flute?
Yes, beginners can make a native flute with patience and the right guidance. There are many online tutorials and resources available to help beginners.
What Is The Best Wood For A Native Flute?
Cedar, bamboo, and walnut are popular choices for making native flutes. These woods are easy to work with and produce a warm, resonant sound.
Conclusion
Creating a native flute can be a rewarding experience. The process, though intricate, is manageable with patience. You now have the steps to craft your own instrument. Each flute will be unique, reflecting your personal touch. Enjoy the journey of making music with your handmade flute.

Remember, practice leads to perfection. Share your music with friends and family. They will appreciate the beauty of your creation. Happy flute making!
As an Amazon Associate, Cleanestor earns from qualifying purchases at no additional cost to you.