Screen recording Apple Music can be a bit tricky. But it’s possible with the right steps.
This guide will show you how to do it. Apple Music offers a vast library of songs. Sometimes, you want to record what you’re listening to for various reasons. Maybe you need to share a segment with friends. Or perhaps you want to save a snippet for offline use.
Whatever the reason, screen recording is a handy tool. In this post, we will explain the process step by step. We’ll cover the devices you can use and the apps that make recording easy. By the end, you’ll know exactly how to screen record your favorite Apple Music tracks. Let’s dive in!
Introduction To Screen Recording
Screen recording has become a valuable tool for many users. It allows you to capture anything on your screen. This includes videos, tutorials, and even music. Many people want to record Apple Music for personal use. This guide will help you understand how to do that.
What Is Screen Recording?
Screen recording is the process of capturing everything on your screen. This can include video, audio, and other activities. It is like taking a video of your screen. You can use it to create tutorials, save important video calls, or record music.
Importance Of Recording Apple Music
There are many reasons to record Apple Music. Here are a few:
- Offline Listening: Record your favorite songs for offline playback.
- Sharing: Share your favorite tracks with friends and family.
- Preservation: Keep a copy of music that may not be available forever.
Recording Apple Music can be very useful. It allows you to enjoy your music in different ways. Follow our guide to learn how to do it easily.
Credit: democreator.wondershare.com
Preparing Your Device
Before you can start screen recording Apple Music on your device, you need to make sure your device is ready. Proper preparation ensures a smooth recording process and avoids any potential issues. Follow these steps to get your device ready.
Check Compatibility
First, you need to check if your device supports screen recording. Not all Apple devices have this feature. Here is a quick guide:
- iPhones: iPhone 8 and later models support screen recording.
- iPads: iPad Pro, iPad Air 2, and later models support screen recording.
- iOS Version: Your device must run on iOS 11 or later.
To check your device’s compatibility, follow these steps:
- Go to Settings on your device.
- Tap on General.
- Select About to see your device model and iOS version.
Update Ios
If your device is compatible, the next step is to ensure your iOS is up to date. An updated iOS ensures better performance and fewer bugs during screen recording.
Follow these steps to update your iOS:
- Open Settings on your device.
- Tap on General.
- Scroll down and tap on Software Update.
- If an update is available, tap Download and Install.
Make sure your device is connected to Wi-Fi and has enough battery life before updating. It’s also a good idea to back up your device data before updating.
Once your device is compatible and running the latest iOS, you are ready to start screen recording Apple Music. Stay tuned for the next steps in our guide!
Enabling Screen Recording
Screen recording can be a helpful tool for capturing content from Apple Music. You may want to share music tutorials or save a favorite playlist. Follow these steps to enable screen recording on your iPhone or iPad.
Access Control Center
First, access the Control Center. Swipe down from the top-right corner of the screen. If you have an older device, swipe up from the bottom. The Control Center provides quick access to important settings.
Add Screen Recording
Next, add the Screen Recording feature to your Control Center. Open the Settings app. Scroll down and tap Control Center.
In the Control Center menu, tap Customize Controls. Look for Screen Recording under the “More Controls” section.
- Tap the green “+” button next to Screen Recording.
- Screen Recording will move to the “Include” section.
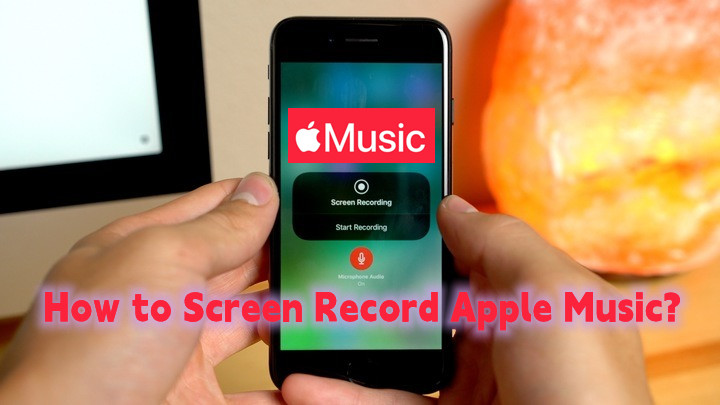
Now, close the Settings app. Return to the Control Center by swiping down or up. You will see the Screen Recording button, a circle within another circle.
To start recording, tap the Screen Recording button. A countdown will begin, and the recording will start. To stop recording, open the Control Center and tap the button again.
The recording will save to your Photos app. You can then edit or share it as needed.
Credit: discussions.apple.com
Recording Apple Music
Recording Apple Music can be a great way to save your favorite tracks. You might want to listen offline or share a snippet with friends. This guide will walk you through the process. Follow the steps below to easily record Apple Music on your device.
Start Screen Recording
First, ensure screen recording is enabled on your device. Go to Settings, then Control Center. Tap Customize Controls and add Screen Recording. Now, open Control Center by swiping down from the top-right corner of your screen. Tap the screen recording button. A countdown will begin.
Play Apple Music
While the recording is active, open the Apple Music app. Play the track you want to record. Make sure your volume is at a good level. This ensures the recording captures the audio clearly. Let the song play through. Once you have the segment you need, stop the recording.
To stop the recording, open the Control Center again. Tap the screen recording button. The recording will save to your Photos app. You can now access your recorded music anytime.
| Step | Action |
|---|---|
| 1 | Enable Screen Recording in Settings |
| 2 | Open Control Center |
| 3 | Tap Screen Recording Button |
| 4 | Play Music in Apple Music App |
| 5 | Stop Recording |
Remember, this method is for personal use. Respect copyright laws and the rights of artists. Happy recording!
Stopping The Recording
Stopping the recording is a crucial step to ensure your screen capture is complete. Once you’ve captured the desired content from Apple Music, you need to end the recording properly. Let’s explore the steps to stop and save your screen recording efficiently.
Stop Recording From Control Center
Open the Control Center on your iPhone. Swipe down from the top-right corner of the screen. You will see the screen recording icon, which is red while recording. Tap the red screen recording icon. This will stop the recording immediately.
Save The Recording
After you stop the recording, you will see a notification. Tap on the notification to preview your recording. The recording will be saved automatically to your Photos app. Open the Photos app to find your recording. From here, you can watch, edit, or share it.
Editing The Recording
After you screen record Apple Music, the next step is editing. This process is crucial for making your video clean and engaging. Let’s explore how to trim the video and add annotations to enhance your recording.
Trim The Video
Trimming your video removes unnecessary parts. This makes your content more focused. Follow these steps:
- Open the recording in a video editor.
- Locate the start and end points you want to keep.
- Use the trimming tool to cut out the unwanted sections.
- Save your trimmed video.
Trimming helps in keeping the audience engaged. It ensures that only relevant content is presented.
Add Annotations
Annotations can provide additional context or highlight important points. They are useful for guiding your viewers. Here’s how to add annotations:
- Open your video in an editor that supports annotations.
- Pause the video where you want to add an annotation.
- Select the annotation tool and choose a style (text, arrow, shape).
- Enter your text or draw your shape.
- Adjust the size and position of the annotation.
- Review and save your changes.
Annotations make your video more informative. They help viewers understand your content better.
Editing the recording is essential for creating high-quality videos. Trim unnecessary parts and add annotations to make your screen recordings of Apple Music stand out.
Sharing Your Recording
Sharing your Apple Music screen recording can be fun and rewarding. You can share your favorite moments with friends, family, and the world. Here are some ways to share your recording easily.
Share Via Social Media
Social media platforms are perfect for sharing your Apple Music recordings. Here is how you can do it:
- Facebook: Open the Facebook app. Tap on ‘What’s on your mind?’ Then, tap on ‘Photo/Video’. Select your screen recording. Add a caption. Tap ‘Post’.
- Instagram: Open the Instagram app. Tap on the ‘+’ icon at the bottom. Select ‘Post’ or ‘Story’. Choose your screen recording. Add filters and captions if you want. Tap ‘Share’.
- Twitter: Open the Twitter app. Tap on the blue ‘Tweet’ button. Tap on the ‘Gallery’ icon. Select your screen recording. Add a tweet. Tap ‘Tweet’.
Send Via Email
Sending your recording via email is a direct and personal way to share it. Follow these steps:
- Open your email app.
- Tap on the ‘Compose’ button.
- Enter the recipient’s email address.
- Tap on the ‘Attach’ icon.
- Select your screen recording from your gallery.
- Add a subject and a message.
- Tap ‘Send’.
These methods make sharing your Apple Music recordings simple and enjoyable.
Legal Considerations
Recording Apple Music might breach copyright laws. Always check Apple’s terms before attempting. Unauthorized recording could lead to legal issues.
Recording Apple Music might seem simple, but it’s important to understand the legal aspects. This section covers copyright issues and fair use guidelines. Knowing these can help you avoid legal trouble.
Copyright Issues
Apple Music is protected by copyright laws. Artists and record labels own the rights to their music. When you record songs from Apple Music, you might be violating copyright laws.
Consider these points:
- You do not own the music, even if you have a subscription.
- Recording music and distributing it is illegal without permission.
- Using recorded music for commercial purposes can lead to legal action.
It’s important to respect intellectual property rights. Always check the terms and conditions of Apple Music.
Fair Use Guidelines
Fair use allows limited use of copyrighted material without permission. This is for purposes like criticism, commentary, or education.
Key points to consider:
- Recording short clips for a review might be fair use.
- Using music for a school project could be considered fair use.
- Always give credit to the original artist.
Here’s a table summarizing fair use:
| Purpose | Allowed | Not Allowed |
|---|---|---|
| Personal Review | Short Clips | Full Songs |
| Education | Clips for Projects | Commercial Use |
| Commentary | Small Excerpts | Mass Distribution |
Understanding fair use can help you stay within legal limits. Be careful and always respect the rights of creators.
“`
Troubleshooting Tips
Screen recording Apple Music can be tricky. You might face some issues. These troubleshooting tips will help you solve common problems. Let’s dive in!
Audio Not Recording
Check your microphone settings. Ensure the microphone is enabled. Go to system preferences. Then, select sound and input. Make sure the right microphone is selected.
Also, check app permissions. Open settings. Tap on privacy. Then, tap on microphone. Ensure the screen recording app has access. This should fix most audio issues.
Poor Video Quality
Close other apps. Running many apps slows down your device. This causes poor video quality. Also, ensure good lighting. Poor lighting affects video clarity. Record in a well-lit area.
Check your storage. Low storage affects video quality. Free up some space. Delete unwanted files. This should improve video quality.
Credit: www.viwizard.com
Frequently Asked Questions
How To Screen Record Apple Music On iPhone?
To screen record Apple Music on iPhone, use the built-in screen recording feature. Go to Settings, then Control Center, and add Screen Recording. Start recording from the Control Center and play the music.
Can You Record Apple Music On Mac?
Yes, you can record Apple Music on Mac using QuickTime Player. Open QuickTime, select New Screen Recording, and start recording while playing Apple Music.
Is It Legal To Screen Record Apple Music?
Screen recording Apple Music for personal use is generally legal. However, sharing or distributing the recordings may violate copyright laws.
What Apps Can Record Apple Music?
Several apps can record Apple Music, such as QuickTime Player for Mac and built-in screen recording on iOS devices. Other third-party screen recording apps are also available.
Conclusion
Screen recording Apple Music is simple with the right tools. Follow these steps. Choose reliable software for the best results. Adjust your settings before recording. Ensure your device has enough space. Save your recordings in a secure folder. Now, enjoy your favorite music offline.

Always respect copyright laws. Share your recordings with friends and family. Happy recording!
As an Amazon Associate, Cleanestor earns from qualifying purchases at no additional cost to you.