Recording streaming music can seem tricky. It’s easier than you think.
Whether you’re a music lover or a budding DJ, capturing your favorite tunes is a useful skill. In this guide, we’ll show you how to record streaming music effortlessly. Streaming platforms have revolutionized how we listen to music. With a vast library at our fingertips, it’s tempting to save some of these tracks for offline listening.
But, not all services offer this feature. That’s where recording streaming music comes in handy. It allows you to enjoy your favorite songs anytime, anywhere. From choosing the right software to following simple steps, we’ll cover everything you need. Get ready to dive into the world of music recording and expand your collection without hassle.
Credit: www.clearclick.com
Introduction To Recording Streaming Music
Streaming music has changed how we listen to our favorite songs. Services like Spotify, Apple Music, and Amazon Music offer vast libraries. Yet, there are moments when we wish to save these songs for offline listening.
Recording streaming music allows you to enjoy your favorite tracks anytime. This blog post will guide you through the basics of recording streaming music. Let’s dive in and explore how to do it.
Why Record Streaming Music
Having your favorite songs saved can be very useful. You can listen without the need for an internet connection. Perfect for travel or poor connection areas. It also allows you to create personal playlists from different platforms. This flexibility makes recording streaming music appealing to many users.
Legal Considerations
Before recording, consider the legal implications. Recording streaming music can breach terms of service agreements. It’s crucial to understand the rules of the platform you are using. Some services may permit personal use but restrict sharing. Always respect copyright laws and the rights of artists.
Choosing The Right Software
Choosing the right software to record streaming music is crucial. The right tool can make the process smooth and efficient. You’ll find many options, but not all are created equal. In this section, we’ll help you understand your choices.
Free Vs Paid Options
Many people start with free software. It’s a good way to test the waters. Free options often have fewer features. They may also have limitations on recording time or quality.
Paid software usually offers more features. You can expect better sound quality and more control. Paid options often come with customer support. This can be helpful if you run into issues.
Top Recording Software
Audacity is a popular free option. It is open-source and easy to use. You can record, edit, and mix music. It works on Windows, Mac, and Linux.
Another great choice is OBS Studio. It’s also free and versatile. It is widely used for video streaming, but it works well for audio too.
For those willing to pay, Adobe Audition is a top choice. It offers professional-grade features. The interface is user-friendly. It integrates well with other Adobe products.
Another paid option is Aimersoft iMusic. It is designed specifically for recording streaming music. It offers high-quality recordings and a simple interface.
Each of these tools has its pros and cons. Consider your needs and budget. Choose the one that fits your requirements.
Setting Up Your Recording Environment
Setting up your recording environment is a crucial step in capturing high-quality streaming music. A well-prepared space ensures clear, interference-free recordings. This section covers everything you need to know about hardware requirements and optimal settings.
Hardware Requirements
To record streaming music, you need the right hardware. Here are the essentials:
- Computer: A reliable computer with a fast processor. It should handle recording software smoothly.
- Audio Interface: Converts analog signals to digital. Ensures high-quality sound.
- Microphone: If you plan to add vocals or instruments. Choose a condenser mic for better clarity.
- Headphones: Over-ear, closed-back headphones for accurate sound monitoring.
- External Hard Drive: For storing large audio files. Avoids cluttering your computer’s storage.
Optimal Settings
Configuring optimal settings in your recording software enhances sound quality. Follow these steps:
- Sample Rate: Set to 44.1 kHz or higher. Higher sample rates capture more details.
- Bit Depth: Use 24-bit for professional-quality recordings. It offers a wider dynamic range.
- Buffer Size: Adjust to minimize latency. A lower buffer size reduces delay but may tax your CPU.
- Recording Level: Aim for peaks around -6 dB. This prevents clipping and distortion.
- Environment: Record in a quiet, echo-free space. Use acoustic panels to absorb sound.
With the right hardware and settings, you can achieve professional-quality recordings of streaming music. Preparation is key to successful recording sessions.
Recording On Different Devices
Recording streaming music has become easier with the right tools. Different devices require different methods. Understanding these methods will help you capture your favorite tunes effortlessly.
Recording On Pc
Windows users have several options for recording streaming music. One popular method is using a software like Audacity. It is free and open-source. Install Audacity, then launch the software. Set the audio host to “Windows WASAPI”. This ensures high-quality recordings. Next, select the appropriate input device. Usually, it’s “Speakers” or “Headphones”. Start playing the music you want to record. Click the “Record” button in Audacity. The software will capture the streaming audio. Once done, click “Stop”. Save your recording in the desired format.
Recording On Mac
Mac users can use QuickTime Player for recording streaming music. Open QuickTime Player. Go to “File” and select “New Audio Recording”. A small recording window will appear. Click the arrow next to the record button. Choose “Internal Microphone” or “System Audio” as the input. Start playing the music you want to record. Hit the “Record” button. QuickTime Player will start recording the audio. Once the music ends, click “Stop”. Save the file to your desired location.
Recording On Mobile Devices
Recording streaming music on mobile devices is convenient. It’s perfect for capturing your favorite tunes on the go. You can easily record music on both Android and iOS devices. This guide will walk you through the steps for each platform.
Recording On Android
To record streaming music on Android, you have several options. Follow these steps:
- Download a reliable recording app like Mobizen or AZ Screen Recorder from the Google Play Store.
- Open the app and adjust the audio settings.
- Start the recorder before playing the music.
- Play your desired streaming music.
- Once the music ends, stop the recording.
- Save the recording to your device.
Note: Ensure your device has enough storage space. High-quality recordings take up more space.
Recording On Ios
Recording on iOS devices is also straightforward. Here’s how:
- Download an app like Voice Memos or Screen Recorder from the App Store.
- Open the app and configure the audio input settings.
- Start recording before playing your music.
- Play the streaming music.
- Stop the recording once the music is over.
- Save your recording to the device.
You can also use the built-in iOS Screen Recording feature:
- Go to Settings > Control Center > Customize Controls.
- Add Screen Recording to the Control Center.
- Open the Control Center and tap the Screen Recording button.
- Play your streaming music.
- Tap the red status bar to stop recording.
- Find the recording in the Photos app.
Ensure your recordings are for personal use only to respect copyright laws.

Credit: www.youtube.com
Editing Your Recorded Music
Once you have recorded your streaming music, the next step is editing. Editing helps you refine your tracks. It ensures they sound polished and professional. Below, we will discuss both basic and advanced editing techniques. This will help you enhance your recorded music.
Basic Editing Techniques
Start with trimming your audio. Remove any unwanted sections. This includes silence at the beginning or end. Use simple tools to cut and paste parts of your track. This helps in arranging your music better.
Next, adjust the volume levels. Ensure consistent volume throughout the track. This improves the listening experience. Use the fade-in and fade-out features. This provides a smooth transition between sections.
Eliminate background noise. This is essential for a clear sound. Use noise reduction tools. These tools help in removing unwanted sounds. They enhance the overall quality of your music.
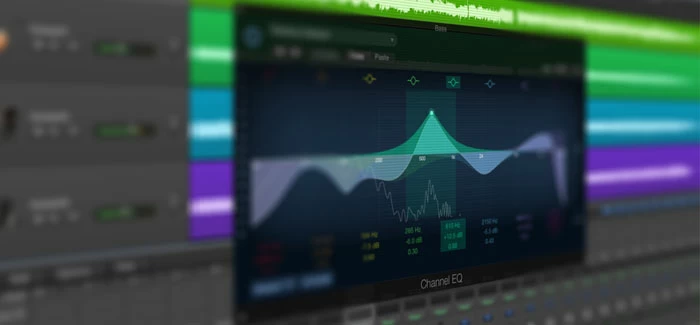
Advanced Editing Tips
For more refined editing, use equalization. Adjust the frequencies to enhance the sound. This helps in highlighting specific elements of the track. It makes your music more dynamic.
Apply compression to your audio. This technique balances the loud and quiet parts. It ensures a consistent sound level. Compression also adds punch to your music. It makes it more engaging.
Experiment with effects. Reverb, delay, and echo can add depth. They create a unique sound. Be cautious not to overuse them. Too many effects can clutter the audio.
Finally, consider mastering your track. This is the final step in the editing process. Mastering ensures your music sounds good on all devices. It adds the final polish to your track.
Storing And Organizing Your Music
After recording your favorite streaming music, the next step is storing and organizing your music. Proper organization ensures you can easily find and enjoy your tracks. This section will guide you through the best practices for storing and organizing your music.
File Formats And Compression
Choosing the right file format is crucial for quality and storage. Common formats include MP3, WAV, and FLAC. Each has its pros and cons.
| Format | Quality | Compression |
|---|---|---|
| MP3 | Good | High |
| WAV | Excellent | None |
| FLAC | Lossless | Moderate |
MP3 files are small but offer good quality. WAV files are large but provide excellent sound. FLAC files balance quality and size well.
Creating Playlists
Creating playlists is a great way to organize your music. It helps group songs by mood, genre, or activity. Here are some tips:
- Genre-based playlists: Keep similar genres together.
- Mood-based playlists: Group songs that match your mood.
- Activity-based playlists: Create lists for working out or relaxing.
Use clear and descriptive names for your playlists. This makes it easier to find the right music.
Organizing your music well ensures a smooth and enjoyable listening experience. Choose the right format and create thoughtful playlists. Your music library will be a joy to navigate.
Credit: www.appgeeker.com
Sharing Your Recorded Music
Sharing your recorded music can be a wonderful experience. It lets you connect with friends, family, and a wider audience. Once you have recorded your favorite streaming music, you might want to share it. But how can you do this easily and effectively? Let’s explore some of the best ways to share your recordings.
Uploading To Cloud Services
Uploading your recorded music to cloud services is a great option. Cloud services like Google Drive, Dropbox, and OneDrive offer free storage space. You can store your recordings safely and access them from any device. Sharing is easy too. Just generate a shareable link and send it to your friends or family. They can listen to your music without downloading it.
Sharing On Social Media
Social media platforms are perfect for sharing music. You can reach a large audience quickly. Platforms like Facebook, Instagram, and Twitter allow you to upload audio files. Alternatively, you can create short videos with your music. Use free tools to add visual elements to your recordings. This makes them more engaging. Share your creations and see how your audience reacts.
By using these methods, sharing your recorded music becomes simple. You can enjoy the process and connect with others through your favorite tunes.
Frequently Asked Questions
How Can I Record Streaming Music?
You can record streaming music using software like Audacity or online tools. Ensure you have legal permission to record.
What Is The Best Software To Record Music?
Audacity is one of the best free software to record music. It offers various features and is user-friendly.
Is It Legal To Record Streaming Music?
Recording streaming music is legal only if you have the necessary permissions. Always check the terms of service.
Can I Record Music On My Smartphone?
Yes, you can use apps like TapeACall or Audio Recorder. They allow easy recording on smartphones.
Conclusion
Recording streaming music is easier than you might think. Follow the steps above, and you’ll have your favorite tunes saved in no time. Remember to respect copyright rules and enjoy the music responsibly. Practice makes perfect, so don’t get discouraged if it takes a few tries.

With patience and the right tools, you’ll soon have a great music library. Happy recording!
As an Amazon Associate, Cleanestor earns from qualifying purchases at no additional cost to you.