
Reverb can make audio sound echoey and unclear. Removing it enhances clarity.
Audacity is a popular free audio editing tool. Its de-reverb feature is vital for clean, crisp recordings. Whether you’re a podcaster, musician, or content creator, knowing how to de-reverb in Audacity is essential. This guide will help you understand the process and improve your audio quality.
By the end, your recordings will sound more professional and polished. Let’s dive into the world of de-reverb in Audacity and unlock the full potential of your audio projects.
Credit: multimedia.easeus.com
Introduction To Reverb
Understanding reverb is essential for anyone involved in audio production. Reverb, short for reverberation, adds depth and space to audio recordings. It makes music sound more natural and professional. In this section, we will explore the basics of reverb and its significance in audio production.
What Is Reverb?
Reverb is the persistence of sound after it is produced. When you clap your hands in a large hall, the sound bounces off the walls and ceiling. This creates a series of echoes that gradually fade away. This phenomenon is reverb.
Reverb can be natural or artificial. Natural reverb occurs in physical spaces, like rooms or halls. Artificial reverb is created using electronic devices or software. It mimics the effect of sound reflecting in a specific environment.
Importance Of Reverb In Audio Production
Reverb plays a crucial role in audio production. It adds a sense of space and depth to recordings. Without reverb, sound can feel flat and lifeless. Here are some reasons why reverb is important:
- Enhances Sound Quality: Reverb makes music sound fuller and richer.
- Creates Atmosphere: Different reverb settings can create various moods and spaces.
- Improves Clarity: Proper use of reverb can improve the clarity of a mix.
Using reverb correctly can transform a simple recording into a professional-sounding track. It is an essential tool for audio engineers and producers.
Audacity Overview
Audacity is a popular open-source audio editing software. It is free and widely used by both beginners and professionals. The software offers a range of features that make audio editing easy and efficient.
Whether you are editing a podcast, music, or any audio file, Audacity provides the tools you need. Its user-friendly interface allows you to navigate through the editing process with ease.
Features Of Audacity
Audacity comes packed with numerous features. You can record live audio through a microphone or mixer. It also lets you digitize recordings from other media. The software supports multiple file formats like WAV, AIFF, and MP3.
You can cut, copy, splice, or mix sounds together. Audacity also offers various effects, including changing the speed or pitch of a recording. Noise reduction and equalization features help improve audio quality.
With its built-in spectrogram, you can visualize frequencies. This helps in detailed audio analysis. Audacity also supports plugins, allowing you to add new features as needed.
Why Choose Audacity For Reverb Adjustment?
Audacity is perfect for reverb adjustment. Its simple interface makes the process straightforward. You can easily apply reverb effects to enhance your audio projects.
Reverb can add depth and space to your recordings. With Audacity, adjusting reverb is quick and efficient. The software offers preset options, but you can also customize settings to suit your needs.
Many users trust Audacity for its reliability. It is constantly updated and improved by a community of developers. This ensures you have access to the latest tools and features.
Audacity also offers a large support community. Tutorials and forums are available if you need help. This makes it easier to learn and master reverb adjustments.
Preparing Your Audio
Before you can start removing reverb from your audio in Audacity, you must prepare your audio files. This involves importing your audio, performing basic cleanup, and setting the stage for effective reverb reduction. Proper preparation can significantly improve the quality of your final output.
Importing Audio Files
To begin, you need to import your audio files into Audacity. Follow these simple steps:
- Open Audacity on your computer.
- Click on the File menu in the top left corner.
- Select Import, then choose Audio.
- Browse your computer to find the audio file you want to import.
- Click Open to import the selected file into Audacity.
Your audio file will now appear in the Audacity workspace. You can see the waveform representation of your audio, which helps in editing and cleaning up the file.
Basic Audio Cleanup
Basic audio cleanup is essential before applying the De Reverb effect. Here are the steps to clean up your audio:
- Remove Background Noise: Select a portion of silence in your audio. Go to Effect > Noise Reduction. Click Get Noise Profile. Select the entire audio, then go to Effect > Noise Reduction again and click OK.
- Normalize Audio Levels: Select the entire audio by pressing Ctrl + A. Go to Effect > Normalize. Ensure the settings are correct and click OK.
- Trim Unwanted Parts: Use the selection tool to highlight parts of the audio you want to remove. Press the Delete key to remove the selected portions.
After completing these steps, your audio is now cleaner and ready for reverb reduction. This preparation helps in achieving better results with the De Reverb effect in Audacity.
Applying Reverb In Audacity
Audacity is a popular audio editing tool. One of its key features is the reverb effect. Reverb adds depth and space to audio recordings. This feature can enhance music, podcasts, and other audio projects.
Accessing The Reverb Effect
Accessing the reverb effect in Audacity is simple. Start by selecting the audio track you want to edit. Click on the “Effect” menu at the top of the screen. From the dropdown list, choose “Reverb.” The reverb effect window will open.
Adjusting Reverb Settings
In the reverb effect window, you will see several settings. These settings allow you to customize the reverb effect:
- Room Size: Controls the perceived size of the space.
- Pre-Delay: Adds a slight delay before the reverb starts.
- Reverb Time: Determines how long the reverb lasts.
- Damping: Reduces high frequencies in the reverb.
- Wet Level: Controls the volume of the reverb.
- Dry Level: Controls the volume of the original signal.
Experiment with these settings to achieve the desired effect. Use the preview button to listen to changes before applying them. Once satisfied, click “OK” to apply the reverb to your audio track.
Fine-tuning Reverb
Fine-tuning reverb is crucial for achieving the perfect audio mix. With Audacity, you can adjust reverb settings to suit your needs. This ensures your recordings sound clear and professional. Let’s dive into how you can tailor reverb and make common adjustments.
Tailoring Reverb To Your Needs
Tailoring reverb involves tweaking various parameters. Adjust the room size to simulate different environments. A small room setting gives a cozy feel. A large hall setting creates a grand atmosphere. Play with these settings to match your recording’s mood.
Next, consider the reverb time. This controls how long the reverb lasts. Short reverb time keeps the sound tight. Long reverb time adds an echo effect. Find the balance that suits your audio.
Common Reverb Adjustments
Common adjustments include tweaking the damping setting. Damping affects how quickly the high frequencies decay. High damping makes the sound warmer. Low damping keeps it bright and sharp.
Another adjustment is pre-delay. This sets the time before the reverb starts. A short pre-delay blends the reverb with the original sound. A long pre-delay creates a distinct echo. Adjust these to fit your mix.
Lastly, consider the wet/dry mix. Wet refers to the reverb signal. Dry is the original signal. Balancing these ensures the reverb complements the main audio. Too much reverb can muddy the sound. Too little may not be noticeable.
Experiment with these settings in Audacity. Listen carefully to the results. Fine-tuning reverb can transform your audio quality.

Credit: music.tutsplus.com
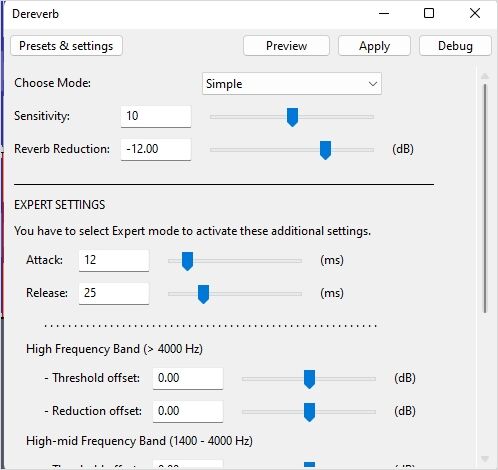
Removing Reverb In Audacity
Reverb can make your audio sound distant or unclear. Removing reverb in Audacity helps improve audio quality. This makes your recordings clearer and more professional. Below are some methods to achieve this.
Using Noise Reduction
Noise Reduction is a helpful tool in Audacity. First, select a quiet part of your audio. This will serve as the noise profile. Go to the “Effect” menu and choose “Noise Reduction.” Click “Get Noise Profile.” This tells Audacity what to remove.
Next, select the whole audio track. Go back to the “Effect” menu and choose “Noise Reduction” again. Adjust the sliders for Noise Reduction, Sensitivity, and Frequency Smoothing. Click “OK” and listen to the results. Adjust if needed.
Manual Reverb Removal Techniques
Manual reverb removal requires more effort but can be effective. Use the “Equalization” tool to reduce specific frequencies. This can help lessen the reverb effect. Go to the “Effect” menu and select “Equalization.”
Experiment with cutting higher frequencies first. Listen to the audio and make further adjustments if needed. This method gives you more control over the final sound.
Another technique is to use the “Compressor” tool. This reduces the dynamic range, making quiet parts louder and loud parts quieter. Go to “Effect,” then “Compressor.” Adjust the settings to find the best balance. This can help reduce reverb.
Tips And Tricks
Working with reverb effects in Audacity can be challenging. But, with some useful tips and tricks, you can achieve better results. This section will guide you through optimizing reverb effects and avoiding common mistakes in Audacity.
Optimizing Reverb Effects
Start by selecting the right type of reverb. Each type has a unique sound. Test different reverb effects to find the best fit for your audio.
Adjust the reverb parameters carefully. Small changes can make a big difference. Focus on decay time, pre-delay, and wet/dry mix. Experiment with these settings to get the desired effect.
Use EQ to shape the reverb sound. Cut unwanted frequencies and boost the ones you need. This will help your reverb blend better with the original audio.
Avoiding Common Mistakes
Don’t overdo the reverb. Too much reverb can make your audio sound muddy. Use reverb sparingly to maintain clarity.
Make sure to balance the wet and dry signals. If the wet signal is too strong, it can overpower the dry signal. Find the right balance to keep your audio clear and natural.
Pay attention to the reverb tail. A long reverb tail can cause your audio to sound messy. Shorten the tail if needed to keep your mix clean.
By following these tips and tricks, you can improve your reverb effects in Audacity. Experiment, adjust, and listen carefully to achieve the best results.

Credit: manual.audacityteam.org
Finalizing Your Audio
Finalizing your audio in Audacity is the last step. It’s time to ensure your track is ready for sharing or publishing. This involves exporting the finished track and ensuring the audio quality is top-notch. Let’s dive into the specifics.
Exporting Your Finished Track
After editing and removing reverb, exporting your track is crucial. Follow these steps:
- Click on File in the top menu.
- Select Export from the dropdown menu.
- Choose the desired file format (e.g.,
.mp3,.wav). - Set the file name and location.
- Adjust the export settings if necessary.
- Click Save to complete the export.
Remember to choose a format that suits your needs. For instance, .mp3 is great for web use, while .wav offers higher quality.
Ensuring Audio Quality
Ensuring audio quality is vital for a professional sound. Here are steps to follow:
- Listen to the track from start to finish. Check for any errors or glitches.
- Use headphones to catch details you might miss with speakers.
- Check the volume levels. Ensure they are consistent throughout the track.
- Use Audacity’s Equalization feature to balance frequencies.
If you notice any issues, go back and make adjustments. Re-export the track if necessary. Always aim for the best quality before sharing your audio.
| Checklist | Details |
|---|---|
| File Format | Choose between .mp3, .wav, etc. |
| Volume Levels | Ensure consistent levels throughout the track. |
| Final Listen | Check for errors with headphones. |
Frequently Asked Questions
What Is De Reverb In Audacity?
De Reverb in Audacity is a feature that helps reduce or remove reverb from an audio recording. It allows users to achieve cleaner and clearer sound, especially useful for podcasting and voice recordings.
How Do I Use De Reverb In Audacity?
To use De Reverb in Audacity, first, import your audio file. Then, select the portion with reverb. Go to “Effect” > “Noise Reduction”. Adjust the settings as needed and apply.
Can De Reverb Improve Audio Quality?
Yes, De Reverb can significantly improve audio quality. By reducing unwanted reverb, it makes the audio sound more professional and clear. This is especially useful for voice recordings.
Is De Reverb Available In All Audacity Versions?
De Reverb is available in the newer versions of Audacity. Ensure you have the latest version installed. Always check for updates to access the latest features and improvements.
Conclusion
Using Audacity to remove reverb can greatly improve your audio quality. The steps are simple and easy to follow. This guide helps you achieve cleaner sound. Practice makes perfect, so keep experimenting. Soon, you’ll notice a big difference in your recordings.

With patience, you’ll master de reverb in no time. Enjoy creating professional-sounding audio with Audacity!
As an Amazon Associate, Cleanestor earns from qualifying purchases at no additional cost to you.