Yes, you can record guitar on GarageBand. This user-friendly software makes it easy.
All you need is a Mac, your guitar, and a few cables. GarageBand is a popular choice for musicians. It offers a range of tools for recording and editing. Whether you’re a beginner or an expert, GarageBand has something for you.
With its simple interface, you can start recording your guitar in minutes. No need for expensive equipment or software. Just plug in your guitar, open GarageBand, and hit record. It’s that simple. This blog will guide you through the steps. You will learn how to set up your equipment, record your tracks, and make your music sound great. Let’s get started on your musical journey with GarageBand.
Setting Up Garageband
Garageband is a popular choice for recording guitar. This guide will help you set it up. Follow these steps to start recording your guitar on Garageband.
Installing Software
First, you need to install Garageband on your Mac. Here are the steps:
- Open the App Store on your Mac.
- Search for “Garageband”.
- Click on the Garageband app.
- Click the “Get” button to download.
- After downloading, click “Install”.
Garageband will now be installed on your Mac. You can find it in your Applications folder.
Creating A New Project
After installing the software, the next step is to create a new project. Here’s how:
- Open Garageband.
- Select “New Project” from the main menu.
- Choose “Empty Project” to start fresh.
- Click “Choose” to proceed.
- In the new window, select “Guitar” as your instrument.
- Click “Create” to open your new project.
Now you have a blank canvas ready for your guitar recording. Make sure your guitar is connected to your Mac.
These simple steps help you set up Garageband for recording guitar. Stay tuned for the next steps in the process.

Credit: thegaragebandguide.com
Connecting Your Guitar
Connecting your guitar to GarageBand is the first step to start recording. This section will guide you through the process. We will explore different methods to connect your guitar. Let’s dive into the options available.
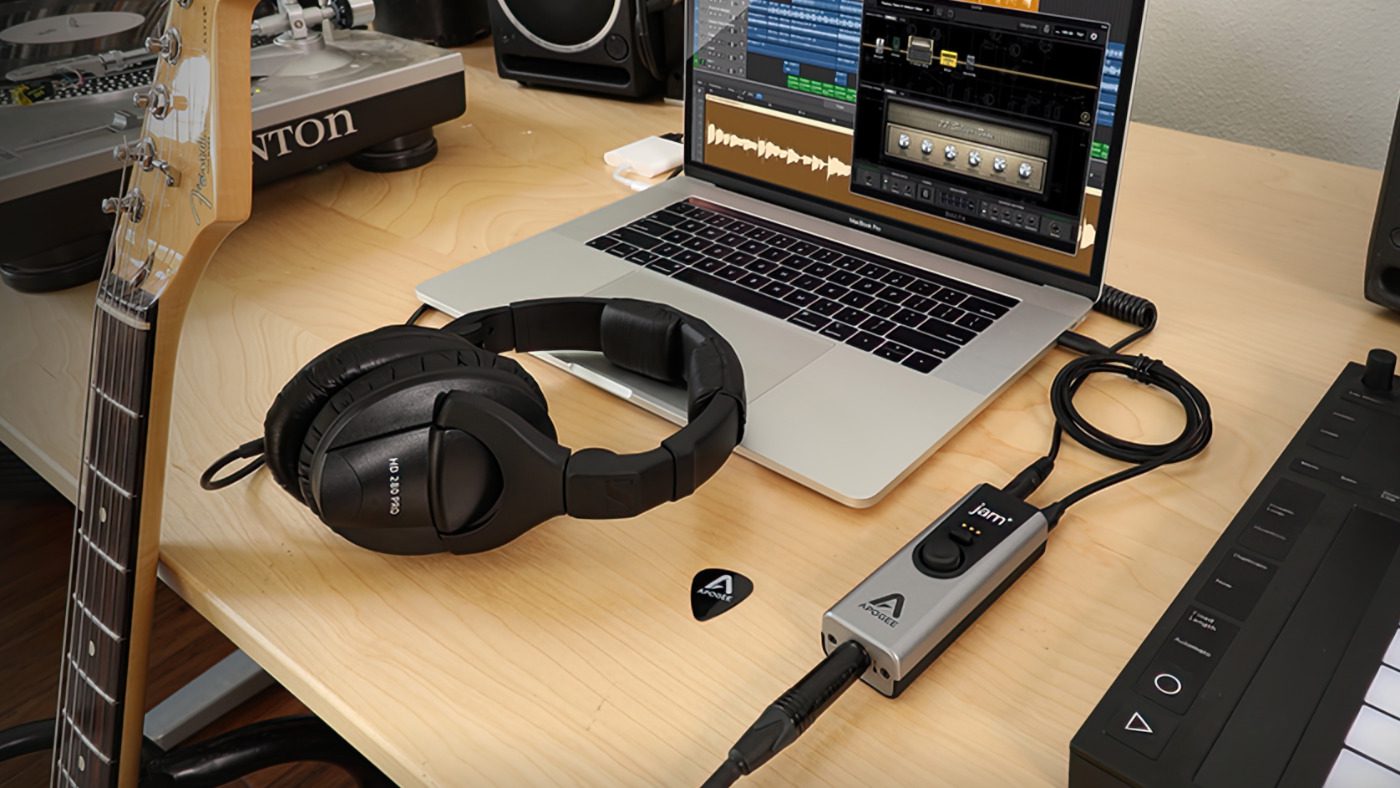
Using An Audio Interface
An audio interface is a popular choice. It converts your guitar signal into a digital format. This allows GarageBand to recognize and record your playing.
First, you will need an audio interface device. Connect the audio interface to your computer using a USB cable. Then, plug your guitar into the audio interface. Use a standard 1/4 inch guitar cable for this connection.
Open GarageBand on your computer. Go to the preferences menu and select the audio interface as your input device. Now, you are ready to record your guitar.
Direct Usb Connection
Some modern guitars come with a USB output. This allows a direct connection to your computer. You don’t need an audio interface for this method.
Connect your guitar to your computer using a USB cable. Open GarageBand and go to the preferences menu. Select your guitar as the input device.
Once set up, you can start recording your guitar directly into GarageBand. This method is simple and effective.
Configuring Audio Settings
Configuring audio settings is crucial for recording guitar on Garageband. Proper settings ensure clear and professional sound quality. Let’s dive into the essential steps for configuring your audio settings.
Selecting Input Source
First, choose the right input source for your guitar. Open Garageband and go to Preferences. Click on the Audio/MIDI tab. Here, you will see the Input Device option. Select your audio interface or built-in input. This choice depends on your recording setup. Ensure your guitar is connected to the selected input.
Adjusting Input Levels
Next, adjust the input levels for optimal sound. Go to the Track menu and select New Track. Choose the Guitar or Bass option. Click on the input level meter in the Smart Controls section. Play your guitar to see the input levels. Adjust the Gain knob to avoid clipping. The levels should peak around -6dB. This prevents distortion and preserves sound quality.
Credit: eshop.macsales.com
Choosing Guitar Presets
Choosing the right guitar presets in GarageBand can elevate your recordings. Whether you are a beginner or a seasoned musician, presets help you achieve the perfect sound quickly. GarageBand offers a variety of built-in presets and customization options to suit your style.
Exploring Built-in Presets
GarageBand comes with several built-in guitar presets. These presets cover a range of genres and styles. You can find presets for rock, blues, jazz, and more. Each preset is designed to give you a polished sound with minimal effort.
To explore these presets, follow these steps:
- Open GarageBand and create a new project.
- Select the Track menu, then choose New Track.
- Choose Guitar from the list of instruments.
- Browse through the available presets in the Library pane.
Experiment with different presets to find the one that suits your music. You can always tweak them later to better fit your needs.
Customizing Your Sound
GarageBand allows you to customize your guitar sound beyond the built-in presets. You can adjust various parameters to create a unique tone.
Some key customization options include:
- Amplifier settings: Modify gain, tone, and volume.
- Effects: Add reverb, delay, and other effects.
- EQ: Adjust the equalizer to shape your sound.
To customize a preset, follow these steps:
- Select a preset from the Library pane.
- Click on the Smart Controls button to open the control panel.
- Adjust the settings to your liking.
Save your customized settings as a new preset. This allows you to reuse your unique sound in future projects.
Using GarageBand’s guitar presets and customization options, you can create professional-sounding recordings. Experiment with different settings and find what works best for your music.
Recording Your Guitar
Recording your guitar on GarageBand is easier than you think. GarageBand is a user-friendly software that offers a simple way to capture your guitar sound. Whether you are a beginner or a seasoned musician, you can create high-quality recordings with this tool. Here’s how to get started.
Setting Up A Track
First, open GarageBand and start a new project. Select the “Empty Project” option. Click on the track type that matches your guitar type. For an electric guitar, choose “Electric Guitar.” For an acoustic, choose “Audio.” Ensure your guitar is connected to your computer using an audio interface or USB cable. Follow these steps:
- Open GarageBand.
- Create a new project.
- Select the appropriate track type.
- Connect your guitar.
Once your guitar is connected, adjust the input levels. Make sure the signal is strong but not peaking. You can monitor the input levels through the track header.
Recording Techniques
With your track set up, you are ready to record. There are several techniques to consider for the best sound:
- Direct Input Recording: Plug your guitar directly into the audio interface. This method offers a clean and precise sound.
- Microphone Recording: Use a microphone to capture the sound from an amp. Place the mic close to the speaker for better quality.
- Layering Tracks: Record multiple takes and layer them. This creates a fuller sound.
Use GarageBand’s built-in metronome to keep time. Enable the metronome by clicking the metronome icon on the top bar. This helps you play in sync.
After recording, you can edit and mix your tracks. Use GarageBand’s various tools to cut, copy, and paste sections. Add effects like reverb and delay for a polished sound.
Experiment with different techniques to find what works best for your music. Happy recording!

Credit: www.youtube.com
Editing Your Recording
After recording your guitar on Garageband, the editing phase is crucial. This is where you shape your raw recording into a polished track. The right edits can make your guitar sound professional and clean. Below are some steps to follow for effective editing.
Trimming Clips
Trimming clips is often the first step. Remove any unwanted parts of the recording. Cut out mistakes, background noise, and long silences. Zoom in on the waveform for more precise cuts. Use the split tool to isolate the parts you want to keep. Drag the edges of the clip to trim it down. This will help focus on the best parts of your performance.
Applying Effects
Applying effects can enhance your guitar sound. Garageband offers many built-in effects. Start with reverb and delay for a fuller sound. Use compression to even out the volume. Experiment with EQ to adjust the tone. Add overdrive or distortion for a grittier feel. Each effect has its own settings. Tweak these settings to suit your track. Listen to your recording after applying each effect. This ensures the best results.
Mixing And Mastering
Recording your guitar on Garageband is only the first step. Mixing and mastering your track are essential. These steps help create a professional sound. They balance the elements and enhance the overall quality.
Balancing Levels
Balancing levels is key. Ensure each instrument is at the right volume. Your guitar should not overpower other tracks. Adjust the faders until every element fits well.
Use the pan controls to place instruments in the stereo field. This creates a sense of space. Your track will sound more dynamic and engaging.
Finalizing The Track
Finalizing the track involves EQ, compression, and reverb. EQ helps to shape the tone of your guitar. Boost the frequencies you want to stand out. Cut the ones that cause muddiness.
Compression controls the dynamics of your track. It makes loud parts quieter and quiet parts louder. This ensures a more consistent sound.
Reverb adds depth to your track. It makes your guitar sound like it was recorded in a space. Use it sparingly to avoid muddiness.
Listen to your track on different systems. Headphones, car speakers, and home stereos. This helps to ensure it sounds good everywhere.
Exporting Your Track
After recording your guitar on Garageband, exporting the track is the next step. This process ensures you can share your music with others. Exporting might seem complex, but it’s quite simple. Here’s a detailed guide.
Choosing Export Settings
First, open your project. Click on “Share” at the top menu. Select “Export Song to Disk.” A new window will pop up. This window has several options. Choose the file format you prefer. Common formats include MP3, AAC, and WAV. MP3 is small in size and good for sharing. WAV is larger but has better quality.
Next, select the audio quality. Higher quality means a larger file. Choose the quality that suits your needs. For casual listening, medium quality is fine. For professional use, select high quality. Finally, click on “Export.” Choose the location on your computer to save the file. Your track will now export.
Sharing Your Music
Once the export is complete, sharing your track is easy. You can upload it to music platforms. Popular platforms include SoundCloud and Bandcamp. Each platform has its own upload process. Follow their instructions to upload your track.
You can also share it on social media. Platforms like Facebook and Instagram allow music sharing. Attach your file to a post and share with friends. Email is another option. Attach the file to an email and send it. Your friends and family can enjoy your music.
Recording and exporting guitar on Garageband is simple. With these steps, your music can reach many listeners. Happy recording!
Frequently Asked Questions
Can You Record Guitar On Garageband?
Yes, you can record guitar on Garageband. Connect your guitar using an audio interface. Choose the right track, and start recording.
What Equipment Do I Need?
You need a guitar, audio interface, and Garageband installed on your Mac. Additionally, you may need a USB cable and guitar adapter.
How Do I Connect My Guitar?
Connect your guitar to an audio interface, then connect the interface to your Mac. Open Garageband and select the input source.
Is Garageband Good For Recording Guitar?
Yes, Garageband is good for recording guitar. It offers various amp models, effects, and recording tools suitable for guitarists.
Conclusion
Recording guitar on Garageband is easy and fun. The software offers many tools for great sound. Connect your guitar, choose a track, and start playing. With practice, you can create amazing music. Experiment with effects and loops. Garageband is a great choice for beginners and pros alike.

Enjoy making music with this user-friendly app. Happy recording!
{ “@context”: “https://schema.org”, “@type”: “FAQPage”, “mainEntity”: [ { “@type”: “Question”, “name”: “Can you record guitar on Garageband?”, “acceptedAnswer”: { “@type”: “Answer”, “text”: “Yes, you can record guitar on Garageband. Connect your guitar using an audio interface. Choose the right track, and start recording.” } } , { “@type”: “Question”, “name”: “What equipment do I need?”, “acceptedAnswer”: { “@type”: “Answer”, “text”: “You need a guitar, audio interface, and Garageband installed on your Mac. Additionally, you may need a USB cable and guitar adapter.” } } , { “@type”: “Question”, “name”: “How do I connect my guitar?”, “acceptedAnswer”: { “@type”: “Answer”, “text”: “Connect your guitar to an audio interface, then connect the interface to your Mac. Open Garageband and select the input source.” } } , { “@type”: “Question”, “name”: “Is Garageband good for recording guitar?”, “acceptedAnswer”: { “@type”: “Answer”, “text”: “Yes, Garageband is good for recording guitar. It offers various amp models, effects, and recording tools suitable for guitarists.” } } ] }As an Amazon Associate, Cleanestor earns from qualifying purchases at no additional cost to you.