Audacity is a popular audio editing software. It offers many tools for clean sound.
One such tool is the De-Clicker. De-Clicker in Audacity helps remove clicks and pops from audio tracks. These unwanted sounds can ruin recordings, making them less professional. Whether you’re a podcaster, musician, or voice-over artist, clear audio is key. De-Clicker can save you time and effort by automatically detecting and fixing these issues.
In this blog post, we’ll explore how De-Clicker works and how to use it effectively. You’ll learn tips and tricks to make your audio sound its best. Ready to dive in? Let’s get started with De-Clicker in Audacity.
Credit: forum.audacityteam.org
Introduction To De-clicker
Audio editing is essential for creating high-quality sound. One tool that stands out in this process is the De-Clicker in Audacity. It helps improve audio recordings by removing unwanted clicks and pops. This tool is beneficial for both professionals and amateurs.
What Is De-clicker?
The De-Clicker is a feature in Audacity, a popular audio editing software. It identifies and removes clicks from audio tracks. These clicks can be caused by various factors such as vinyl records, digital errors, or microphone issues. The De-Clicker tool analyzes the audio and smooths out these imperfections.
By using this tool, editors can ensure that their audio is clear and professional. It saves time and effort compared to manual editing. The De-Clicker is easy to use and highly effective.
Importance In Audio Editing
Removing clicks and pops is crucial for a clean audio experience. These imperfections can distract listeners and reduce the overall quality of the recording. The De-Clicker ensures that the final product is polished.
Here are some key benefits of using the De-Clicker:
- Improves audio clarity
- Enhances listener experience
- Saves time on manual editing
- Easy to use for beginners
Using the De-Clicker in Audacity can make a significant difference. It is an essential tool for any audio editor aiming for high-quality results.

Credit: www.youtube.com
Getting Started With Audacity
Audacity is an excellent tool for audio editing. One of its powerful features is the De-Clicker effect. This feature is essential for cleaning audio files with clicks or pops. In this section, we’ll explore how to get started with Audacity.
Installing Audacity
To begin, download Audacity from its official website. Follow these simple steps:
- Visit the Audacity download page.
- Choose your operating system (Windows, Mac, or Linux).
- Click the download button and save the installer file.
- Once downloaded, open the installer and follow the on-screen instructions.
After installation, launch Audacity from your applications or start menu. You are now ready to explore the interface.
Basic Interface Overview
When you open Audacity, you’ll see a simple and user-friendly interface. Here’s a quick overview of the main sections:
| Section | Description |
|---|---|
| Menu Bar | Contains all the main functions and settings. |
| Transport Toolbar | Controls playback and recording. |
| Tools Toolbar | Offers selection, zoom, and other tools. |
| Tracks | Displays the audio you are working on. |
| Status Bar | Shows information about your project. |
Understanding these sections will help you navigate Audacity with ease. Next, let’s dive into importing and editing your audio files.
Installing De-clicker Plugin
Are you tired of those annoying clicks in your audio recordings? Installing the De-Clicker Plugin in Audacity can help you clean up those pesky noises. This guide will show you how to download and install the plugin step-by-step. Follow these instructions to enhance your audio quality effortlessly.
Downloading The Plugin
First, you need to download the De-Clicker Plugin. Visit the official Audacity website or a trusted source to find the plugin.
- Go to the Audacity website.
- Navigate to the plugins section.
- Search for “De-Clicker Plugin”.
- Click on the download link.
Ensure you download the correct version compatible with your Audacity software.
Plugin Installation Steps
Once you have downloaded the plugin, follow these steps to install it:
- Locate the downloaded file: Find the De-Clicker Plugin file in your downloads folder.
- Extract the file: Use extraction software to unzip the plugin file.
- Copy the file: Copy the extracted file.
- Open Audacity: Launch the Audacity application on your computer.
- Navigate to the plugins folder: In Audacity, go to “Edit” > “Preferences” > “Effects”.
- Paste the file: Paste the copied plugin file into the Audacity plugins folder.
- Enable the plugin: Restart Audacity and go to “Effect” > “Add/Remove Plugins”. Enable the De-Clicker Plugin from the list.
Congratulations! You have successfully installed the De-Clicker Plugin. Start using it to remove clicks from your audio recordings.
Preparing Your Audio
Before you start using the De-Clicker in Audacity, it’s important to prepare your audio files properly. This ensures that you achieve the best possible results. In this section, we’ll guide you through the essential steps of importing your audio files and creating a backup.
Importing Audio Files
To begin, open Audacity and import your audio files. Follow these simple steps to import your audio:
- Click on File in the top menu.
- Select Import, then choose Audio….
- Browse your computer to find the desired audio file.
- Click Open to import the file into Audacity.
Your audio file is now ready for editing. Make sure to check the waveform to ensure it’s loaded correctly.
Creating A Backup
It’s always wise to create a backup of your original audio file. This allows you to revert to the original if needed. Follow these steps to create a backup:
- Select the track by clicking on its title.
- Click on Edit in the top menu.
- Select Duplicate. This creates a copy of your track.
- Rename the duplicated track to indicate it’s a backup.
Now you have a backup track. You can proceed with confidence, knowing your original file is safe.
Using De-clicker In Audacity
Using De-Clicker in Audacity can help you remove unwanted clicks from your audio files. This tool is especially useful for cleaning up recordings and ensuring a smooth listening experience. Below, we will guide you through the steps to access and adjust the De-Clicker plugin in Audacity.
Accessing The Plugin
First, you need to open Audacity. Make sure you have the De-Clicker plugin installed. If not, you can download it from the Audacity website. Once installed, follow these steps:
- Open your audio file in Audacity.
- Click on the “Effect” menu at the top.
- Scroll down and select “De-Clicker…” from the list.
This will open the De-Clicker interface, where you can adjust the settings to remove clicks from your audio.
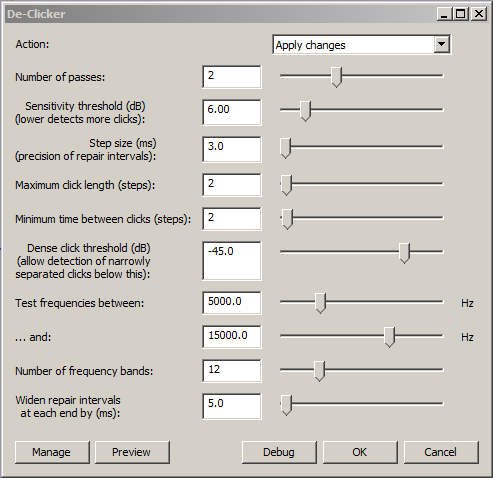
Adjusting Settings
In the De-Clicker interface, you will see several settings you can adjust. Here is a table with the most important settings:
| Setting | Description |
|---|---|
| Threshold | Determines the level at which clicks are detected. |
| Reduction | Controls how much the clicks are reduced. |
| Width | Adjusts the width of the area around the detected clicks. |
To get started, you can follow these steps:
- Set the Threshold to a level that detects most clicks.
- Adjust the Reduction to a value that reduces the clicks but keeps the audio quality.
- Modify the Width to ensure the clicks are properly targeted.
After adjusting these settings, click “OK” to apply the De-Clicker. Listen to your audio to make sure the clicks are removed and the quality is intact.

Credit: www.notetracks.com
Fine-tuning Results
Fine-tuning the results with the De-Clicker in Audacity can make a big difference in your audio quality. This process helps remove unwanted clicks and makes your recordings sound smooth. Let’s explore the steps you can take to achieve the best results.
Listening For Clicks
First, listen carefully to your audio. Focus on finding any clicks or pops. Use headphones for the best results. This will help you catch even the smallest sounds. Take your time. Note the areas that need fixing. This step is crucial to ensure you address all issues.
Tweaking Parameters
Next, adjust the De-Clicker settings in Audacity. Start with the default settings. Play a small section of your audio. Listen for improvements. If clicks are still present, tweak the parameters. Change the sensitivity and threshold levels. Test each change by playing the audio again.
Make small adjustments. This helps you find the best settings without over-processing your audio. Avoid making drastic changes. They can affect the natural sound of your recording. Once satisfied, apply the De-Clicker to the entire track.
Common Issues And Fixes
Using the De-Clicker plugin in Audacity can greatly enhance your audio projects. Yet, users often face common issues. Knowing the solutions can save time and improve your results.
Plugin Not Showing Up
One common issue is the De-Clicker plugin not appearing in Audacity. This can be frustrating, but there are simple fixes.
Steps to Fix:
- Ensure the plugin is placed in the correct folder. The usual path is:
C:\Program Files (x86)\Audacity\Plug-Ins - Restart Audacity after placing the plugin in the folder.
- Go to Effect > Add/Remove Plug-ins and enable the De-Clicker plugin.
Clicks Not Being Removed
Sometimes, the De-Clicker plugin does not remove clicks effectively. This can affect your audio quality.
Steps to Fix:
- Ensure you have selected the entire track or the specific part with clicks.
- Adjust the Sensitivity and Threshold settings in the plugin. Experiment to find the best settings.
- If clicks persist, try running the De-Clicker multiple times with different settings.
These steps can help you resolve issues and get the most out of the De-Clicker plugin in Audacity.
Advanced Tips And Tricks
Unlocking the full potential of Audacity’s De-Clicker plugin requires a deep dive into advanced tips and tricks. This section will guide you through some expert techniques to enhance your audio editing skills, making your sound projects cleaner and more professional.
Batch Processing
Batch processing allows you to apply the De-Clicker plugin to multiple files at once. This saves time and ensures consistency across your audio files. Follow these steps to set up batch processing in Audacity:
- Go to File > Chains > Edit Chains.
- Click on Add and name your chain, for example, “De-Clicker Chain”.
- Select Insert, then choose Apply Macro and add the De-Clicker plugin.
- Save your chain, then go to File > Apply Chain.
- Select your new chain and choose the files you want to process.
By following these steps, you can efficiently apply De-Clicker settings to numerous audio files, streamlining your workflow.
Combining With Other Plugins
Combining De-Clicker with other Audacity plugins can significantly improve your audio quality. Consider using the following plugins in conjunction with De-Clicker:
- Noise Reduction: Reduces background noise, making the de-clicked audio clearer.
- Compressor: Balances the dynamic range, ensuring even sound levels.
- Equalization: Adjusts frequency ranges to enhance overall audio quality.
Here’s a suggested order for applying these plugins:
| Plugin | Purpose |
|---|---|
| Noise Reduction | Eliminates background noise. |
| De-Clicker | Removes clicks and pops. |
| Compressor | Balances sound levels. |
| Equalization | Enhances audio frequencies. |
Applying these plugins in the suggested order ensures you address major audio issues first, then refine the sound quality further.
Frequently Asked Questions
What Is De-clicker In Audacity?
De-Clicker in Audacity is a tool used to remove clicks and pops from audio recordings. It improves audio quality.
How Do I Use De-clicker In Audacity?
To use De-Clicker, go to the Effect menu, select De-Clicker, adjust settings, and apply. It’s simple.
Why Should I Use De-clicker?
De-Clicker enhances audio quality by removing unwanted clicks and pops. It makes recordings sound professional.
Can De-clicker Remove All Clicks?
De-Clicker can remove most clicks, but some might require manual editing. It’s highly effective for general use.
Conclusion
Audacity’s De-Clicker is a helpful tool for audio editing. It removes clicks and pops, improving sound quality. Simple and effective, it enhances recordings easily. Whether you’re a podcaster or musician, this feature is useful. Try it out and see the difference.

Enjoy cleaner audio with just a few clicks. Happy editing!
{ “@context”: “https://schema.org”, “@type”: “FAQPage”, “mainEntity”: [ { “@type”: “Question”, “name”: “What is De-Clicker in Audacity?”, “acceptedAnswer”: { “@type”: “Answer”, “text”: “De-Clicker in Audacity is a tool used to remove clicks and pops from audio recordings. It improves audio quality.” } } , { “@type”: “Question”, “name”: “How do I use De-Clicker in Audacity?”, “acceptedAnswer”: { “@type”: “Answer”, “text”: “To use De-Clicker, go to the Effect menu, select De-Clicker, adjust settings, and apply. It’s simple.” } } , { “@type”: “Question”, “name”: “Why should I use De-Clicker?”, “acceptedAnswer”: { “@type”: “Answer”, “text”: “De-Clicker enhances audio quality by removing unwanted clicks and pops. It makes recordings sound professional.” } } , { “@type”: “Question”, “name”: “Can De-Clicker remove all clicks?”, “acceptedAnswer”: { “@type”: “Answer”, “text”: “De-Clicker can remove most clicks, but some might require manual editing. It’s highly effective for general use.” } } ] }As an Amazon Associate, Cleanestor earns from qualifying purchases at no additional cost to you.