Burning a CD from Audacity is simple. Follow these steps to get it done.
First, you need to export your audio project from Audacity. Audacity is a popular, free audio editing software. Many people use it for recording and editing music or podcasts. Once you have your audio ready, the next step is to save it in a format that can be burned to a CD.
This usually means exporting the file as a WAV or MP3. After that, you will use CD burning software to transfer the file onto a CD. This process allows you to create physical copies of your audio projects, which can be useful for sharing or archiving. Keep reading to learn the exact steps needed to burn a CD from Audacity.
Introduction To Cd Burning
Burning a CD from Audacity can seem complex at first. But it’s a straightforward process. This guide will help you understand the basics of CD burning. You’ll learn why it’s important and how to do it with ease.
What Is Cd Burning?
CD burning is the process of writing data onto a blank CD. This data can be music, files, or any digital content. Burning a CD involves using software to transfer files from your computer to the CD. Once the files are written, they become readable by any CD player or computer.
Importance Of Cd Burning
CD burning is still relevant today for several reasons. First, it’s a reliable way to back up important data. CDs are less prone to data corruption compared to some digital storage options. Second, burning a CD allows for easy sharing of files and music. You can create personalized music CDs for friends or family. Lastly, many older car stereos and home audio systems still use CDs. Burning a CD ensures compatibility with these devices.
Credit: www.digitaldjtips.com
Getting Started With Audacity
Audacity is a free, open-source audio editing software. It is great for recording and editing sound. Before you can burn a CD from Audacity, you need to get comfortable with the software. Let’s go through the first steps together.
Installing Audacity
First, you need to download and install Audacity on your computer. Follow these simple steps:
- Visit the official Audacity website.
- Click on the Download button.
- Select your operating system (Windows, Mac, Linux).
- Download the installer file.
- Open the installer file and follow the instructions.
Once installed, you can open Audacity from your desktop or start menu.
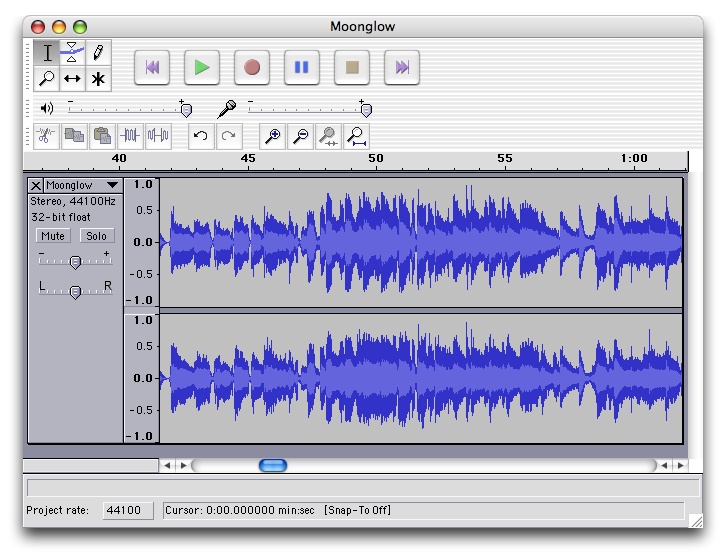
Familiarizing With The Interface
When you open Audacity for the first time, the interface might look complex. But don’t worry. Here is a simple guide to help you understand the main parts:
| Section | Description |
|---|---|
| Menu Bar | Located at the top. It has options like File, Edit, and View. |
| Toolbars | Below the menu bar. It includes buttons for common tasks. |
| Tracks Area | The large area in the middle. This is where you will see your audio tracks. |
| Status Bar | At the bottom. It shows information about your project. |
Spend some time exploring these sections. Click on different buttons to see what they do. This will help you feel more confident using Audacity.
Now that you have installed Audacity and know the interface, you can start using it to create and edit audio files. The next step will be to learn how to import and export audio files, which is crucial for burning CDs.
Preparing Your Audio Files
Before you can burn a CD from Audacity, you need to prepare your audio files. This involves importing, editing, and enhancing your audio to ensure it sounds great on the final CD. The following sections will guide you through these crucial steps.
Importing Audio Files
To begin, open Audacity and import your audio files. Click on File, then select Import and choose Audio. Browse your computer for the desired files and click Open. Your audio files will now appear in the Audacity workspace.
Ensure your files are in a compatible format, like WAV or MP3. If not, convert them before importing. You can use online tools or software for conversion.
Editing And Enhancing Audio
Once your files are imported, you can start editing and enhancing them. Here are some essential steps:
- Trim Silence: Remove unwanted silence at the beginning or end of your tracks. Highlight the silent part and press Delete.
- Normalize Volume: Ensure consistent volume levels across all tracks. Go to Effect, then Normalize.
- Remove Noise: Use the Noise Reduction tool under the Effect menu to clean up background noise.
- Equalize Sound: Adjust frequencies to enhance sound quality. Select Effect, then Equalization.
- Fade In/Out: Smoothly fade your tracks in or out. Highlight the section, go to Effect, and choose Fade In or Fade Out.
After editing, listen to your track to ensure it sounds perfect. Make any final adjustments as needed.
With your audio files imported and enhanced, you’re one step closer to burning a high-quality CD from Audacity. Happy editing!

Credit: www.youtube.com
Exporting Audio From Audacity
Once you’ve finished editing your audio project in Audacity, it’s time to export it. Exporting your audio is a crucial step before burning a CD. This ensures your project is in the right format for playback on various devices.
Choosing The Right Format
Choosing the correct format for your audio file is important. Audacity offers several options for exporting audio.
- WAV: Best for high-quality audio. It’s uncompressed but takes up more space.
- MP3: Commonly used format. It’s compressed and saves space, but may lose some quality.
- AIFF: Another uncompressed format. Similar to WAV but used mainly on Apple devices.
To choose the right format, go to File > Export and select the desired format. Ensure the format meets your quality and space requirements.
Saving Your Project
Before exporting, it’s important to save your project. This way, you can return to it later if needed.
- Go to File > Save Project.
- Choose a name and location for your project.
- Click Save.
Saving your project ensures you don’t lose your work. It also makes it easier to make future edits.
After saving your project, you can proceed to export your audio. Double-check your settings to ensure everything is correct. This will help you create a high-quality CD.
Selecting Cd Burning Software
Once you have your audio file ready in Audacity, the next step is to burn it onto a CD. This process requires the use of CD burning software. Choosing the right software is crucial for achieving a high-quality burn without any errors. Here, we will discuss some recommended software options and how to install them.
Recommended Software Options
There are several reliable CD burning software options available. Here are three of the best:
- Nero Burning ROM: Known for its advanced features and reliability.
- ImgBurn: A lightweight, user-friendly option that is perfect for beginners.
- CDBurnerXP: Free software that offers a wide range of burning options.
Installing Cd Burning Software
Installing CD burning software is a straightforward process. Follow these steps:
- Download the installer file from the official website.
- Open the downloaded file to start the installation process.
- Follow the on-screen instructions to complete the installation.
- Once installed, open the software to get started with burning your CD.
Choosing the right CD burning software is the first step in creating a perfect CD from your Audacity files. Make sure to follow the installation steps carefully to ensure everything runs smoothly.
Burning Your Audio To A Cd
Burning audio files to a CD can seem challenging. But with Audacity, it’s straightforward. Follow these steps to transfer your audio files from Audacity to a CD. Let’s get started with the process.
Inserting A Blank Cd
First, you need a blank CD. Place the CD into your computer’s CD drive. Make sure the CD is blank and writable. Your computer should recognize the CD. If not, check your drive settings.
Transferring Audio Files
Next, save your Audacity project. Export your audio as a WAV or MP3 file. Open your CD burning software. Many computers have built-in software for this task. Drag and drop your audio file into the software. Select the option to burn the CD. Follow the on-screen instructions. The software will transfer your audio to the CD. This process may take a few minutes.
Once complete, your CD is ready. Test it in a CD player. Make sure the audio plays correctly. If so, you have successfully burned a CD from Audacity.
Finalizing The Cd
Finalizing the CD is a crucial step in the CD burning process. It ensures that the CD can be played on various devices. This step locks the data and prevents further changes. Without finalizing, some players might not read the CD correctly.
Ensuring Compatibility
To ensure compatibility, choose the correct burn settings. Select “Audio CD” instead of “Data CD” in your burning software. Audio CDs are more compatible with most players.
Burning at a lower speed also helps. A slower burn reduces errors. Try burning at 4x or 8x speed. This often results in better playback quality.
Testing Your Burned Cd
After burning, test your CD in different devices. Try it in a car stereo, home CD player, and computer. This helps to ensure it works everywhere.
Listen to the entire CD. Check for skips or errors. If you find issues, re-burn the CD at a slower speed. This usually fixes the problems.
Troubleshooting Common Issues
Burning a CD from Audacity can sometimes present challenges. These issues can range from burning errors to audio quality concerns. Here are some common problems and how to fix them.
Fixing Burning Errors
Burning errors can stop the process. Here are some solutions:
- Check the CD: Ensure your CD is not scratched or damaged.
- Use a Compatible Format: Audacity supports formats like WAV or MP3. Make sure your audio files are in these formats.
- Update Your Software: Use the latest version of Audacity and your CD burning software.
- Ensure Enough Space: CDs have limited space. Check if your audio files fit.
- Verify Burn Speed: A slow burn speed can help prevent errors. Adjust this in your burning software settings.
Ensuring Audio Quality
Good audio quality is essential. Follow these tips to ensure it:
- Export in High Quality: Export your audio from Audacity in 16-bit or higher quality.
- Check Levels: Ensure your audio levels are balanced. Avoid peaks that cause distortion.
- Use Quality CDs: Use CDs from reputable brands to maintain audio fidelity.
- Avoid Compression: Too much compression can reduce audio quality. Keep it minimal.
By following these steps, you can troubleshoot common issues and ensure a smooth CD burning process with Audacity.

Credit: forum.audacityteam.org
Frequently Asked Questions
How Do I Export Audio From Audacity?
To export audio from Audacity, go to “File” > “Export”. Choose your desired file format and save the file.
Can I Burn A Cd Directly From Audacity?
No, Audacity cannot burn CDs directly. Export your audio file and use CD burning software to burn it.
Which Format Should I Export For Burning A Cd?
Export your audio from Audacity in WAV format. WAV files maintain high audio quality for CD burning.
What Software Do I Need To Burn A Cd?
Use CD burning software like Windows Media Player, iTunes, or dedicated programs such as Nero or ImgBurn.
Conclusion
Burning a CD from Audacity is simple and straightforward. First, export your audio file. Next, use CD burning software. Insert a blank CD and follow the prompts. Ensure your audio quality is high. Test the CD after burning to confirm success.

Now, you can share your audio projects easily. Enjoy your music or podcasts on any CD player. Happy burning!
{ “@context”: “https://schema.org”, “@type”: “FAQPage”, “mainEntity”: [ { “@type”: “Question”, “name”: “How do I export audio from Audacity?”, “acceptedAnswer”: { “@type”: “Answer”, “text”: “To export audio from Audacity, go to \”File\” > \”Export\”. Choose your desired file format and save the file.” } } , { “@type”: “Question”, “name”: “Can I burn a CD directly from Audacity?”, “acceptedAnswer”: { “@type”: “Answer”, “text”: “No, Audacity cannot burn CDs directly. Export your audio file and use CD burning software to burn it.” } } , { “@type”: “Question”, “name”: “Which format should I export for burning a CD?”, “acceptedAnswer”: { “@type”: “Answer”, “text”: “Export your audio from Audacity in WAV format. WAV files maintain high audio quality for CD burning.” } } , { “@type”: “Question”, “name”: “What software do I need to burn a CD?”, “acceptedAnswer”: { “@type”: “Answer”, “text”: “Use CD burning software like Windows Media Player, iTunes, or dedicated programs such as Nero or ImgBurn.” } } ] }As an Amazon Associate, Cleanestor earns from qualifying purchases at no additional cost to you.