Cleaning a drum kit may seem challenging. But it’s easier than you think.
In this guide, you’ll learn how to clean your drum kit properly. Drum kits collect dust, grime, and fingerprints over time. Regular cleaning keeps them looking good and sounding great. Clean drums also last longer. You don’t need expensive tools or special products.
Just a few household items and a little time will do. This guide will show you step-by-step how to clean each part of your drum kit. Whether you’re a beginner or a pro, these tips will help you maintain your drums. Keep reading to discover how to keep your drum kit in top shape.
Gather Necessary Supplies
Cleaning your drum kit starts with gathering the right supplies. Proper tools ensure a thorough clean without damaging your equipment. Below, we break down the essentials you’ll need for each step.
Cleaning Cloths
Use soft, lint-free cloths to avoid scratching the drum surfaces. Microfiber cloths work best as they remove dust and grime efficiently. Have a few on hand for different parts of the drum kit.
Mild Soap And Water
Mix a small amount of mild soap with water. This solution can clean the drum shells and hardware. Ensure the soap is gentle to prevent damage. Avoid harsh chemicals which may harm the finish.
Polish And Wax
Use drum polish and wax to give your kit a shiny finish. These products protect the drum shells and hardware. Apply sparingly and buff with a clean cloth for best results.
Credit: www.musicradar.com
Disassemble The Drum Kit
Properly cleaning a drum kit starts with disassembling it. This step is crucial. It ensures each part gets the attention it needs. Follow these steps to disassemble your drum kit effectively.
Remove Drum Heads
Begin by removing the drum heads. Use a drum key to loosen the tension rods. Turn each rod counterclockwise. Once loose, remove them completely. Carefully lift the drum heads off the shells. Set them aside in a safe place. Remember, drum heads are delicate. Handle them with care.
Detach Hardware And Cymbals
Next, detach all hardware and cymbals. Remove the cymbals from their stands. Unscrew any wing nuts or fasteners. Place the cymbals on a soft surface to prevent damage. Detach the drum hardware. This includes lugs, mounts, and other attachments. Use a drum key or screwdriver if necessary. Keep all small parts in a container. This prevents losing them.
Disassembling the drum kit makes cleaning easier. It allows you to clean each part thoroughly. Follow these steps to ensure a well-maintained drum kit.
Clean The Drum Shells
Cleaning your drum shells is essential for maintaining their appearance and sound quality. Dust, dirt, and grime can affect the drums’ finish and even the sound. Regular cleaning helps keep your drum kit looking and sounding great. Follow these steps to clean your drum shells properly.
Wipe Down With Damp Cloth
Start by removing the drumheads and hardware. Use a soft, damp cloth to wipe down the drum shells. Make sure the cloth is not too wet to avoid water damage. Gently wipe the entire surface of the drum shells. This will remove dust and light dirt. Pay attention to any crevices or hard-to-reach areas.
Use Mild Soap For Tougher Stains
For tougher stains, mix a small amount of mild soap with water. Dip a soft cloth into the soapy water. Gently scrub the stained areas of the drum shells. Avoid using harsh chemicals or abrasive materials. These can damage the finish of the drums. After cleaning, wipe the shells with a clean, damp cloth to remove any soap residue. Finally, dry the drum shells with a soft towel to prevent water spots.
Credit: www.sweetwater.com
Polish The Drum Shells
Polishing your drum shells gives them a new life. A well-polished drum kit not only looks great but also sounds better. Follow these simple steps to keep your drum shells shining and clean.
Apply Drum Polish
First, choose the right drum polish. You can find many options online or at music stores. Ensure the polish is safe for your drum shells. Next, apply a small amount of polish to a clean, soft cloth. Avoid using too much polish; a little goes a long way.
Gently rub the polish onto the drum shell in a circular motion. Cover the entire surface evenly. Pay attention to any stubborn spots and give them extra care. This step helps remove dirt and grime, restoring your drum’s original shine.
Buff To A Shine
After applying the polish, take another clean, dry cloth. Use this cloth to buff the drum shell. Buffing helps bring out the shine and gives the drum a smooth finish. Work in small sections, using circular motions.
Ensure you buff each area thoroughly. This step is crucial for achieving a high-gloss finish. Repeat the process for all drum shells. In no time, your drum kit will look as good as new.
Remember, regular maintenance keeps your drum kit in top condition. Polish your drums every few months for the best results.
Clean The Drum Heads
Keeping your drum heads clean is essential for great sound. Dirty drum heads can affect the quality of your performance. Regular cleaning can help maintain their condition.
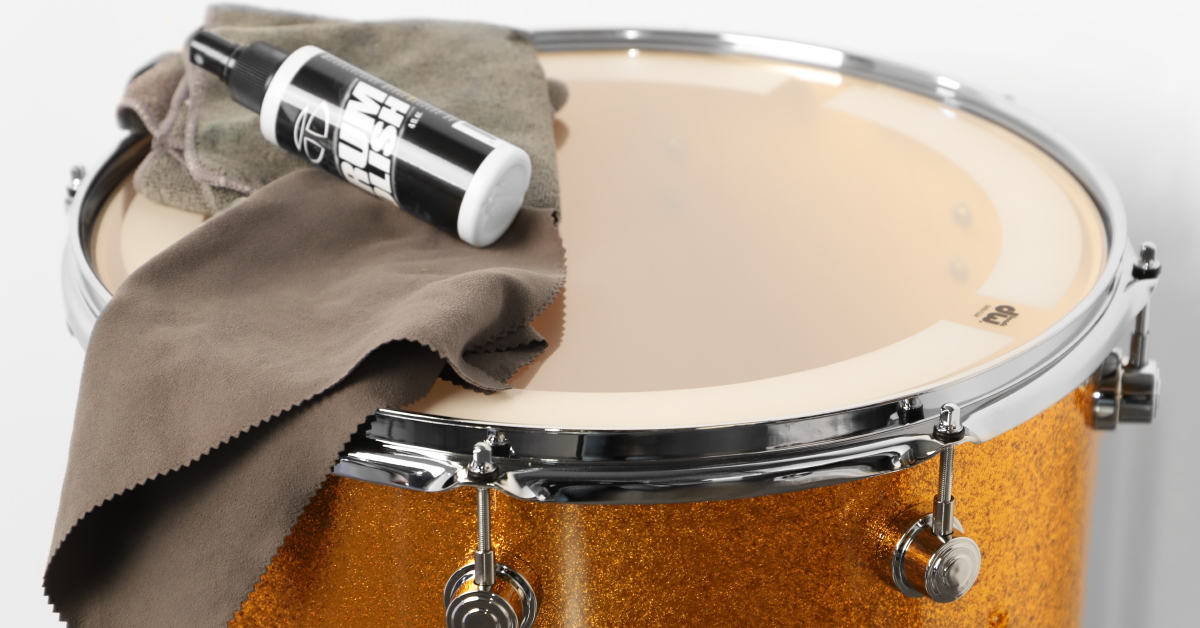
Wipe With A Dry Cloth
Begin by wiping each drum head with a dry cloth. This removes dust and loose debris. Make sure to cover the entire surface. Take extra care with any marks or stains. A gentle circular motion works best.
Replace If Necessary
Sometimes, cleaning is not enough. Check for signs of wear and tear. If drum heads look damaged, consider replacing them. New drum heads can enhance your sound quality.
Clean The Hardware
Gently wipe each drum and hardware piece with a soft cloth. Use a mild cleaning solution for any stubborn spots. Regular cleaning keeps your drum kit looking and sounding its best.
Cleaning your drum kit’s hardware is essential. It maintains the look and function. Dirty hardware can affect sound and performance. Follow these steps to clean your hardware effectively.
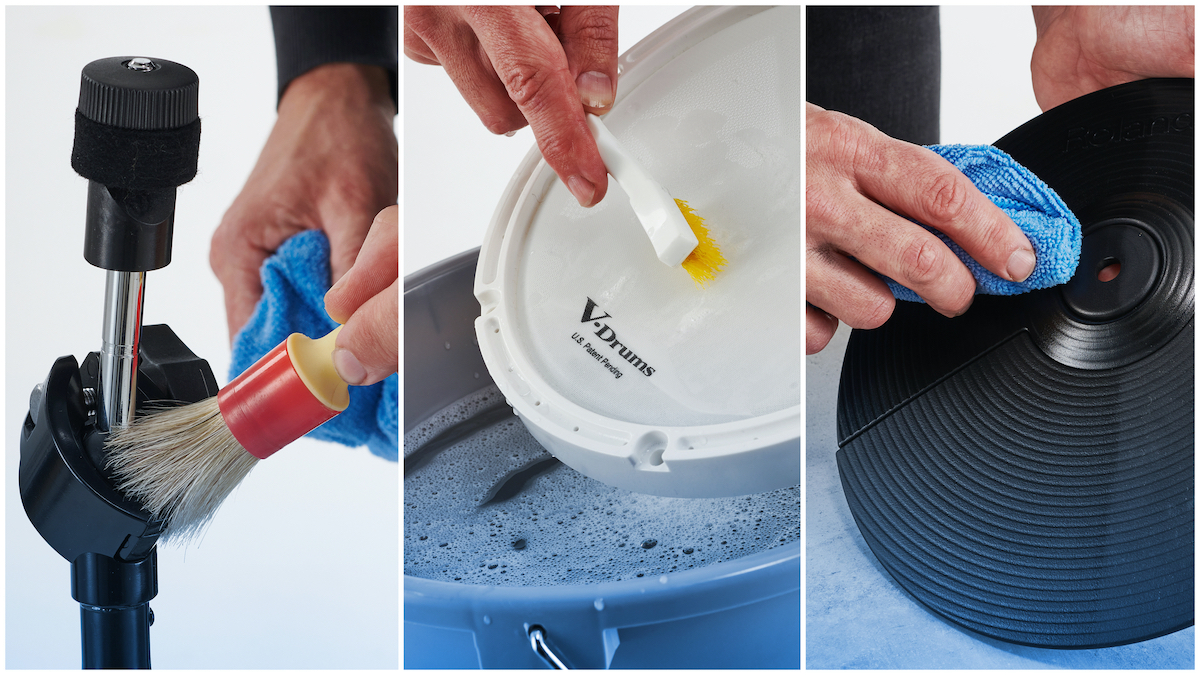
Soak And Scrub Hardware
First, remove all hardware from the drum kit. Place the hardware in a large tub filled with warm soapy water. Let it soak for 15-20 minutes. This loosens the dirt and grime.
After soaking, scrub each piece with a soft brush. Focus on the joints and tight areas. A toothbrush works well for this task. Use gentle pressure to avoid scratches.
Rinse each piece with clean water. Ensure all soap is removed. Inspect each part for any remaining dirt. Repeat scrubbing if needed.
Dry Thoroughly
After cleaning, dry each hardware piece with a soft towel. Ensure no water remains. Water can cause rust and damage.
Lay the hardware on a dry surface. Let it air dry for a few hours. Check all parts to ensure they are completely dry.
Reassemble the hardware on your drum kit. Ensure all pieces are secure and in their proper places. Enjoy your clean and shiny drum kit!
Clean The Cymbals
Cleaning your drum kit is essential for its longevity and performance. Cymbals, in particular, need special attention. They are the shining stars of your drum set. Keeping them clean ensures they sound their best. Let’s dive into the process of cleaning cymbals.
Use Cymbal Cleaner
First, choose a good cymbal cleaner. These products are designed to remove dirt and grime. Apply the cleaner to a soft cloth. Gently rub the cymbal with the cloth. Make circular motions to cover the entire surface. Avoid using abrasive materials. These can scratch the cymbal.
Dry And Polish
After cleaning, dry the cymbal completely. Use a separate, clean cloth for this step. Wipe in circular motions again. This prevents water spots and streaks. Once dry, you can polish the cymbal. Cymbal polish adds a protective layer. It also enhances the shine. Apply a small amount of polish to a cloth. Rub it evenly over the cymbal. Buff with a clean cloth for a brilliant finish.
Reassemble The Drum Kit
After cleaning your drum kit, it’s time to put it back together. Reassembling the drum kit properly ensures optimal sound and performance. Follow these steps to get your drum set ready for the next session.
Reattach Drum Heads
Start by placing the drum heads back on each drum. Make sure they fit snugly. Tighten the tension rods evenly. This helps maintain the drum’s pitch. Use a drum key to fine-tune the tension. Tap around the edge to check for even sound.
Secure Hardware And Cymbals
Next, reattach the hardware pieces. Secure the tom mounts, snare stand, and bass drum legs. Make sure each piece is tight. Loose hardware can affect your playing. Finally, place the cymbals back on their stands. Adjust the height and angle for comfort. Tighten the wing nuts to keep them in place.
Now your drum kit is clean and reassembled. Ready for the next jam session!
Regular Maintenance Tips
Keeping your drum kit in top condition ensures a great sound. Regular maintenance is key. It not only extends the life of your drums but also keeps them looking sharp. Here are some essential tips to keep your drum kit clean and well-maintained.
Store Properly
Proper storage is vital. Always store your drum kit in a cool, dry place. Avoid direct sunlight. Sunlight can cause the drum shells to warp. Humidity can damage the drum heads. Use drum cases or covers for added protection. This prevents dust buildup and reduces the risk of scratches.
Clean Regularly
Regular cleaning is essential. Start by dusting the drum shells and hardware. Use a soft, dry cloth. For deeper cleaning, use a slightly damp cloth. Avoid using harsh chemicals. They can damage the finish. Clean the drum heads gently. Remove any stick marks. A bit of mild soap and water works well. Dry thoroughly before reassembling.
Don’t forget the cymbals. Use a cymbal cleaner or a mild polish. Wipe them with a clean cloth. This keeps them shiny and free from fingerprints. Regular cleaning ensures your drum kit always looks and sounds its best.

Credit: www.youtube.com
Frequently Asked Questions
How Often Should I Clean My Drum Kit?
You should clean your drum kit every few months. Regular cleaning helps maintain sound quality and longevity.
What Materials Do I Need To Clean A Drum Kit?
You need a microfiber cloth, mild soap, water, and polish. Avoid harsh chemicals to prevent damage.
Can I Use Household Cleaners On My Drum Kit?
It’s best to avoid household cleaners. They can damage the drum’s finish. Use drum-specific cleaning products instead.
How Do I Clean Drum Cymbals Properly?
Use a soft cloth and a cymbal cleaner. Gently rub in a circular motion, then wipe dry.
Conclusion
A clean drum kit sounds better and lasts longer. Regular cleaning keeps your kit in top shape. Follow these steps to maintain your drums. Use soft cloths and gentle cleaners. Don’t forget the hardware. Clean it carefully too. Consistent care ensures your drum kit stays reliable.

Enjoy playing with a well-maintained kit. Happy drumming!
As an Amazon Associate, Cleanestor earns from qualifying purchases at no additional cost to you.