Connecting your Akai MPK Mini to an audio interface is simple. This guide will show you how.
The Akai MPK Mini is a popular MIDI controller for music producers. It offers great features in a small package. Many users face challenges when connecting it to an audio interface. This connection is crucial for recording and producing high-quality sound.
If you follow the right steps, you can easily set it up. In this blog post, we will walk you through the process. You will learn how to connect your Akai MPK Mini to an audio interface. This will help you make the most of your music production setup. Let’s get started!

Credit: www.youtube.com
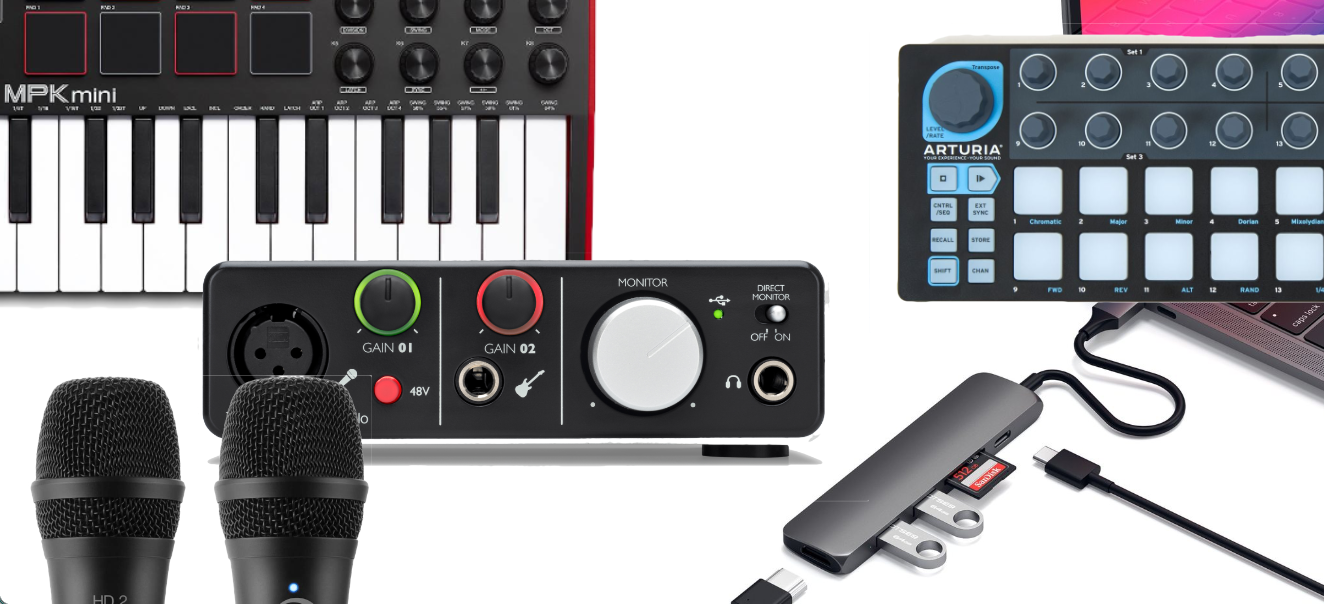
Necessary Equipment
Connecting your Akai MPK Mini to an audio interface requires specific equipment. Each piece plays a crucial role in ensuring your setup works seamlessly. Below, we will detail the necessary equipment for this connection.
Akai Mpk Mini
The Akai MPK Mini is a compact MIDI controller. It offers 25 velocity-sensitive keys, eight backlit pads, and multiple control knobs. It is ideal for music production on the go. Ensure you have the latest firmware installed for optimal performance.
Audio Interface
An audio interface serves as the bridge between your MIDI controller and your computer. It converts analog signals to digital ones and vice versa. Choose an interface with MIDI input and output ports. This ensures compatibility with the Akai MPK Mini.
Cables And Adapters
To connect your Akai MPK Mini, you need specific cables. A USB cable connects the MIDI controller to the computer. MIDI cables link the controller to the audio interface. Ensure your cables are high-quality to prevent signal loss. You may also need adapters, depending on your setup.
Computer And Software
A computer is essential for running your music production software. Make sure it meets the software’s system requirements. Install a Digital Audio Workstation (DAW) to manage your recordings. Popular choices include Ableton Live, FL Studio, and Logic Pro X. Ensure your DAW recognizes the Akai MPK Mini.
Credit: www.macprovideo.com
Setting Up The Akai Mpk Mini
Setting up the Akai MPK Mini might seem challenging, but it’s straightforward. This guide will help you connect your Akai MPK Mini to your audio interface with ease. We’ll cover the essential steps to get you started.
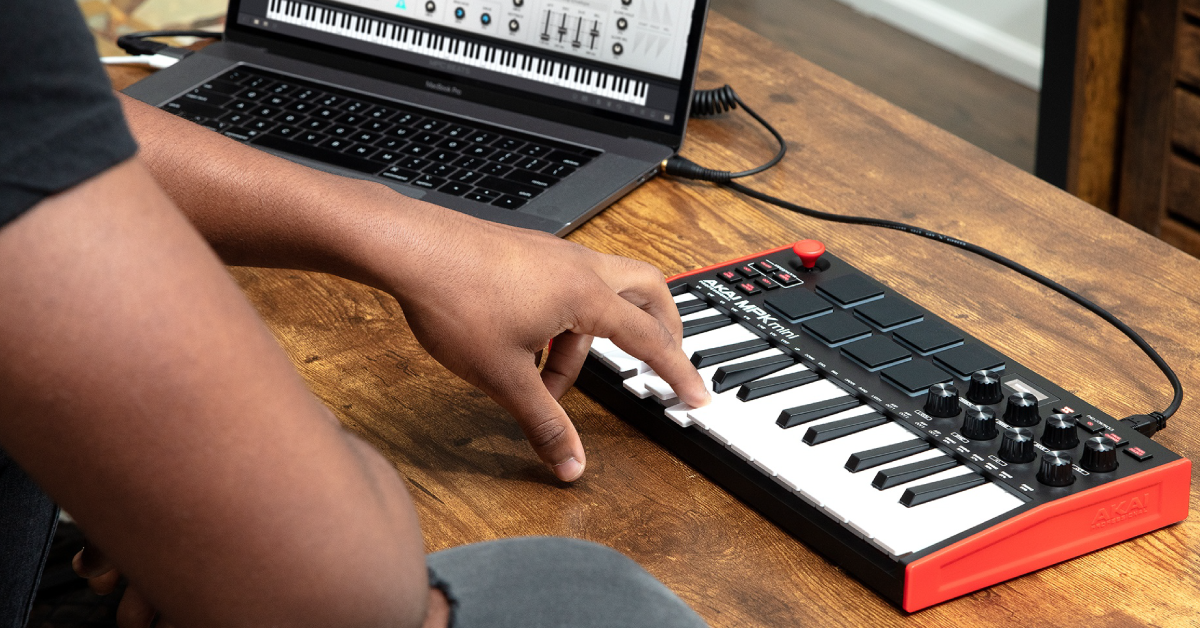
Unboxing And Initial Setup
Begin by unboxing your Akai MPK Mini. Ensure you have all components. You should find the MPK Mini, a USB cable, and a user manual. Place the MPK Mini on a stable surface close to your computer. Connect the USB cable to the MPK Mini and then to your computer.
Installing Drivers And Firmware
Next, install the necessary drivers. Visit the Akai Professional website. Download the latest drivers for the MPK Mini. Follow the on-screen instructions to complete the installation. This ensures your computer recognizes the device.
Check for firmware updates. Firmware updates improve functionality. Download any available updates from the Akai website. Follow the instructions to update your MPK Mini.
Connecting To The Audio Interface
Connecting your Akai MPK Mini to an audio interface can seem tricky. With the right steps, it’s quite simple. Start by gathering the necessary cables and equipment. This ensures a smooth setup process.
Choosing The Right Cables
First, identify the type of cables you need. The Akai MPK Mini uses a USB cable. Ensure your audio interface has a compatible USB port. Most modern interfaces do. If not, you may need an adapter. Check your audio interface’s manual for details.
Next, consider the length of the cable. Shorter cables reduce signal loss. Longer cables may be necessary for larger setups. Choose a cable that meets your needs. It’s best to have a few options on hand.
Physical Connections
Once you have the right cables, connect the Akai MPK Mini to the audio interface. Plug one end of the USB cable into the MPK Mini. Then, connect the other end to the audio interface’s USB port.
Ensure the connections are secure. Loose connections can cause issues. Double-check both ends of the cable. If your audio interface has multiple USB ports, choose the one recommended in the manual.
After connecting, power on your devices. Turn on the Akai MPK Mini first. Then, power on the audio interface. This helps ensure proper communication between the devices. Your computer should recognize the MPK Mini automatically.
Configuring Software Settings
Connecting your Akai MPK Mini to an audio interface is just the first step. The next crucial part is configuring your software settings. This ensures the hardware works seamlessly with your Digital Audio Workstation (DAW). This section will guide you through setting up your DAW, adjusting MIDI, and audio preferences.
Daw Setup
First, open your DAW. Common DAWs include Ableton Live, FL Studio, and Logic Pro. Select the preferences or settings option from the menu. Look for the hardware or devices section.
In this section, you should see a list of connected devices. Locate your Akai MPK Mini from the list. Select it to configure it as the primary MIDI input device. This enables the DAW to receive signals from your controller.
Midi And Audio Preferences
Next, navigate to the MIDI settings tab. Ensure that the Akai MPK Mini is enabled as both an input and output device. This setting is crucial for sending and receiving MIDI data effectively.
After configuring the MIDI settings, move to the audio preferences tab. Here, select your audio interface from the list of available devices. Ensure the correct driver is installed for optimal performance.
| Setting | Action |
|---|---|
| DAW Preferences | Select Akai MPK Mini as MIDI input |
| MIDI Settings | Enable Akai MPK Mini as input and output |
| Audio Preferences | Select your audio interface |
Finally, ensure all settings are saved. Test the setup by playing notes on your Akai MPK Mini. You should hear sound through your audio interface. If not, recheck the settings.
Testing The Connection
Testing the Connection is essential to ensure your Akai MPK Mini works well with your audio interface. This step will help confirm that everything is set up correctly and that you can start creating music without any issues. In this section, we’ll cover the key steps to test your connection effectively.
Checking Audio Levels
To check the audio levels, open your DAW (Digital Audio Workstation). Make sure your Akai MPK Mini is selected as the input device. Play a few notes on the keyboard. Look at the level meters in your DAW. The meters should move when you play notes, indicating that the MIDI signal is being received.
Adjust the volume settings on your audio interface. Ensure the levels are neither too low nor too high. This avoids distortion or weak signals. You can also use headphones for a more accurate check. Listen for any latency issues or audio dropouts.
Troubleshooting Common Issues
If the audio levels are not moving, check the connections. Ensure that the USB cable is securely plugged into both the Akai MPK Mini and the computer. Also, verify that the audio interface is properly connected.
Sometimes, the issue might be with the DAW settings. Make sure the correct input and output devices are selected in the DAW preferences. If you still face issues, try restarting the DAW and the computer. This can often resolve connectivity problems.
If you encounter latency or delay, check the buffer size settings in your DAW. A lower buffer size reduces latency but may increase CPU load. Adjust it to find a balance that works for your system.
Optimizing Performance
Connecting your Akai MPK Mini to an audio interface is just the first step. Optimizing performance ensures a seamless music production experience. Focus on latency reduction and sound quality to achieve the best results. With a few tweaks, you can enhance your setup’s performance.
Latency Reduction Tips
Latency can hinder your music creation process. To reduce latency, start by updating your audio interface drivers. Updated drivers often provide better performance. Next, adjust your buffer size settings. A smaller buffer size reduces latency but may increase CPU load. Find a balance that works for your system.
Use a direct USB connection instead of a USB hub. Hubs can introduce delays. Also, disable any unused audio inputs and outputs in your digital audio workstation (DAW). This reduces the processing load and helps minimize latency.
Enhancing Sound Quality
Sound quality is crucial for any music production. To improve it, use high-quality cables. Cheap cables can introduce noise and degrade sound. Ensure your audio interface’s sample rate matches your project settings. Mismatched settings can cause distortions.
Enable any built-in effects or enhancements your audio interface provides. These can add depth and clarity to your recordings. Finally, consider investing in a good pair of studio monitors or headphones. Accurate monitoring helps in making precise adjustments to your sound.
Advanced Tips And Tricks
Connecting your Akai MPK Mini to an audio interface can significantly enhance your music production. Once you have the basics down, you can explore advanced tips and tricks. These can help you get the most out of your setup. Let’s dive into some advanced techniques.
Customizing Controls
Customizing the controls on your Akai MPK Mini can improve your workflow. Here are some steps to get you started:
- Open the MPK Mini Editor software on your computer.
- Connect your Akai MPK Mini to your computer via USB.
- Select the control you want to customize.
- Choose the desired function for that control.
- Save the new configuration to your MPK Mini.
By customizing controls, you can create a setup that fits your unique style. For instance, you can map specific pads to trigger drum samples. Or, assign knobs to control volume or effects.
Using Additional Plugins
Using additional plugins can greatly expand your sound palette. Here’s how you can integrate plugins with your Akai MPK Mini:
| Step | Action |
|---|---|
| 1 | Open your DAW (Digital Audio Workstation). |
| 2 | Navigate to the plugins section. |
| 3 | Load your desired plugin. |
| 4 | Assign the plugin to a track. |
| 5 | Use the MPK Mini to control the plugin parameters. |
With plugins, you can access a wide range of sounds and effects. This can elevate your music production to the next level. Whether you are adding synths, drum machines, or other instruments, plugins offer endless possibilities.
These advanced tips and tricks can help you unlock the full potential of your Akai MPK Mini. Customize your controls to suit your workflow. Experiment with different plugins. The more you explore, the better your music will become.
Credit: www.sweetwater.com
Frequently Asked Questions
How To Connect Akai Mpk Mini To Audio Interface?
To connect Akai MPK Mini to an audio interface, use a USB cable. Plug the USB into your computer. Then, connect the audio interface to your computer. Ensure your DAW recognizes both devices.
Do You Need Software For Akai Mpk Mini?
Yes, you need software for Akai MPK Mini. It requires a Digital Audio Workstation (DAW) to function properly. Many DAWs are compatible.
Can Akai Mpk Mini Work Without Audio Interface?
Yes, Akai MPK Mini can work without an audio interface. You can connect it directly to your computer via USB. However, using an audio interface can enhance sound quality.
Is Akai Mpk Mini Easy To Set Up?
Yes, Akai MPK Mini is easy to set up. Simply connect it via USB to your computer. Install any necessary drivers. Then, configure it within your DAW.
Conclusion
Connecting your Akai MPK Mini to an audio interface is simple. Follow the steps outlined in this guide. You’ll soon enjoy creating music seamlessly. Remember to check connections and software settings. Troubleshooting common issues can save time and frustration. Experiment with different setups to find what works best for you.

Your musical journey just got easier. Happy producing!
{ “@context”: “https://schema.org”, “@type”: “FAQPage”, “mainEntity”: [ { “@type”: “Question”, “name”: “How to connect Akai MPK Mini to audio interface?”, “acceptedAnswer”: { “@type”: “Answer”, “text”: “To connect Akai MPK Mini to an audio interface, use a USB cable. Plug the USB into your computer. Then, connect the audio interface to your computer. Ensure your DAW recognizes both devices.” } } , { “@type”: “Question”, “name”: “Do you need software for Akai MPK Mini?”, “acceptedAnswer”: { “@type”: “Answer”, “text”: “Yes, you need software for Akai MPK Mini. It requires a Digital Audio Workstation (DAW) to function properly. Many DAWs are compatible.” } } , { “@type”: “Question”, “name”: “Can Akai MPK Mini work without audio interface?”, “acceptedAnswer”: { “@type”: “Answer”, “text”: “Yes, Akai MPK Mini can work without an audio interface. You can connect it directly to your computer via USB. However, using an audio interface can enhance sound quality.” } } , { “@type”: “Question”, “name”: “Is Akai MPK Mini easy to set up?”, “acceptedAnswer”: { “@type”: “Answer”, “text”: “Yes, Akai MPK Mini is easy to set up. Simply connect it via USB to your computer. Install any necessary drivers. Then, configure it within your DAW.” } } ] }
As an Amazon Associate, Cleanestor earns from qualifying purchases at no additional cost to you.