Connecting a TC Helicon to an audio interface is simple. Follow these steps for a smooth setup.
Whether you’re a budding musician or a seasoned pro, connecting your TC Helicon to an audio interface can enhance your sound. This guide will walk you through the process, ensuring you get the best audio quality. Many users find this connection beneficial for live performances and recording sessions.
By understanding the basics, you can avoid common pitfalls and achieve a seamless setup. Ready to dive in? Let’s explore how to connect your TC Helicon to an audio interface efficiently and effectively.

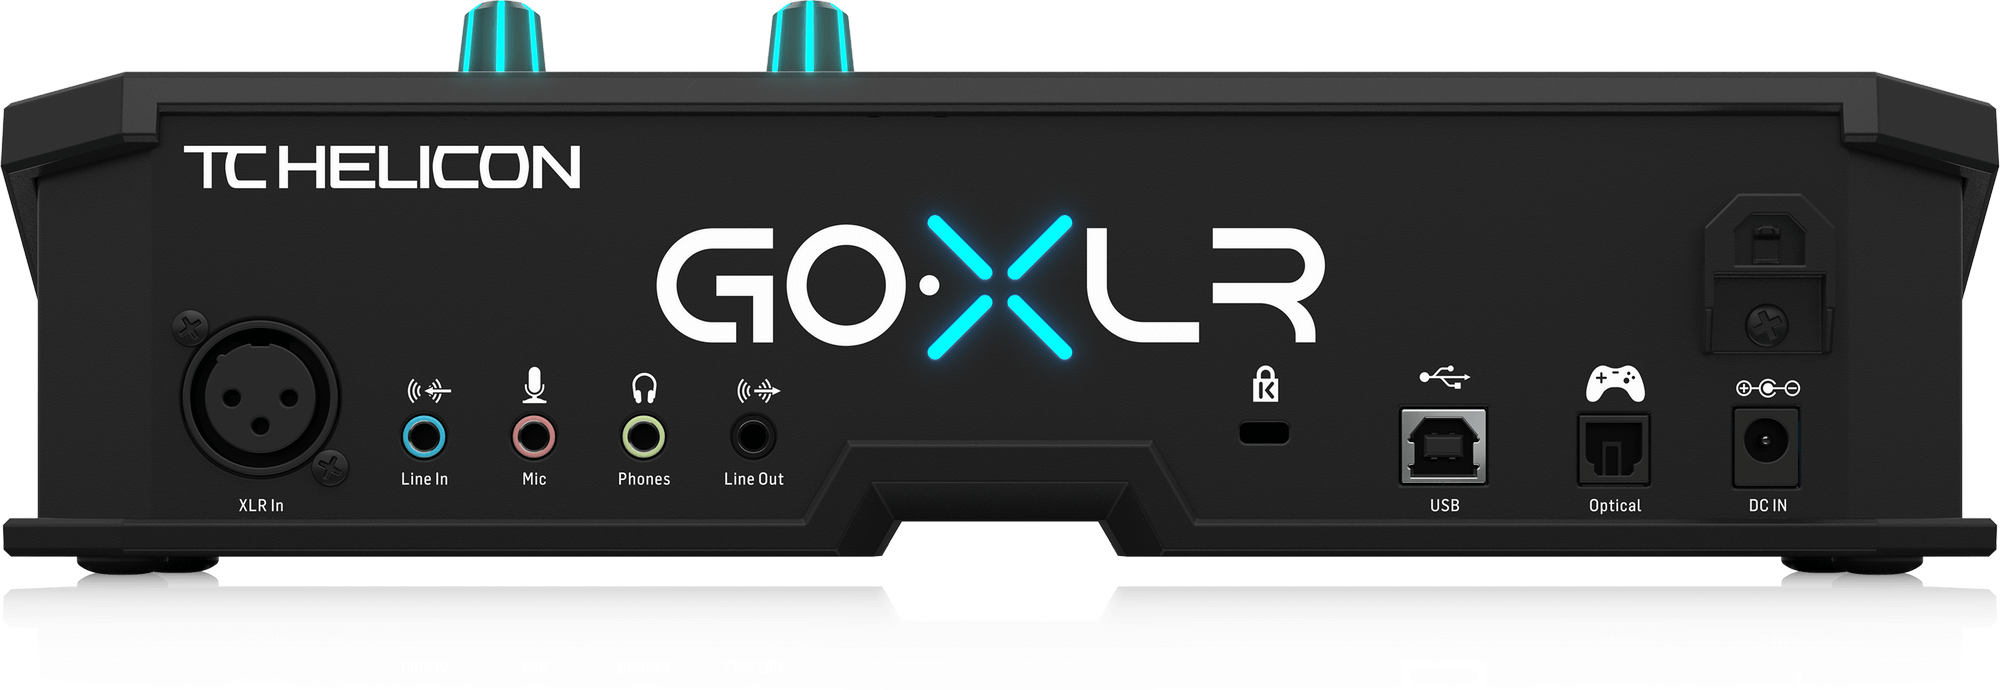
Credit: www.bhphotovideo.com
Gathering Equipment
Connecting your TC Helicon device to an audio interface can seem complex. But it’s quite simple with the right equipment. Let’s dive into what you need to gather before starting the process.
Required Cables
First, you will need the right cables. Check if you need XLR cables or 1/4 inch TRS cables. The type of cable depends on your TC Helicon model. Always have spare cables ready. It’s also good to have adapters on hand.
Audio Interface Compatibility
Ensure your audio interface is compatible with the TC Helicon device. Check the audio interface’s input options. Some interfaces support both XLR and TRS inputs. Make sure your interface has the correct inputs. Read the user manuals for both devices. This will help avoid any connection issues.
Setting Up Tc Helicon
Setting up your TC Helicon device can seem daunting at first. But with a step-by-step approach, you’ll have it ready in no time. This section will guide you through powering the device and configuring the initial settings.
Powering The Device
First, connect the power adapter to your TC Helicon device. Then plug the adapter into a power outlet. Ensure the power outlet is working. Press the power button on the device. Wait for the lights to indicate it’s on. Your TC Helicon is now powered up and ready.
Configuring Initial Settings
Next, navigate to the settings menu on the device. Use the control knobs to adjust settings. Set the input level to match your microphone. Adjust the output level for your audio interface. Ensure the device is set to the correct mode. This ensures optimal performance with your audio interface. Save your settings before exiting the menu.
Connecting To Audio Interface
Connecting your TC Helicon to an audio interface might seem tricky. But it’s simple with the right cables. In this guide, we will show you how to connect using XLR and TRS cables.
Using Xlr Cables
First, locate the XLR output on your TC Helicon device. It looks like a three-pin connector. Connect one end of the XLR cable to this output. The other end goes into the XLR input on your audio interface. Ensure both ends are secured tightly. Check for any loose connections.
Using Trs Cables
Find the TRS output on your TC Helicon. TRS cables have two rings on the plug. Insert one end of the TRS cable into the TRS output. Plug the other end into the TRS input on your audio interface. Make sure the connections are firm. This ensures a stable signal.
Adjusting Audio Levels
Adjusting the audio levels is crucial when connecting your TC Helicon to an audio interface. Properly balanced audio levels ensure clear and crisp sound. It also helps in avoiding distortion and noise. Let’s dive into the key aspects of adjusting audio levels.
Setting Gain Levels
Start by turning down the gain on your audio interface. Then, slowly increase the gain while speaking or singing into the microphone. Watch the signal level indicators. Aim for a level that is strong but not peaking. Peaking can cause distortion. Adjust the gain until you find a sweet spot. This ensures a clean and strong signal.
Monitoring Output
Next, monitor the output levels. Use headphones or studio monitors for this. Listen carefully to the sound quality. Ensure there is no unwanted noise or distortion. Adjust the output levels on both the TC Helicon and the audio interface. This helps in achieving a balanced sound.
Also, check the levels on your recording software. Make sure they are not too high or too low. Balanced levels in the software ensure the best recording quality. Take your time to get this right. Good audio levels are key to a great sound experience.
Testing The Connection
Testing the connection is essential after setting up your TC Helicon with an audio interface. This step ensures everything works correctly. It helps you identify any potential issues early.
Performing A Sound Check
Start by playing some audio through your setup. Choose a track you know well. Listen carefully. You should hear clear, crisp sound without any distortion. Adjust the volume and other settings on the TC Helicon and audio interface. Make small changes and listen again. This helps find the best settings for your needs.
Troubleshooting Common Issues
If you encounter problems, don’t worry. Check your connections first. Ensure all cables are plugged in securely. Sometimes, a loose cable causes issues. Next, review the settings on both devices. Make sure they match your requirements. If the problem persists, try using different cables. Faulty cables can affect sound quality.
Another common issue is software settings. Ensure your audio interface is selected as the input and output device in your computer’s audio settings. Restart your computer and devices to reset any glitches. If you still face problems, consult the user manuals or seek help from online forums.
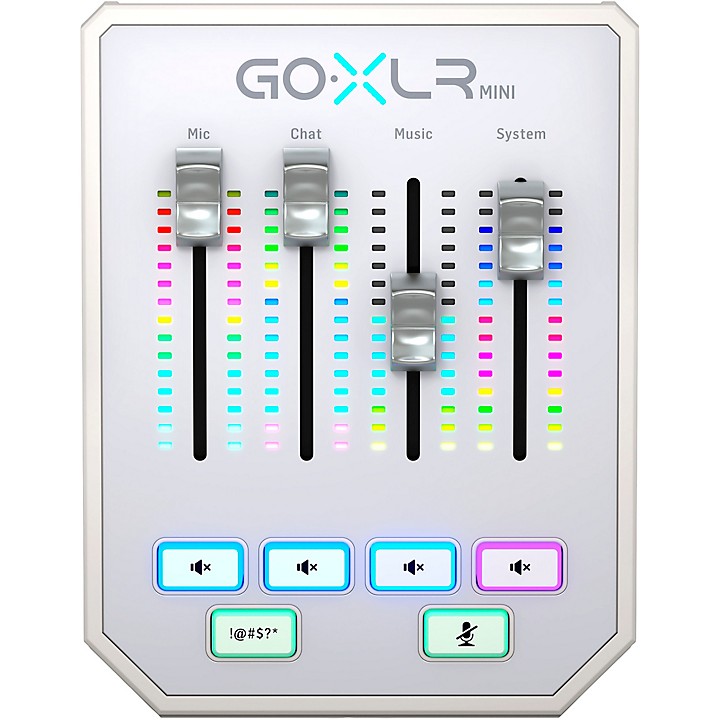
Credit: www.tc-helicon.com
Optimizing Sound Quality
Optimizing sound quality is crucial when connecting your TC Helicon to an audio interface. Achieving the best sound ensures your music or voice shines. This guide will cover key aspects to help you optimize your setup.
Using Effects
Effects can enhance your sound. TC Helicon devices come with various effects. Echo, reverb, and harmony are popular choices. Experiment with different settings. Small changes can make a big difference. Listen closely to how each effect alters your sound. Find the perfect balance for your needs.
Balancing Input And Output
Proper balance between input and output levels is essential. Set your input gain on the audio interface. Ensure it is not too high. Distortion can occur if it’s too high. Set it too low, and the sound may be weak. Adjust your output volume on the TC Helicon device. Check that it matches the input levels on your interface. Use headphones or monitors to fine-tune the sound. Aim for a clear, strong signal.
Practical Tips
Connecting your TC Helicon to an audio interface can seem tricky. With some practical tips, you can simplify the process and achieve a professional sound. Here are some key tips to help you set up your equipment efficiently.
Maintaining Your Setup
Keeping your setup organized is crucial. Use cable ties to keep wires neat. Label your cables to identify them quickly. Regularly inspect your connections to ensure they’re secure. Dust your equipment often to prevent buildup.
| Task | Frequency |
|---|---|
| Check connections | Weekly |
| Clean equipment | Monthly |
| Label cables | As needed |
Avoiding Common Mistakes
Many users make simple mistakes that cause issues. Here are some common ones to avoid:
- Not using balanced cables: Balanced cables reduce noise and improve sound quality.
- Ignoring the manual: Read the manual for both the TC Helicon and your audio interface.
- Improper gain staging: Set the gain properly to avoid distortion.
To ensure you avoid these mistakes, follow these steps:
- Use balanced XLR cables for all connections.
- Read the manuals thoroughly before starting.
- Adjust the gain slowly and test the sound.
Following these tips will help you connect your TC Helicon to an audio interface smoothly. You will achieve a cleaner and more professional sound.
Credit: www.musicarts.com
Frequently Asked Questions
How To Connect Tc Helicon To An Audio Interface?
To connect TC Helicon to an audio interface, use XLR or TRS cables. Connect the output of TC Helicon to the input of your audio interface. Ensure both devices are powered on and properly configured.
Do I Need Special Cables For Tc Helicon?
No, you do not need special cables. Standard XLR or TRS cables are sufficient. Ensure the cables are of good quality to maintain audio integrity.
What Settings Should I Use On Tc Helicon?
Set TC Helicon to match the input levels of your audio interface. Adjust gain and output levels for optimal sound quality. Refer to the user manual for specific settings.
Can I Use Tc Helicon With Any Audio Interface?
Yes, TC Helicon can be used with any audio interface. Ensure the interface has compatible input connections like XLR or TRS. Check the interface’s compatibility with your recording setup.
Conclusion
Connecting your TC Helicon to an audio interface enhances your sound quality. Follow the steps, and you’ll achieve great results. Always check connections for the best performance. Experiment with different settings to find your perfect sound. Remember, practice makes perfect.

Enjoy making music with your TC Helicon and audio interface. Share your music journey with others. Happy recording!
{ “@context”: “https://schema.org”, “@type”: “FAQPage”, “mainEntity”: [ { “@type”: “Question”, “name”: “How to connect TC Helicon to an audio interface?”, “acceptedAnswer”: { “@type”: “Answer”, “text”: “To connect TC Helicon to an audio interface, use XLR or TRS cables. Connect the output of TC Helicon to the input of your audio interface. Ensure both devices are powered on and properly configured.” } } , { “@type”: “Question”, “name”: “Do I need special cables for TC Helicon?”, “acceptedAnswer”: { “@type”: “Answer”, “text”: “No, you do not need special cables. Standard XLR or TRS cables are sufficient. Ensure the cables are of good quality to maintain audio integrity.” } } , { “@type”: “Question”, “name”: “What settings should I use on TC Helicon?”, “acceptedAnswer”: { “@type”: “Answer”, “text”: “Set TC Helicon to match the input levels of your audio interface. Adjust gain and output levels for optimal sound quality. Refer to the user manual for specific settings.” } } , { “@type”: “Question”, “name”: “Can I use TC Helicon with any audio interface?”, “acceptedAnswer”: { “@type”: “Answer”, “text”: “Yes, TC Helicon can be used with any audio interface. Ensure the interface has compatible input connections like XLR or TRS. Check the interface’s compatibility with your recording setup.” } } ] }
As an Amazon Associate, Cleanestor earns from qualifying purchases at no additional cost to you.