Connecting your Yamaha HS5 to an audio interface is simple. You need the right cables and a few steps.
The Yamaha HS5 is a popular studio monitor. It offers clear and accurate sound. Musicians and producers love it. But, connecting it to an audio interface can be tricky for beginners. Don’t worry! This guide will help you. We will show you the steps needed.
You will learn the best way to connect your HS5. By the end, you will enjoy great sound from your studio setup. Let’s get started!
Credit: www.youtube.com
Required Equipment
Connecting your Yamaha HS5 monitors to an audio interface is simple. You need the right equipment. This guide covers all the essentials. Follow the steps to enjoy great sound quality. Let’s start with the required equipment.
Yamaha Hs5 Monitors
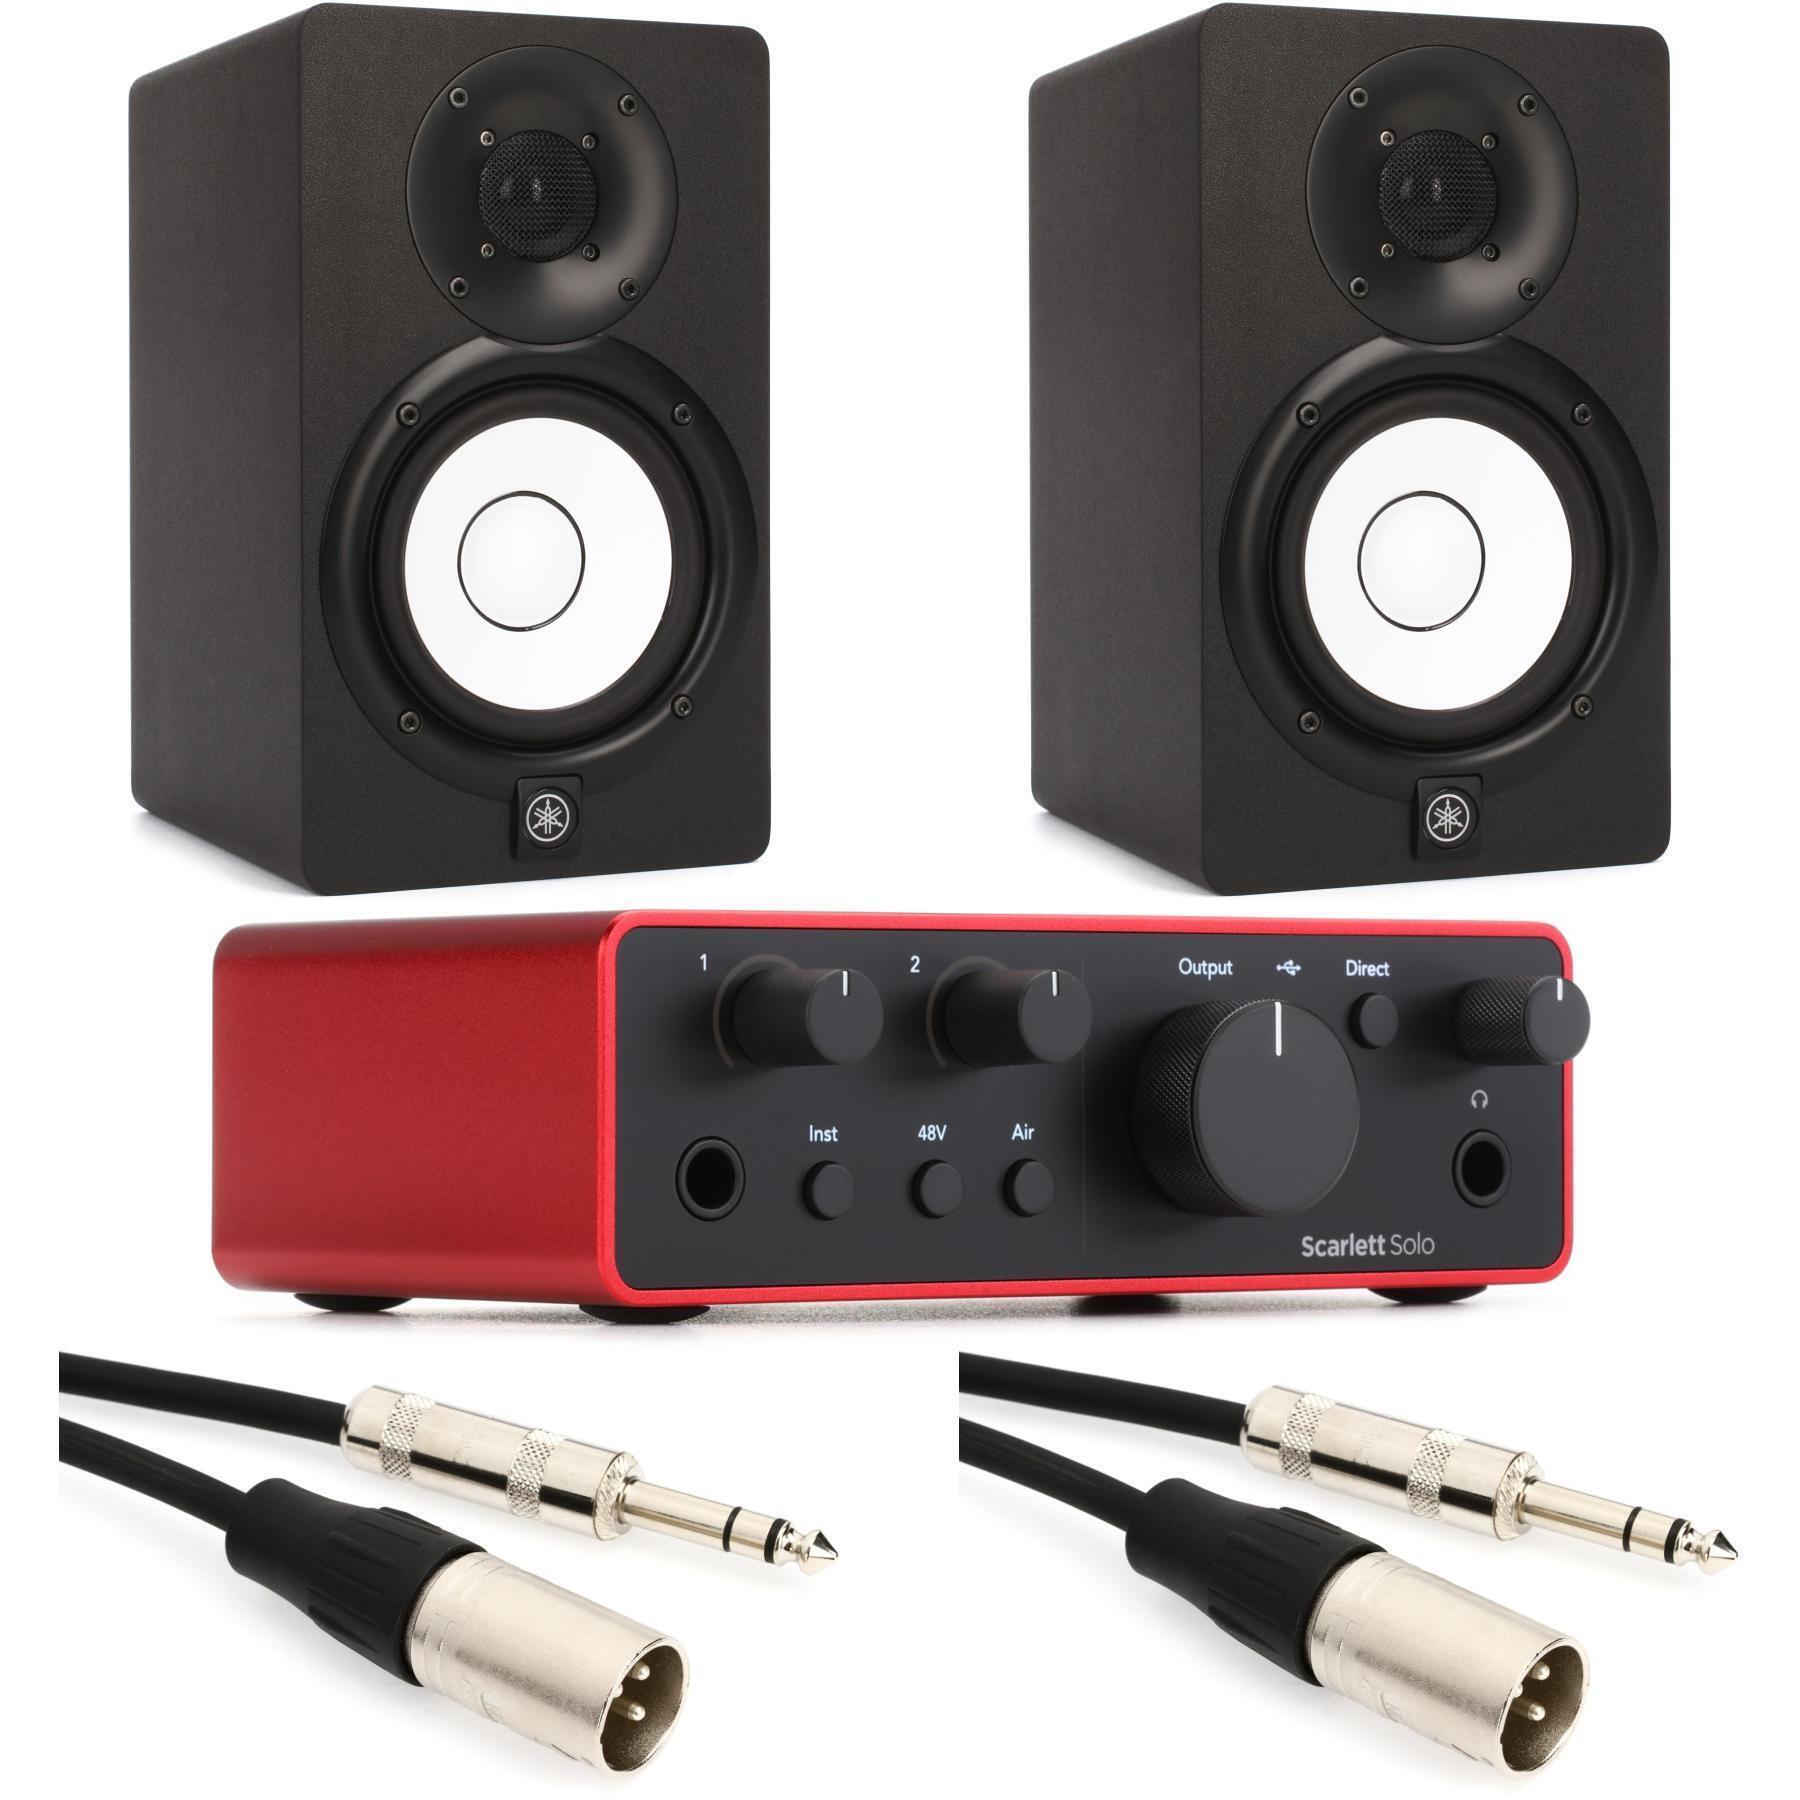
The Yamaha HS5 monitors are popular for their accurate sound. They have a 5-inch cone woofer and a 1-inch dome tweeter. These monitors are known for their clear audio. They are ideal for both professional and home studios.
Audio Interface Options
An audio interface connects your monitors to your computer. There are many options available. Focusrite Scarlett 2i2 is a common choice. It offers high-quality preamps and a simple design. Other options include PreSonus AudioBox and Behringer UMC22. Choose one that suits your needs and budget.
Necessary Cables
You need the right cables to connect your equipment. For Yamaha HS5 monitors, balanced TRS or XLR cables work best. These cables reduce noise and interference. Ensure you have enough length to reach your audio interface. Also, you may need USB or Thunderbolt cables for your audio interface. These cables connect the interface to your computer.
With these items ready, you can set up your system. Follow the instructions in the next sections. Enjoy your new audio setup!
Setting Up The Workspace
Setting up your workspace is crucial for achieving the best sound quality. It helps in creating an environment where your Yamaha HS5 monitors and audio interface can perform optimally. This guide will walk you through the steps needed to ensure an efficient and organized setup.
Ideal Placement For Monitors
Proper placement of your Yamaha HS5 monitors is essential. Follow these guidelines for the best results:
- Height: Place the monitors at ear level.
- Distance: Position them at least 3 feet apart.
- Angle: Point them towards your listening position, forming an equilateral triangle.
- Surface: Use stands or isolation pads to minimize vibrations.
These steps help in achieving a balanced sound stage and accurate audio representation.
Organizing Cables And Equipment
Keeping your cables and equipment organized can save you a lot of trouble. Here’s how to do it:
- Label: Label all cables for easy identification.
- Route: Use cable ties or clips to route cables neatly.
- Separate: Keep power and audio cables separate to avoid interference.
- Store: Use drawers or shelves for storing unused equipment.
An organized workspace not only looks clean but also improves workflow and reduces potential issues.
| Step | Action |
|---|---|
| 1 | Place monitors at ear level |
| 2 | Position monitors 3 feet apart |
| 3 | Angle monitors towards listening position |
| 4 | Use stands or isolation pads |
| 5 | Label all cables |
| 6 | Route cables neatly with ties or clips |
| 7 | Keep power and audio cables separate |
| 8 | Store unused equipment in drawers or shelves |
Connecting The Yamaha Hs5 To The Audio Interface
The Yamaha HS5 is a popular studio monitor. Connecting it to an audio interface ensures optimal sound quality. This guide will help you connect your HS5 to your audio interface step by step.
Choosing The Right Cables
First, you need the right cables. The Yamaha HS5 requires balanced cables. These cables reduce noise and interference.
- TRS (Tip-Ring-Sleeve) cables: These are common and reliable.
- XLR cables: These offer excellent audio quality.
Choose the cable that fits your setup. Both TRS and XLR are good options.
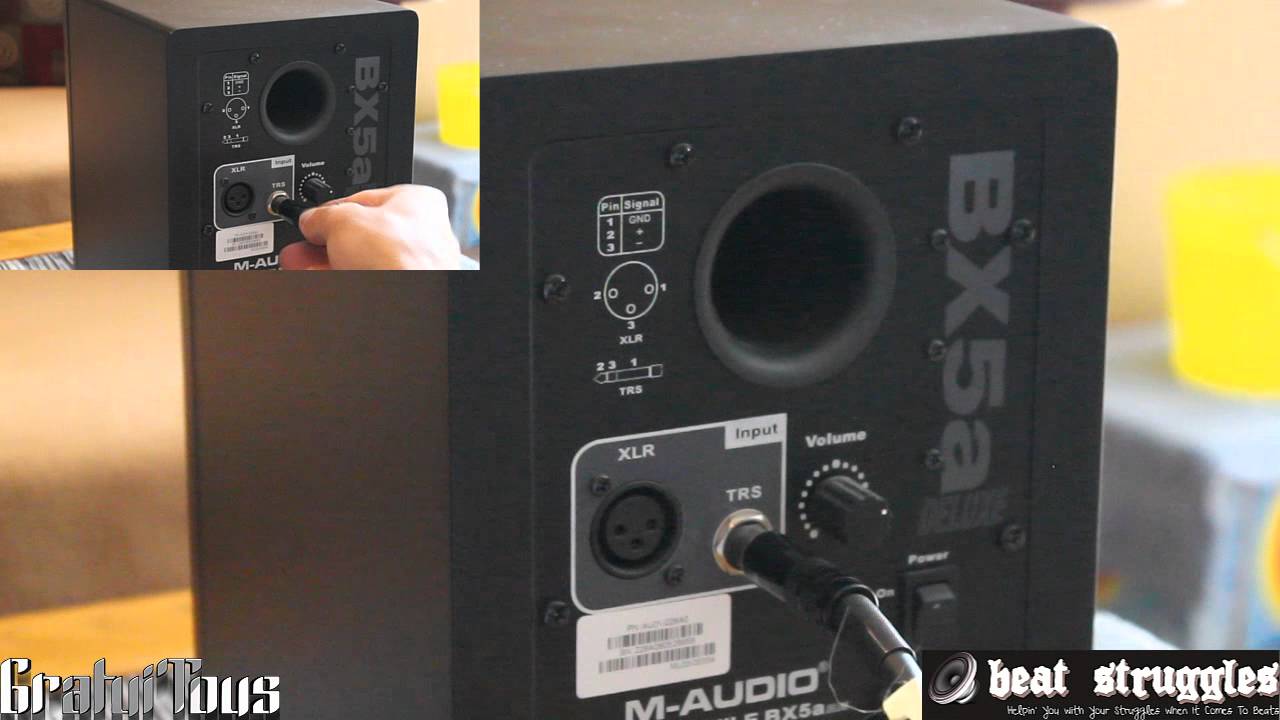
Connecting Cables To Hs5
Next, connect the cables to your HS5. Locate the input panel on the back of the monitor.
- Insert the TRS or XLR cable into the corresponding input.
- Ensure the connection is secure.
A loose connection can cause audio problems.
Connecting Cables To Audio Interface
Now, connect the other end of the cable to the audio interface. Locate the output panel on your audio interface.
- Insert the TRS or XLR cable into the output jack.
- Double-check the connection for stability.
Proper connections prevent signal loss and ensure clear sound.
Once everything is connected, power on your devices. Adjust the volume levels on both the HS5 and the audio interface. Your Yamaha HS5 should now be ready to deliver high-quality audio.
Configuring The Audio Interface
To ensure the best sound quality from your Yamaha HS5, configuring the audio interface is essential. This step ensures a smooth connection and optimal performance. Follow these guidelines to set up your audio interface effectively.
Installing Drivers
First, install the necessary drivers for your audio interface. Drivers help your computer communicate with the interface. Visit the manufacturer’s website to download the latest drivers. Follow the on-screen instructions for a smooth installation.
Adjusting Input And Output Settings
After installing the drivers, adjust the input and output settings. Open your digital audio workstation (DAW) or sound settings on your computer. Ensure the audio interface is selected as the primary input and output device.
Follow these steps:
- Open your DAW or sound settings.
- Select the audio interface as the input device.
- Do the same for the output device.
- Set the sample rate and buffer size for optimal performance.
Here is a simple table to help you remember the settings:
| Setting | Recommended Value |
|---|---|
| Sample Rate | 44.1 kHz or 48 kHz |
| Buffer Size | 256 samples or 512 samples |
These settings ensure low latency and high audio quality.
Once configured, test your setup by playing an audio track. Adjust the volume levels on your Yamaha HS5 and audio interface. Make small changes until you achieve the desired sound quality.
Testing The Connection
After connecting your Yamaha HS5 to an audio interface, testing the connection is crucial. This ensures everything works as expected, providing you with the best audio experience. This section will guide you through playing test audio and troubleshooting common issues.
Playing Test Audio
Start by playing a familiar track. Choose a high-quality audio file. This helps you assess the sound accuracy. Play the track through your audio interface. Ensure the volume is set to a moderate level. Listen for any distortions or irregularities. The sound should be clear and balanced. Adjust the settings on your audio interface if needed. This step helps ensure your Yamaha HS5 is working correctly.
Troubleshooting Common Issues
If you encounter issues, don’t panic. First, check all connections. Ensure cables are secure and properly connected. Loose cables often cause sound problems. Next, verify the audio interface settings. Make sure the input and output settings are correct. If the issue persists, test the Yamaha HS5 with another device. This helps identify if the problem is with the speakers or the audio interface.
Also, check for software updates. Outdated drivers can cause performance issues. Visit the manufacturer’s website for the latest updates. If none of these steps work, consult the user manual. It might provide specific troubleshooting tips. Remember, patience is key. Testing and troubleshooting ensure the best audio experience from your Yamaha HS5.
Optimizing Sound Quality
Connecting your Yamaha HS5 to an audio interface is only the first step. To truly get the best sound, you need to optimize the settings of both the monitor and the audio interface. This involves fine-tuning various parameters to enhance the audio output.
Adjusting Monitor Settings
Start by positioning your Yamaha HS5 monitors correctly. The tweeters should be at ear level. This ensures you get a clear and accurate sound.
- Set the Room Control switch based on your room’s acoustics. This switch helps to reduce low-end frequencies that can muddy the sound in smaller rooms.
- Adjust the High Trim control to fine-tune high frequencies. This is useful if your room has a lot of reflective surfaces.
Proper placement and adjustment of these settings can significantly improve sound quality.
Using Audio Interface Features
Your audio interface also has several features that can help optimize sound quality. Use the following tips:
- Gain Staging: Set the gain levels correctly. Avoid clipping by keeping the levels in the green zone on your interface.
- Sample Rate: Choose the appropriate sample rate. Common rates are 44.1 kHz and 48 kHz. Higher rates offer better quality but use more CPU.
- Monitor Mix: Use the monitor mix knob to adjust the balance between the direct signal and the computer playback.
These settings ensure you get the best performance from your audio interface.
| Feature | Purpose |
|---|---|
| Room Control | Reduces low-end frequencies in small rooms. |
| High Trim | Adjusts high frequencies for reflective surfaces. |
| Gain Staging | Sets correct gain levels to avoid clipping. |
| Sample Rate | Determines audio quality and CPU usage. |
| Monitor Mix | Balances direct signal and computer playback. |
By carefully adjusting both the monitor settings and the audio interface features, you can achieve a sound quality that is clear, accurate, and enjoyable.
Maintenance And Care
Proper maintenance and care for your Yamaha HS5 speakers ensure they deliver optimal performance. Keeping your equipment in good condition will extend its lifespan and maintain high-quality sound. Regular cleaning and careful handling are crucial aspects of this process.
Regular Cleaning
Dust can accumulate on your Yamaha HS5 speakers over time. Use a soft, dry cloth to wipe the exterior surfaces. Avoid using harsh chemicals or abrasive materials. These can damage the finish and harm the components. If you notice any stubborn dirt, a slightly damp cloth can help. Ensure the speakers are unplugged before cleaning. This prevents any electrical hazards.
Handling And Storage Tips
Handle your Yamaha HS5 speakers with care. Always lift them from the bottom. Avoid touching the speaker cones directly. This prevents damage to the delicate components. When not in use, store your speakers in a safe, dry place. Cover them with a dust cover if possible. This keeps them clean and protected. Avoid storing them in damp or humid environments. Moisture can damage the internal components.

Credit: www.reddit.com
Credit: www.sweetwater.com
Frequently Asked Questions
How To Connect Yamaha Hs5 To An Audio Interface?
To connect Yamaha HS5 to an audio interface, use balanced TRS or XLR cables. Plug one end into the HS5 input and the other into the interface output. Ensure both devices are powered off during connection. Once connected, power them on and adjust the interface settings as needed.
What Cables Do I Need For Yamaha Hs5?
You need balanced TRS or XLR cables to connect Yamaha HS5. These cables provide a clean and noise-free signal. Ensure they are of good quality for the best audio performance. Balanced cables reduce noise and interference, enhancing sound clarity.
Can I Use Unbalanced Cables With Yamaha Hs5?
Yes, you can use unbalanced cables with Yamaha HS5. However, balanced cables are recommended for optimal performance. Unbalanced cables may introduce noise and reduce sound quality. For the best audio experience, use balanced TRS or XLR cables.
Why Use Balanced Cables For Yamaha Hs5?
Balanced cables reduce noise and interference, providing a cleaner audio signal. They are ideal for studio monitors like Yamaha HS5. Using balanced cables ensures better sound quality and minimizes audio issues. They are recommended for professional audio setups.
Conclusion
Connecting the Yamaha HS5 to an audio interface is simple. Follow the steps carefully. First, gather all necessary cables. Next, connect the cables securely. Then, adjust the settings on your audio interface. Finally, test the setup to ensure sound quality.

With these steps, you can enjoy clear audio. Remember, practice makes perfect. Experiment with different settings. Happy listening!
{ “@context”: “https://schema.org”, “@type”: “FAQPage”, “mainEntity”: [ { “@type”: “Question”, “name”: “How to connect Yamaha HS5 to an audio interface?”, “acceptedAnswer”: { “@type”: “Answer”, “text”: “To connect Yamaha HS5 to an audio interface, use balanced TRS or XLR cables. Plug one end into the HS5 input and the other into the interface output. Ensure both devices are powered off during connection. Once connected, power them on and adjust the interface settings as needed.” } } , { “@type”: “Question”, “name”: “What cables do I need for Yamaha HS5?”, “acceptedAnswer”: { “@type”: “Answer”, “text”: “You need balanced TRS or XLR cables to connect Yamaha HS5. These cables provide a clean and noise-free signal. Ensure they are of good quality for the best audio performance. Balanced cables reduce noise and interference, enhancing sound clarity.” } } , { “@type”: “Question”, “name”: “Can I use unbalanced cables with Yamaha HS5?”, “acceptedAnswer”: { “@type”: “Answer”, “text”: “Yes, you can use unbalanced cables with Yamaha HS5. However, balanced cables are recommended for optimal performance. Unbalanced cables may introduce noise and reduce sound quality. For the best audio experience, use balanced TRS or XLR cables.” } } , { “@type”: “Question”, “name”: “Why use balanced cables for Yamaha HS5?”, “acceptedAnswer”: { “@type”: “Answer”, “text”: “Balanced cables reduce noise and interference, providing a cleaner audio signal. They are ideal for studio monitors like Yamaha HS5. Using balanced cables ensures better sound quality and minimizes audio issues. They are recommended for professional audio setups.” } } ] }
As an Amazon Associate, Cleanestor earns from qualifying purchases at no additional cost to you.