Drawing a drum set can be a fun and rewarding activity. It’s easier than you might think.
For music lovers and art enthusiasts alike, capturing the essence of a drum set on paper can be a delightful challenge. Whether you’re an aspiring artist or just looking to try something new, learning to draw a drum set step-by-step can boost your creativity.
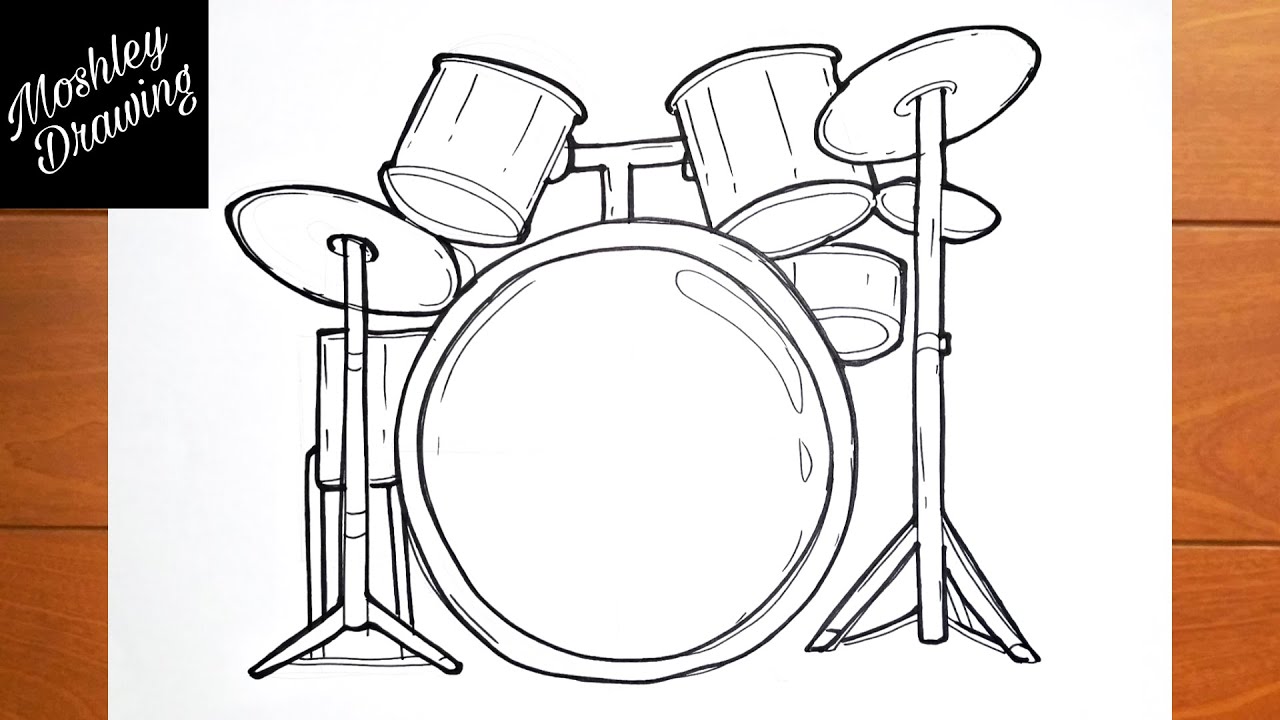
This guide will break down the process into simple, manageable parts. You’ll go from basic shapes to a detailed drum set illustration. Ready to pick up your pencil and get started? Let’s dive into the world of drawing and bring those rhythmic beats to life on paper!
Credit: www.youtube.com
Materials Needed
Learning how to draw a drum set can be an exciting journey. Before starting, gather all the necessary materials. The right tools and references are essential for a successful drawing.
Drawing Tools
Having the right drawing tools is crucial. Below is a list of recommended items:
- Pencils: Use HB, 2B, and 4B pencils for different strokes.
- Eraser: A kneaded eraser works best for light erasing.
- Paper: Choose a smooth, medium-weight drawing paper.
- Ruler: Useful for drawing straight lines.
- Sharpener: Keep pencils sharp for fine details.
- Blending Stump: Helps in shading and blending.
Reference Images
Reference images are essential for accuracy. They help you understand the structure and details of a drum set. Here are some tips:
- Online Searches: Use search engines to find high-quality images.
- Music Books: Many books have detailed images of drum sets.
- Photographs: Take your own photos if you have access to a drum set.
- Magazines: Music magazines often feature drum sets.
Using these materials ensures a more accurate and detailed drawing. Gather them before starting to draw your drum set. This preparation will make the drawing process smoother and more enjoyable.
Basic Drum Set Structure
Understanding the basic structure of a drum set is crucial for beginners. It helps in drawing an accurate and detailed drum set. Let’s break down the components and proportions of a typical drum set.
Identifying Components
First, identify the main components of a drum set. The bass drum is the largest and sits on the floor. It has a pedal. The snare drum is smaller and sits in the center. It has a distinct sound. Toms are mounted on the bass drum or on stands. They come in various sizes. Hi-hat cymbals are two cymbals mounted on a stand. They open and close with a pedal. Crash and ride cymbals are larger and placed on stands.
Understanding Proportions
Next, understand the proportions of each component. The bass drum is the largest. It often takes up the most space. The snare drum is medium-sized and sits slightly above and in front of the bass drum. Toms vary in size but are smaller than the bass drum. The hi-hat cymbals are about the same height as the snare drum. Crash and ride cymbals are placed higher than the hi-hat.
Drawing these components in correct proportions helps in creating a realistic drum set. Pay attention to the size and position of each part. Practice makes perfect.
Drawing The Bass Drum
Drawing the bass drum is a fun and simple process. This drum is the largest part of the drum set. It sits on the floor and helps keep the beat. Let’s break it down into easy steps.
Creating The Circle
First, draw a large circle on your paper. This will be the main body of the bass drum. Use a light pencil stroke. It allows you to erase any mistakes easily. Make sure the circle is as round as possible. If needed, use a compass or a round object to trace the circle.
Adding Details
Next, add two small circles inside the large circle. These will be the drum’s lugs. Place one at the top and one at the bottom. Draw a small rectangle at each side of the drum. These rectangles represent the drum’s legs. They help the drum stand upright.
Now, draw a thin rectangle across the middle of the drum. This is the drum’s head. Finally, add some small lines around the edge of the drum. These lines show the tension rods. They keep the drum’s head tight.

Credit: www.pinterest.com
Illustrating The Snare Drum
The snare drum is a key part of any drum set. It sits in the center and creates the crisp, sharp sounds that drive the rhythm. Drawing the snare drum accurately is crucial to capturing the drum set’s overall look. This section will guide you through the steps of illustrating the snare drum with ease.
Shape And Placement
Start with the basic shape of the snare drum. Draw a horizontal oval to represent the drum’s top view. This oval should be slightly wider than it is tall. Place it in the center of your drawing area, as the snare drum sits in the middle of the drum set.
Next, draw two vertical lines extending downward from each side of the oval. These lines will form the sides of the drum. Connect the bottom of these lines with another horizontal oval, slightly smaller than the top one. This will give your snare drum a three-dimensional look.
Detailing The Snare
Once the basic shape is in place, add details to make the snare drum look realistic. Start by drawing the drumheads. Inside the top oval, draw a smaller oval to represent the drumhead. Repeat this step for the bottom oval.
Add the drum’s tension rods. These are small cylindrical shapes that connect the top and bottom drumheads. Draw six to eight evenly spaced rods around the drum’s side. Make sure they are evenly spaced and aligned.
The snare wires are next. These are thin lines that run across the bottom drumhead. Draw a few parallel lines inside the bottom oval to represent the snare wires. They should be slightly curved to match the drum’s shape.
Finally, add the drum’s lugs. These are small, round shapes that sit at the ends of the tension rods. Draw a lug at the top and bottom of each rod, ensuring they are consistent in size and shape.
With these steps, your snare drum illustration is complete. You now have a detailed and accurate representation of this essential drum set component.
Sketching The Tom-toms
Drawing a drum set can be a fun and rewarding experience. It’s essential to focus on each component, including the tom-toms. These drums add variety and depth to the drum set. Let’s explore how to sketch the tom-toms effectively.
Positioning The Toms
First, decide where to place the tom-toms. Typically, they are above the bass drum. Start by drawing a horizontal guideline for alignment. This ensures the toms are even.
Next, draw two circles on the guideline. These circles represent the drumheads. Make sure they are not too close or too far from each other. This gives the toms a balanced look.
Adding Depth
To add depth, begin by drawing the sides of the toms. From the edge of each circle, draw short, vertical lines downwards. These lines should be equal in length.
Connect the bottom of these lines with a curved line. This creates the drum shell. Repeat the process for the other tom-tom.
Ensure the curves match the top circle’s shape. This consistency gives a realistic look to the drums.
Finally, add details like lugs and rims. Draw small rectangles along the drum’s edge. These elements complete the tom-toms’ appearance.
Crafting The Cymbals
Crafting the cymbals is an essential part of drawing a drum set. These shiny components add character and detail to your illustration. They also provide a realistic touch. To achieve this, focus on the shape and positioning. Let’s break it down into smaller steps.
Drawing The Hi-hats
Start by drawing two circles, one above the other. They should be slightly tilted. This creates the effect of stacked plates. Next, draw a thin line connecting them. This represents the stand. Add a small pedal at the bottom. The hi-hats should look like they can open and close. Don’t forget to add some shading. This gives them a metallic look.
Illustrating The Crash And Ride
The crash and ride cymbals are larger. Begin with a large oval or circle. Position it at an angle. This shows the cymbal’s curve. Draw a small bell shape in the center. This is where the cymbal connects to the stand. Add a thin line for the stand. Place the ride cymbal on the right side of the drum set. The crash cymbal goes on the left. Use light strokes to create a shiny effect.
Remember, each cymbal has its own unique size and shape. This will make your drum set look more realistic.
Adding Drum Hardware
Adding drum hardware is an essential step in drawing a complete drum set. Drum hardware includes stands, pedals, and other components that support the drums and cymbals. These elements give the drum set structure and functionality. Let’s break down the process into simple steps.
Drawing The Stands
Stands hold the drums and cymbals in place. Start by drawing straight lines for the legs. The legs should be angled outward for stability. Next, add small circles at the top of each leg. These circles represent the joints.
Draw the vertical poles extending from these joints. These poles hold the drums and cymbals. At the top of each pole, draw small horizontal lines. These lines will hold the drums or cymbals. Don’t forget the details like screws and clamps.
Including Pedals
Pedals are crucial for playing the bass drum and hi-hat. Start by drawing a small rectangle at the base of the bass drum. This represents the pedal’s footboard. Next, draw a thin line extending from the footboard to the drum. This line represents the beater rod.
For the hi-hat pedal, draw a similar rectangle next to the hi-hat stand. Connect it to the hi-hat cymbals with a thin vertical line. Add small details like springs and hinges. These details make your drawing more realistic.
By carefully adding these components, you bring your drum set to life. Each detail adds to the overall look and functionality. Follow these steps, and your drum set drawing will be complete and accurate.

Credit: www.pinterest.com
Final Touches
Final touches can make your drum set drawing come alive. This step adds depth, detail, and a professional look to your artwork. Let’s dive into the techniques for shading and enhancing details.
Shading Techniques
Shading gives your drum set a three-dimensional feel. Start with light strokes. Use a soft pencil for subtle shading. Focus on areas where shadows naturally fall. Under the drum rims, around the drumsticks, and beneath the cymbals. Gradually, build up the darkness. Avoid pressing too hard. Blend the pencil marks for a smooth finish. This creates a realistic look.
Enhancing Details
Details make your drum set drawing stand out. Add bolts on the drum rims. Draw the texture on the drumsticks. Highlight the cymbals with light lines. Show reflections on the drum surfaces. Use a fine-tip pen for crisp lines. Be patient. Small details add character. They transform a simple drawing into a masterpiece.
Frequently Asked Questions
What Materials Do I Need To Draw A Drum Set?
You’ll need paper, pencils, erasers, and a ruler. Colored pencils or markers are optional for adding details.
How Do I Start Drawing A Drum Set?
Begin by sketching basic shapes for each drum. Use circles and ovals to outline the drums’ positions.
How Can I Add Details To The Drum Set?
Add details like drum rims, stands, and pedals. Use straight and curved lines to create realistic components.
How Do I Draw Drum Set Cymbals?
Draw cymbals as thin, slightly curved ovals. Add details like the bell and edge for realism.
Conclusion
Drawing a drum set can be fun and rewarding. Follow the steps carefully. Practice makes perfect, so keep trying. Don’t rush the process. Focus on each part of the drum set. Use references if needed. Enjoy the creative journey. Soon, you’ll see progress.

Keep your lines clean and clear. Share your artwork with friends. They will love it. Happy drawing!
As an Amazon Associate, Cleanestor earns from qualifying purchases at no additional cost to you.