
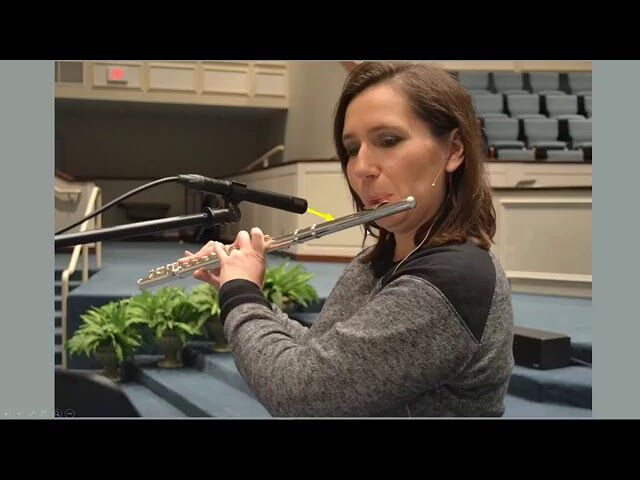
Miking a flute can be tricky. But with the right technique, it’s achievable.
Flute players often face challenges when amplifying their instrument. The flute’s sound is delicate and unique, requiring special attention to capture its true essence. Proper miking ensures that the flute’s sound is clear and natural. This guide will walk you through the steps to mic a flute effectively.
Whether you’re recording in a studio or performing live, the right setup can make a big difference. You’ll learn about mic types, placement, and tips to avoid common pitfalls. Let’s dive into the world of flute miking and enhance your musical experience.
Credit: www.youtube.com
Introduction To Micing A Flute
Micing a flute can be challenging. Capturing the instrument’s unique sound requires skill. The flute produces sound both from the mouthpiece and the body. To mic a flute correctly, you need to understand its sound production and the microphone placement.
Importance Of Proper Micing
Proper micing ensures a clear and accurate sound. A poorly mic’ed flute can sound muffled or harsh. Good micing techniques enhance the flute’s natural tone. This results in a better performance and recording.
- Ensures sound clarity
- Captures the flute’s natural tone
- Improves performance quality
Challenges In Micing A Flute
Micing a flute presents several challenges. The sound emanates from both the embouchure hole and the keys. This makes it tricky to capture the true sound. Additionally, the flute’s dynamic range can vary greatly, making mic placement critical.
| Challenge | Explanation |
|---|---|
| Sound Source | Sound comes from both the mouthpiece and the keys. |
| Dynamic Range | The flute’s sound can be soft or loud, requiring careful mic adjustment. |
Understanding these challenges helps in better micing techniques.

Credit: www.musicademy.com
Choosing The Right Microphone
Choosing the right microphone is crucial for capturing the true sound of a flute. The flute’s unique tonal qualities require a microphone that can capture its subtle nuances and dynamics. Understanding the different types of microphones and knowing which ones work best for a flute will make a significant difference in your recordings or live performances.
Types Of Microphones
There are several types of microphones to consider:
- Dynamic Microphones: Durable and great for high sound pressure levels. Often used in live settings.
- Condenser Microphones: Sensitive and provide a detailed sound. Ideal for studio recordings.
- Ribbon Microphones: Warm and natural sound. Require careful handling.
Each type has its pros and cons. Knowing these will help you make an informed choice.
Best Microphones For Flutes
Here is a list of some of the best microphones for flutes:
| Microphone | Type | Key Features |
|---|---|---|
| Shure SM57 | Dynamic | Durable, clear sound, affordable |
| Rode NT1-A | Condenser | Low noise, detailed sound, versatile |
| AKG C414 | Condenser | Multiple polar patterns, excellent detail, professional quality |
| Royer R-121 | Ribbon | Warm sound, natural tone, high-end |
These microphones are known for their ability to capture the flute’s unique sound accurately. They offer a balance of quality and performance that suits both studio and live applications.
Microphone Placement Techniques
Capturing the beautiful sound of a flute requires proper microphone placement. The mic’s position affects the sound quality and the recording’s overall feel. Let’s explore two common techniques: close micing and distant micing.
Close Micing
Close micing places the microphone near the flute. This technique captures detailed sound and reduces background noise. Positioning the mic correctly is crucial for the best result.
- Place the mic about 6-12 inches from the embouchure hole.
- Angle the mic slightly towards the keys to capture breath and finger sounds.
- Use a cardioid microphone to focus on the flute sound and minimize room noise.
Advantages:
| Advantage | Details |
|---|---|
| Detailed Sound | Captures intricate nuances and dynamics. |
| Reduced Noise | Minimizes unwanted background sounds. |
Distant Micing
Distant micing places the microphone farther from the flute. This technique captures a more natural sound with room ambiance. It is ideal for creating a sense of space in the recording.
- Position the mic 3-6 feet away from the flute.
- Use a condenser microphone for a wide frequency response.
- Experiment with mic height to find the best sound.
Advantages:
| Advantage | Details |
|---|---|
| Natural Sound | Captures the instrument’s true tone and room ambiance. |
| Spacious Feel | Creates a sense of depth in the recording. |
Avoiding Common Micing Mistakes
Flute micing can be tricky. Avoiding common mistakes ensures better sound. This section explores how to handle wind noise and prevent feedback.
Handling Wind Noise
Wind noise can ruin recordings. Follow these steps to reduce it:
- Use a windscreen on the microphone.
- Position the microphone slightly off-axis from the flute’s embouchure hole.
- Maintain a consistent distance between the flute and the microphone.
These steps help capture a clean, clear sound.
Preventing Feedback
Feedback can disrupt live performances. Here’s how to prevent it:
- Position the microphone away from speakers.
- Use a directional microphone to focus on the flute sound.
- Adjust the gain levels to avoid excessive volume.
These precautions ensure smooth, feedback-free performances.
Recording Tips And Tricks
Recording a flute can be tricky. The delicate sound requires careful mic placement. Proper techniques help capture the best audio quality. Let’s dive into some tips and tricks.
Capturing Clear Sound
Choose a quiet room. Background noise ruins recordings. Use a condenser microphone. It captures the flute’s delicate tones well. Position the mic near the mouthpiece. This captures the breathy sound. Avoid placing the mic too close. It can distort the sound. Experiment with angles. Aim for the center of the mouthpiece. Adjust until you find the sweet spot.
Balancing Volume Levels
Flute dynamics vary greatly. Set your levels carefully. Use a compressor. It helps maintain a consistent volume. Test different settings. Find what works best for the flute. Monitor the levels while recording. Ensure the peaks do not clip. Clipping distorts the sound. Keep the volume balanced. This ensures a clean recording.
Live Performance Micing
Live performance micing for a flute can be tricky. The flute’s delicate sound needs careful handling to be heard clearly. Proper micing ensures the audience enjoys every note. Let’s explore how to set up and adjust for acoustics during concerts.
Setup For Concerts
Start with the right microphone. A small diaphragm condenser mic works best. Place the mic about 6 to 12 inches from the flute. Aim it at the embouchure hole. This captures the breath and the sound. Use a mic stand to keep it steady. Clip-on mics are also good for freedom of movement.
Avoid placing the mic too close. It can pick up unwanted breath noise. Test the setup before the concert. Check for feedback and other issues. Make adjustments as needed.
Adjusting For Acoustics
Every venue has different acoustics. Large halls can make sound bounce. Small rooms can sound too tight. Adjust the mic placement based on the room. Listen to how the flute sounds in the space. Move the mic until the sound is clear and balanced.
Use the venue’s sound system to your advantage. Work with the sound engineer. They can help fine-tune the setup. Adjust the gain to avoid distortion. Ensure the flute is heard over other instruments.
Keep testing and adjusting. The goal is a natural, clear flute sound. With the right setup, the flute will shine in any live performance.
Using Effects And Processing
Using effects and processing can greatly enhance the sound of a mic’d flute. These techniques add depth, clarity, and character to your recordings. In this section, we will explore two key methods: adding reverb and using equalization.
Adding Reverb
Reverb can make a flute sound more natural and spacious. It simulates the effect of playing in a larger room. To add reverb, start with a small amount. Too much can make the flute sound distant. Choose a reverb that matches the style of music. For classical, use a hall reverb. For pop, a plate reverb works well.
Adjust the reverb time and mix levels carefully. Short reverb times keep the sound clear. Long reverb times add a dreamy effect. The mix level controls how much reverb you hear. A good starting point is around 20%. Listen and adjust until it sounds right.
Using Equalization
Equalization (EQ) helps balance the frequencies of a flute recording. Start by cutting any low frequencies below 100 Hz. Flutes do not produce much sound in this range. This cut reduces unwanted noise. Boost the mid-range frequencies around 1-3 kHz. This range brings out the flute’s tone and clarity. Be gentle with boosts, a few decibels are often enough.
Cut high frequencies above 10 kHz if the sound is harsh. Experiment with different EQ settings. Each flute and recording environment is unique. Listen carefully and make small adjustments. This process takes practice, but it’s worth the effort.

Credit: www.youtube.com
Troubleshooting Micing Issues
Micing a flute can be tricky. Sound quality issues often arise. This section addresses troubleshooting micing issues. Read on to discover common problems and quick fixes.
Identifying Problems
First, identify the problem. Listen to the sound output. Is there feedback? Is the sound too quiet or too loud? Check for distortion. Each issue has a specific cause. Feedback often means the mic is too close. A quiet sound might suggest a weak signal. Loud sounds could indicate a high gain setting. Distortion usually means the mic is overloaded. Identify the issue to find the right fix.
Quick Fixes
Now, apply some quick fixes. Move the mic slightly back if there’s feedback. Adjust the mic position for a better sound. Increase the gain if the sound is too quiet. Turn down the gain if the sound is too loud. Use a pop filter to reduce wind noise. Check all connections for secure fittings. Sometimes, a simple reconnection solves the problem.
Frequently Asked Questions
What Is The Best Mic For Recording A Flute?
A small diaphragm condenser mic is ideal. It captures the flute’s high frequencies and subtle nuances. Ensure it has a cardioid polar pattern.
Where Should I Place The Mic For A Flute?
Position the mic around 12-18 inches from the mouthpiece. Aim it slightly off-axis to reduce breath noise. Adjust for best sound.
How To Reduce Breath Noise When Micing A Flute?
Use a pop filter or windscreen. Position the mic slightly off-axis. Experiment with mic placement to minimize breath sounds.
Can I Use A Dynamic Mic For A Flute?
Yes, but it’s not ideal. Dynamic mics may not capture the flute’s detailed high frequencies. Condenser mics are generally better for flutes.
Conclusion
Micing a flute can seem tricky, but with practice, it gets easier. Choose the right microphone for the best sound. Position it carefully to capture the flute’s tone. Experiment with different angles. Test and adjust as needed. Follow these tips, and you’ll get great sound.

Remember, practice makes perfect. Keep learning and improving. Enjoy making music!
As an Amazon Associate, Cleanestor earns from qualifying purchases at no additional cost to you.