
Recording drums with just one mic can seem daunting. But it’s entirely possible and effective.
Capturing a great drum sound with a single microphone is an art. You don’t need a studio full of gear to achieve a professional result. With the right approach, you can record high-quality drum tracks using one mic. This method is perfect for home studios or budget projects.
It simplifies your setup and still delivers impressive results. Let’s explore how to make the most of one mic for drum recording. This guide will help you achieve a balanced and clear drum sound.
Credit: blog.zzounds.com
Choosing The Right Mic
Recording drums with one mic requires choosing the right mic. Position it to capture a balanced sound. Test different placements to find the best spot.
Selecting the right mic is crucial for recording drums with one mic. The mic you choose will impact the sound quality. It will also affect the clarity of your drum recording. Understanding the types of mics and their features helps make an informed decision.
Dynamic Vs. Condenser
Dynamic mics are durable and handle high sound pressure levels. They are great for loud drum hits. They also tend to be less sensitive to background noise. Condenser mics, on the other hand, are more sensitive. They capture more detail and nuance in the sound. They require phantom power to operate. Both types have their benefits and drawbacks.
Optimal Features
Look for a mic with a wide frequency response. This ensures it captures the full range of drum sounds. A cardioid polar pattern is ideal. It picks up sound from the front and reduces background noise. A high SPL (Sound Pressure Level) rating is important. It means the mic can handle loud sounds without distorting. Portability and ease of setup are also key features. You want a mic that is easy to position and adjust.
Positioning The Mic
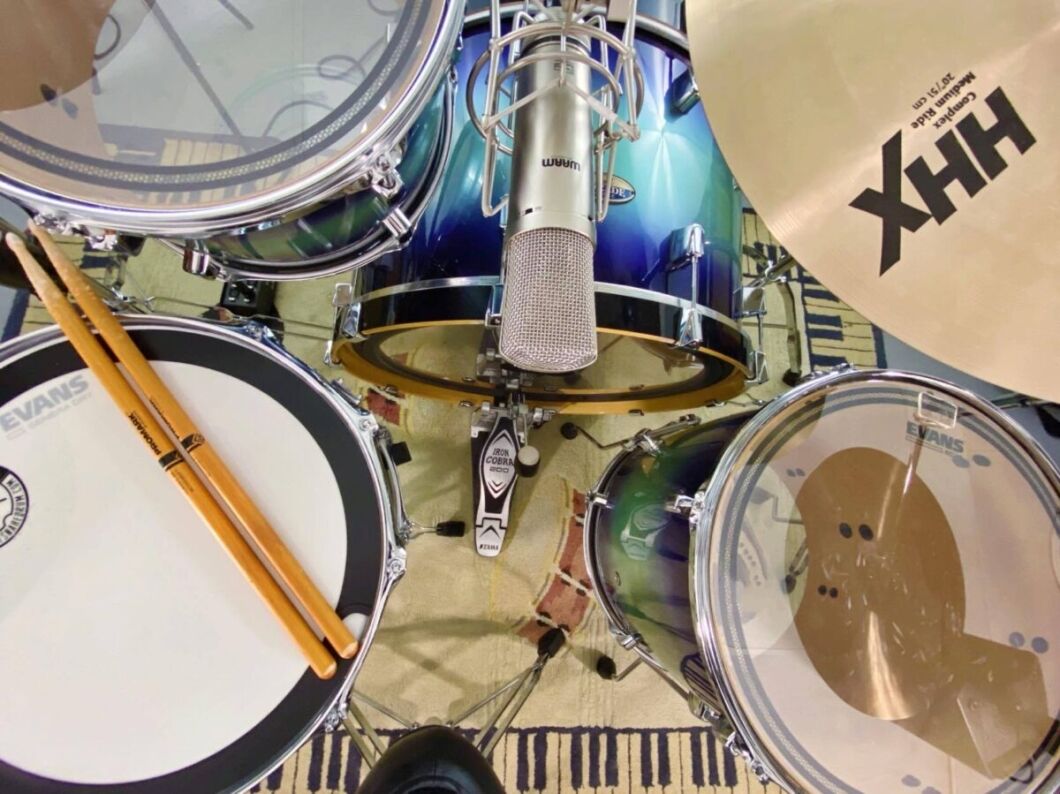
Recording drums with one mic can be challenging but rewarding. The mic’s position is critical. It captures the best sound and gives a balanced mix. Two popular placements are Overhead and Front of Kit. Let’s dive into each.
Overhead Placement
Overhead placement is common for capturing drums with one mic. It focuses on the overall sound of the kit.
Here’s how to do it:
- Place the mic above the drum kit.
- Position it around 3 to 4 feet above the cymbals.
- Ensure the mic points straight down.
This placement captures a balanced mix of cymbals, toms, and snare. It is ideal for an open, natural sound. Adjust the height to control the mix of cymbals and drums.
| Mic Height | Sound Characteristics |
|---|---|
| 3 feet | More cymbals, less drums |
| 4 feet | Balanced cymbals and drums |
Front Of Kit
Placing the mic in front of the kit captures a different sound. It focuses more on the kick and snare.
Follow these steps for front of kit placement:
- Position the mic about 2 feet in front of the kit.
- Ensure it is at the drummer’s chest level.
- Angle the mic slightly upward.
This placement emphasizes the kick and snare, providing a punchier sound. It also captures some toms and cymbals but less prominently.
Experiment with the distance and angle to find the sweet spot. This placement works well for rock and pop genres.
| Mic Distance | Sound Characteristics |
|---|---|
| 1.5 feet | More kick, less cymbals |
| 2 feet | Balanced kick and snare |
Room Acoustics
Room acoustics play a vital role in recording drums with one mic. The sound of the room can enhance or ruin your drum recording. It’s crucial to understand your room and make adjustments to get the best possible sound.
Soundproofing Tips
Soundproofing is essential to control unwanted noise. Use thick curtains or blankets on the walls. This helps in absorbing sound and reducing reflections. Lay a rug on the floor to minimize echo. Avoid using hard surfaces as they reflect sound waves.
Seal gaps around doors and windows. This prevents outside noise from entering. Use weather stripping or door sweeps for better results. Place foam panels or bass traps in the corners. These help in controlling low-frequency sounds. A well-soundproofed room ensures a cleaner drum recording.
Natural Reverb
Natural reverb adds character to your drum recordings. It’s the sound that bounces off the walls and creates depth. To capture natural reverb, position the mic at a distance from the drum kit. Experiment with different mic placements. This helps in finding the sweet spot for the best reverb.
Hard surfaces like brick or tiles enhance natural reverb. Wooden surfaces offer a warm tone. Experiment with different materials in your room. Remember, less is often more. A controlled amount of natural reverb can make your drums sound lively and spacious.
Tuning The Drums
Recording drums with just one mic can be challenging. The key is to ensure your drums sound their best. Tuning your drums is crucial. It can make a big difference in the final recording.
Head Tension
Head tension affects the sound of your drums. Tight heads produce a higher pitch. Loose heads give a deeper tone. Balance is important. Make sure each lug is tightened evenly. This helps avoid unwanted overtones. Use a drum key to adjust the tension. Turn each lug a little at a time. Check the pitch around the drumhead. Aim for a consistent sound.
Dampening Techniques
Dampening controls the resonance of your drums. Too much ring can be distracting. There are simple ways to dampen your drums. Try using drum gels. These small pads stick to the drumhead. They reduce unwanted overtones. Another option is using tape. Place a small piece on the drumhead. This can quickly reduce ring. Experiment with different placements. Find what works best for your sound.
Recording Equipment
Recording drums with just one microphone can be challenging. But with the right recording equipment, you can achieve impressive results. Below, we’ll break down the essential gear you need for this setup.
Audio Interface
An audio interface is crucial for converting your analog drum sounds into digital signals. Choose one with a high-quality preamp for better sound capture. Make sure it has at least one XLR input for your microphone. Popular brands include Focusrite and PreSonus.
Cables And Stands
Good quality cables ensure a clean signal from your microphone to the audio interface. Look for balanced XLR cables to minimize noise. A sturdy mic stand is also essential. It allows you to position the microphone correctly. Use a stand with a boom arm for more flexibility. This helps in capturing the best sound from your drum kit.
Recording Techniques
Recording drums with just one microphone can seem daunting. But with the right techniques, you can achieve impressive results. This section will guide you through some essential recording techniques. These will help you get the best sound possible from a single mic setup.
Gain Staging
Gain staging is crucial for capturing clean drum recordings. First, set your preamp gain to a moderate level. Avoid pushing it too high, which can cause distortion. Listen to the drum hits and watch the meters. Aim for levels that peak around -6dB. This gives you headroom and prevents clipping.
Monitoring Levels
Proper monitoring levels ensure you hear the true sound of your recording. Use headphones to monitor the mic signal. Adjust the headphone volume to a comfortable level. Make sure you can hear the nuances of the drum hits. Do not rely on speakers, which can introduce room noise.
Mixing Tips
Mixing drums with just one microphone can be challenging. But with the right techniques, you can achieve a great sound. Here are some essential tips to help you mix your drum recording.
Eq Settings
Start by cutting the low frequencies. This removes unwanted rumble. Boost the mid-range to highlight the snare and toms. You might also want to add a slight high-frequency boost. This can bring out the cymbals and hi-hats. Always make small adjustments and listen carefully.
Compression
Use a gentle compression setting. This helps control the dynamics of the drums. Set a slow attack time. This allows the initial hit to come through. Adjust the release time to suit the tempo of the song. This ensures the compression breathes with the music. Aim for a ratio of around 4:1. This provides enough control without squashing the sound.

Credit: producelikeapro.com
Troubleshooting Common Issues
Recording drums with a single mic can be challenging. You might face various issues during the process. Understanding these problems helps you achieve better sound quality. Here are some common issues and how to fix them.
Phase Problems
Phase problems occur when two sound waves interfere. This can result in a thin or weak sound. To avoid this, ensure the mic is placed correctly. Placing the mic at a consistent distance from the drums helps maintain phase alignment.
Use the 3:1 rule to reduce phase issues. This rule states the mic should be three times further from other sound sources than from the main sound source. For example, if the mic is one foot from the snare, it should be three feet from other drums.
| Distance from Snare | Distance from Other Drums |
|---|---|
| 1 foot | 3 feet |
| 2 feet | 6 feet |
Unwanted Noise
Unwanted noise can ruin your recording. To minimize this, check your recording space. Ensure the room is quiet and free from distractions. Background noise, such as fans or air conditioners, can be problematic.
Use dynamic mics to reduce unwanted noise. These mics are less sensitive to background sounds. Additionally, consider using a pop filter. This tool helps reduce plosive sounds, like “p” and “b”.
- Choose a quiet recording space
- Use dynamic mics
- Add a pop filter
Another tip is to use noise gates. These tools eliminate sounds below a certain threshold. This helps keep your recording clean and focused.
- Set up your mic in a quiet room
- Use dynamic mics and pop filters
- Apply noise gates to your recording

Credit: bobbyowsinskiblog.com
Frequently Asked Questions
Can You Record Drums With One Mic?
Yes, you can record drums with one mic. Place the mic strategically to capture the entire kit. Experiment with different positions for the best sound.
What Type Of Mic Is Best For Drums?
A condenser or dynamic mic works well for recording drums. A large diaphragm condenser captures details, while a dynamic mic handles high SPLs.
Where To Place The Mic For Recording Drums?
Place the mic overhead or in front of the drum kit. Experiment with positioning to capture a balanced sound of all drums and cymbals.
Do You Need A Special Mic For Recording Drums?
No, you don’t need a special mic. A versatile condenser or dynamic mic can effectively record drums, provided it’s positioned correctly.
Conclusion
Recording drums with one mic is achievable and rewarding. Simplicity often yields surprisingly good results. Positioning is key; find the sweet spot. Experiment with mic placement. Listen carefully to the sound. Adjust as needed. Don’t forget to check levels. Proper tuning of drums enhances the recording.

Practice and patience make perfect. With these tips, you can capture great drum sounds. Enjoy the process and trust your ears. Happy recording!
As an Amazon Associate, Cleanestor earns from qualifying purchases at no additional cost to you.