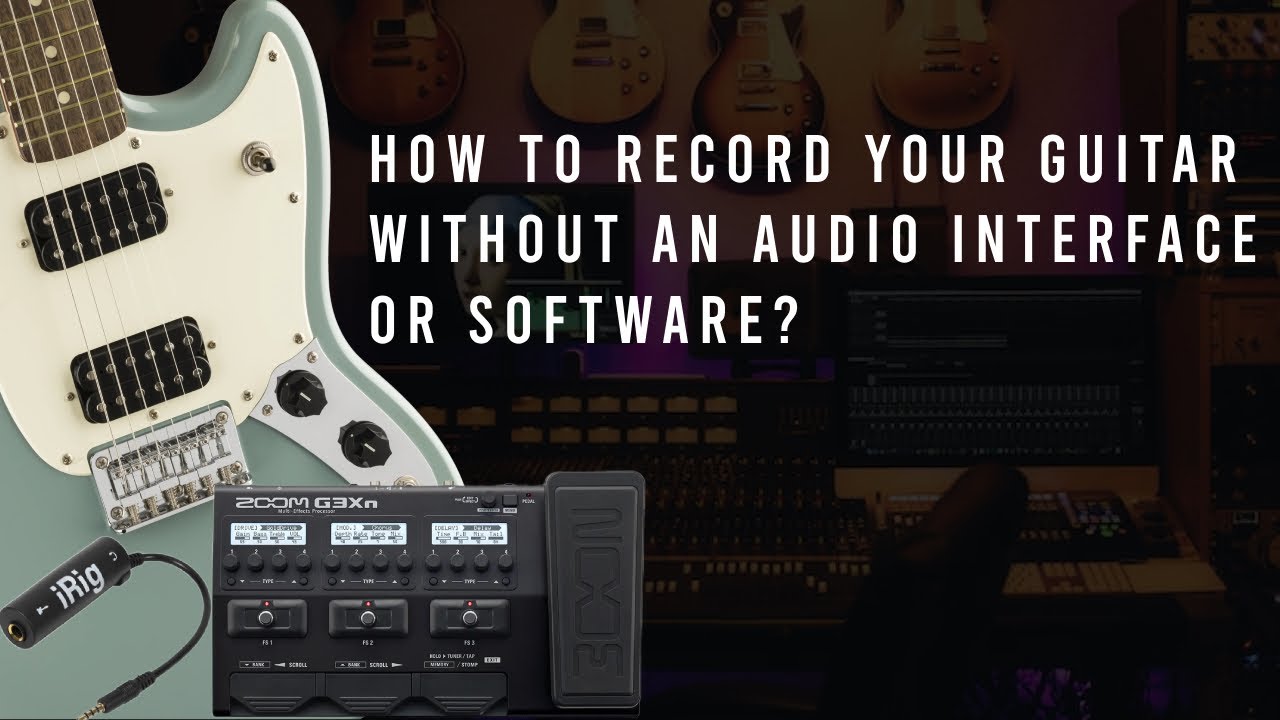
Recording guitar without an audio interface might seem challenging. But it’s completely doable.
Many musicians don’t have access to professional equipment. Knowing how to record guitar without an audio interface can be a game-changer. Whether you’re a beginner or just experimenting, there are several methods to capture your sound. From using your smartphone to leveraging basic computer tools, you can still produce quality recordings.
This guide will explore simple, effective ways to record your guitar without needing an audio interface. By the end, you’ll have the skills to record your music with ease. Ready to dive in? Let’s get started!
Introduction To Recording Guitar
Recording guitar can be a fulfilling process. Many believe you need an audio interface to achieve quality recordings. But it is possible to record without one. In this post, we will explore how to do this effectively.
Why Record Without An Interface
Not everyone has access to an audio interface. They can be expensive. Some beginners might not want to invest in one right away. Others might need a quick solution. Recording without an interface offers flexibility. It allows you to capture ideas on the go.
Basic Requirements
You will need a few things to get started. A computer or smartphone is essential. You also need recording software. Many free options are available online. A good microphone is crucial. It should connect directly to your device. You might also want a mic stand. This keeps your hands free to play.
Headphones are useful. They help you monitor the sound. Ensure your recording space is quiet. Background noise can ruin a good take. Finally, have fun. Recording should be an enjoyable process.
Using A Computer’s Built-in Microphone
Recording guitar without an audio interface can seem challenging. But it is possible. You can use your computer’s built-in microphone. This method is simple and cost-effective. It can help you capture your guitar’s sound quickly.
Setting Up Your Environment
First, find a quiet room. Background noise can ruin your recording. Turn off fans, close windows, and ask others to keep the noise down.
Next, position your guitar near the computer. Place it about 6-12 inches from the built-in microphone. This helps capture a clear sound. You can use a table or a stand to hold your computer in place.
| Item | Reason |
|---|---|
| Quiet Room | Reduces background noise |
| 6-12 inches distance | Captures clear sound |
| Table or Stand | Stabilizes your computer |
Tips For Better Sound Quality
To get better sound quality, follow these tips:
- Use a pop filter: This can reduce harsh sounds. You can make one with a wire hanger and some pantyhose.
- Check your levels: Ensure your microphone input is not too high. It should not be too low either. Adjust the levels in your computer’s sound settings.
- Experiment with angles: Try different guitar positions. Find the one that sounds best. Move slightly closer or further from the microphone.
Recording guitar without an audio interface is possible. Use these tips to improve your recordings. Happy playing!
Smartphone Recording Techniques
Recording guitar without an audio interface can be challenging. But with the right techniques, you can achieve good results using your smartphone. In this section, we will explore some effective smartphone recording techniques that can help you capture your guitar’s sound.
Choosing The Right App
There are many apps available for recording audio on your smartphone. Some are free, while others offer premium features. It is important to choose an app that suits your needs.
Here are some popular options:
- GarageBand (iOS) – A powerful app with many features.
- BandLab (iOS & Android) – Free and easy to use.
- Voice Memos (iOS) – Simple and effective for quick recordings.
- RecForge II (Android) – Offers high-quality recording options.
Test a few apps to see which one works best for you. Look for features like noise reduction, multi-track recording, and equalization.
Positioning Your Phone
Proper positioning of your phone is crucial for good sound quality. Here are some tips to help you get the best results:
- Find a quiet room – Minimize background noise.
- Use a stand – Keep your phone steady and at a consistent angle.
- Maintain distance – Place the phone about 1-2 feet away from the guitar.
- Avoid direct sound – Do not point the microphone directly at the sound hole.
Experiment with different positions to find the best sound. Make small adjustments and listen to the recordings to determine the optimal setup.
Recording guitar with a smartphone can be simple. By choosing the right app and positioning your phone correctly, you can capture quality recordings without an audio interface.
Credit: www.youtube.com
Recording With External Microphones
Recording guitar without an audio interface can be challenging. Yet, using external microphones offers a simple solution. External microphones can capture the rich tones of your guitar. They provide an authentic sound that many musicians desire. Below are steps to help you record guitar using external microphones.
Connecting To Your Computer
First, you need to connect your external microphone to your computer. Most microphones have a USB connection. Plug the USB cable into your computer’s USB port. If your microphone uses an XLR connection, you will need an XLR-to-USB adapter.
Ensure your computer recognizes the microphone. Check the sound settings on your computer. Select the microphone as the input device. This will allow your computer to capture the audio from the microphone.
Optimizing Microphone Settings
Proper microphone settings are essential for clear recordings. Start by placing the microphone close to your guitar. Aim for the 12th fret of the guitar for a balanced sound. Adjust the microphone’s gain to avoid distortion. Lower the gain if the sound is too loud.
Use your recording software to fine-tune the settings. Set the sample rate to at least 44.1kHz for high-quality audio. Adjust the bit depth to 16-bit or higher. This ensures your recordings have a professional quality.
| Setting | Recommendation |
|---|---|
| Microphone Placement | Close to the 12th fret |
| Gain | Adjust to avoid distortion |
| Sample Rate | 44.1kHz or higher |
| Bit Depth | 16-bit or higher |
Once you have optimized the settings, you are ready to start recording. Press the record button in your software. Play your guitar and capture the sound. You can edit the recording later to enhance the quality.
Leveraging Digital Audio Workstations
Leveraging Digital Audio Workstations (DAWs) can be a great way to record your guitar without an audio interface. DAWs are software programs that help you record, edit, and produce music. With the right DAW, you can turn your computer into a recording studio. You can record directly using your computer’s microphone. This method works well for beginners or those on a budget.
Free Daw Options
There are several free DAWs you can use. Audacity is a popular choice. It is easy to use and has many features. Another option is Tracktion T7. This DAW has a simple interface and is good for guitar recordings. BandLab is also worth considering. It offers cloud storage, so your projects are always safe.
Basic Editing Techniques
After recording, editing your tracks is essential. First, trim any unwanted parts. This keeps your recording clean. Next, adjust the volume levels. Make sure your guitar sounds balanced. Use panning to place your guitar in the stereo field. This makes your recording sound more professional. Finally, add some effects. Reverb and delay can add depth to your guitar sound. These basic techniques can greatly improve your recordings.
Using Usb Guitar Cables
Recording guitar without an audio interface may seem difficult, but it is possible. One simple method is using USB guitar cables. These cables are designed to connect your guitar directly to your computer’s USB port. This eliminates the need for an audio interface. It is a cost-effective and straightforward solution for beginners.
How To Connect
To connect your guitar using a USB cable, follow these steps:
- Purchase a USB guitar cable. Ensure it is compatible with your guitar and computer.
- Plug the 1/4-inch jack into your guitar’s output.
- Connect the USB end to your computer’s USB port.
- Wait for your computer to recognize the device. It may take a few seconds.
- Once recognized, your guitar is ready to record.
Recommended Software
After connecting your guitar, you need recording software. Here are some recommendations:
- Audacity – Free, open-source, and beginner-friendly.
- GarageBand – Ideal for Mac users. Simple and powerful.
- Reaper – Affordable and feature-rich. Suitable for all skill levels.
Each of these programs can help you record and edit your guitar tracks. Audacity is great for its simplicity. GarageBand offers many tools for creativity. Reaper provides advanced features for experienced users.
Here is a comparison table of these software options:
| Software | Price | Platform | Features |
|---|---|---|---|
| Audacity | Free | Windows, Mac, Linux | Basic editing tools, multi-track recording |
| GarageBand | Free | Mac | Virtual instruments, easy interface |
| Reaper | Affordable | Windows, Mac | Extensive features, customizable |
With a USB guitar cable and the right software, you can easily record guitar at home. This setup is perfect for beginners and those on a budget.
Troubleshooting Common Issues
Recording guitar without an audio interface can be challenging. Even with the best setup, you may run into some common issues. Knowing how to troubleshoot these problems can make the process smoother and more enjoyable. Let’s explore some of the most frequent issues you might encounter: latency problems and poor sound quality.
Latency Problems
Latency can disrupt the recording process. It causes a delay between playing a note and hearing it. This can make it difficult to stay in sync with your recording. Here are some solutions:
- Use a direct connection: Plug your guitar directly into the computer’s microphone input. This can help reduce latency.
- Adjust buffer size: Lowering the buffer size in your recording software can minimize latency. Be mindful, as lowering it too much might cause audio dropouts.
- Close other applications: Running multiple applications can increase latency. Close any unnecessary programs to free up system resources.
- Update drivers: Ensure your audio drivers are up-to-date. Outdated drivers can cause latency issues.
Poor Sound Quality
Poor sound quality can ruin your recording. It can be caused by various factors. Here are some tips to improve sound quality:
| Issue | Solution |
|---|---|
| Unwanted noise | Use a noise gate plugin to filter out background noise. |
| Distortion | Lower the input volume to avoid clipping. |
| Flat sound | Use EQ settings to enhance the tone of your guitar. |
| Low volume | Increase the gain on your recording software. |
Recording guitar without an audio interface can be tricky. By addressing latency problems and improving sound quality, you can achieve better results.

Credit: solarheavystudios.com
Enhancing Your Recordings
Enhancing your guitar recordings can take them from good to great. Even without an audio interface, you can improve your sound quality. Focus on mixing and adding effects. These steps can help you create clear, professional recordings.
Basic Mixing Tips
Start with balancing the volume levels. Ensure no part overpowers another. Adjust the bass and treble to suit the song’s mood. Keep the guitar’s sound clear and distinct. Use an equalizer to fine-tune the frequencies. This helps in making each note clear. Panning can also add depth. Place different sounds in the left and right channels. This creates a more immersive experience.
Adding Effects
Effects can enhance the feel of your recordings. Reverb can add space and depth. It makes the guitar sound like it’s in a room. Delay can create an echo effect. This adds a layer of complexity. Distortion can give the guitar a gritty sound. It’s perfect for rock and metal genres. Chorus can make the guitar sound like multiple guitars. This adds richness to the recording. Experiment with different effects. Find what best suits your style and song.
Finalizing And Sharing Your Tracks
Finalizing and sharing your tracks is the last step in recording guitar without an audio interface. After all the hard work, it’s time to make your music shine. This phase involves exporting your recording and sharing it with the world. Let’s explore how you can do that.
Exporting Your Recording
Once your recording is complete, it’s time to export it. Choose a file format like MP3 or WAV. These formats are common and easy to share. Make sure to save your file with a clear name. This will help you find it easily later.
Use the export feature in your recording software. Check the settings to ensure the best quality. High bit rates will give you a clearer sound. After exporting, listen to your track. Ensure it sounds just the way you want.
Sharing On Social Media
Now that your track is ready, share it on social media. Platforms like SoundCloud and YouTube are great for musicians. Upload your track and add a catchy title. Write a short description about your music. This will attract more listeners.
Post your track on Facebook, Instagram, and Twitter. Use music groups and communities to reach a wider audience. Encourage your friends to share your music. This will help you gain more exposure.
Engage with your listeners. Respond to comments and messages. This will build a loyal fan base. Keep sharing your music regularly. This will keep your audience engaged and interested.

Credit: indiesongmakers.com
Frequently Asked Questions
Can You Record Guitar Without An Audio Interface?
Yes, you can record guitar without an audio interface. Use a USB microphone, smartphone, or digital recorder. These alternatives provide decent quality.
What Equipment Do You Need?
You need a USB microphone, smartphone, or digital recorder. Ensure you have recording software on your device for editing.
How Do You Connect A Guitar To A Computer?
Use a USB guitar cable or a USB microphone. Plug directly into your computer’s USB port for recording.
Can You Use A Smartphone For Recording?
Yes, smartphones can record guitar. Use a quality recording app and a compatible adapter for better sound.
Conclusion
Recording guitar without an audio interface is possible and fun. Explore different methods and find what works for you. Use your smartphone, computer’s built-in mic, or digital recorders. Experiment with positioning and settings to get the best sound. Remember, practice makes perfect.

Don’t worry if the first attempts aren’t great. Keep trying, and you’ll improve. Enjoy making music and creating unique recordings. Happy playing and recording!
{ “@context”: “https://schema.org”, “@type”: “FAQPage”, “mainEntity”: [ { “@type”: “Question”, “name”: “Can you record guitar without an audio interface?”, “acceptedAnswer”: { “@type”: “Answer”, “text”: “Yes, you can record guitar without an audio interface. Use a USB microphone, smartphone, or digital recorder. These alternatives provide decent quality.” } } , { “@type”: “Question”, “name”: “What equipment do you need?”, “acceptedAnswer”: { “@type”: “Answer”, “text”: “You need a USB microphone, smartphone, or digital recorder. Ensure you have recording software on your device for editing.” } } , { “@type”: “Question”, “name”: “How do you connect a guitar to a computer?”, “acceptedAnswer”: { “@type”: “Answer”, “text”: “Use a USB guitar cable or a USB microphone. Plug directly into your computer’s USB port for recording.” } } , { “@type”: “Question”, “name”: “Can you use a smartphone for recording?”, “acceptedAnswer”: { “@type”: “Answer”, “text”: “Yes, smartphones can record guitar. Use a quality recording app and a compatible adapter for better sound.” } } ] }As an Amazon Associate, Cleanestor earns from qualifying purchases at no additional cost to you.