Recording music on a laptop is easier than ever. You don’t need a studio.
Just a laptop and a few tools can get you started. Creating music at home is a dream for many. With technology, this dream is within reach. Laptops offer powerful software and connectivity. This makes recording music simple and affordable.
You can produce high-quality tracks without fancy equipment. Whether you’re a beginner or a pro, recording on a laptop is accessible. This guide will show you how to set up and start recording. Discover the essentials to turn your laptop into a music studio. Ready to make some music? Let’s dive in!
Credit: m.youtube.com
Choosing The Right Software
Choosing the right software for recording music on your laptop is crucial. The software, also known as a DAW (Digital Audio Workstation), will be your main tool. It will help you record, edit, and produce your music. There are many options available, each with its own features and benefits. Understanding the differences can help you make the best choice for your needs.
Popular Daws
Several DAWs are popular among musicians and producers. These include Ableton Live, FL Studio, Logic Pro, and Pro Tools. Ableton Live is known for its live performance capabilities. FL Studio is user-friendly and great for beginners. Logic Pro is exclusive to Mac users and offers a wide range of features. Pro Tools is often used in professional studios.
Free Vs. Paid Options
There are both free and paid DAWs available. Free options include Audacity and GarageBand. Audacity is open-source and works on multiple platforms. GarageBand is free for Mac users and is very intuitive. Paid DAWs usually offer more features and better support. Examples include Ableton Live, FL Studio, and Logic Pro. These offer advanced tools and higher sound quality.
Setting Up Your Equipment
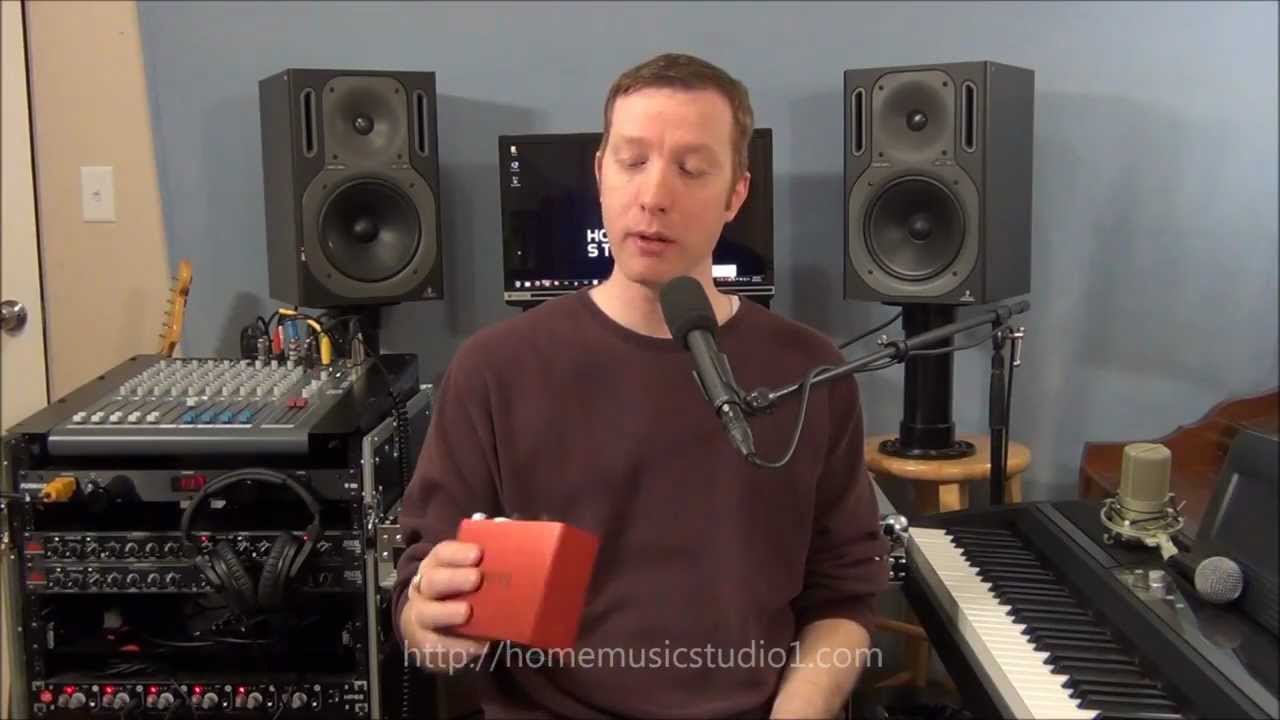
Recording music on a laptop requires the right setup. Good equipment ensures clear sound. The setup process includes choosing the right hardware and microphone. These steps will help you get started.
Essential Hardware
The first thing you need is a reliable laptop. It should have enough RAM and storage. This helps in handling large audio files. Next, you need an audio interface. This device connects your instruments to your laptop. Make sure it has multiple input and output options. A good pair of headphones is also essential. They help you hear the details in your recording. Lastly, consider getting studio monitors. They provide a clear and accurate sound. This helps in mixing and mastering your tracks.
Microphone Selection
Choosing the right microphone is crucial. It affects the quality of your recording. For vocals, a condenser microphone is a good choice. It captures clear and detailed sound. For instruments, consider a dynamic microphone. It handles high sound levels well. Make sure to get a microphone stand. It keeps the microphone steady while recording. Use a pop filter to reduce unwanted noises. This helps in getting a clean recording. Remember, the right microphone makes a big difference.
Configuring Your Laptop
Configuring your laptop is crucial for recording music. Proper configuration ensures smooth performance and high-quality recordings.
Optimizing Performance
To record music, your laptop must run efficiently. Here are key steps:
- Close unnecessary applications. This frees up system resources.
- Disable startup programs. They slow down your laptop.
- Update your operating system. Ensures compatibility and security.
- Adjust power settings. Choose ‘High Performance’ for better efficiency.
These steps help your laptop handle the demands of music recording. A well-optimized laptop prevents lag and crashes.
Audio Interface Setup
An audio interface is vital for quality recordings. Follow these steps:
- Choose the right audio interface. Popular brands include Focusrite and PreSonus.
- Install necessary drivers. Ensure your laptop recognizes the device.
- Connect the interface to your laptop. Use a USB or Thunderbolt cable.
- Configure your DAW software. Set the audio interface as the input and output device.
An audio interface improves sound quality. It also reduces latency, ensuring real-time playback.
By optimizing performance and setting up an audio interface, you create a strong foundation for recording music on your laptop.

Credit: www.practical-music-production.com
Creating Your First Track
Creating your first track on a laptop can be an exciting journey. It allows you to bring your musical ideas to life. You don’t need a studio. Just a laptop and some basic tools are enough. Let’s dive into the steps to get started.
Recording Instruments
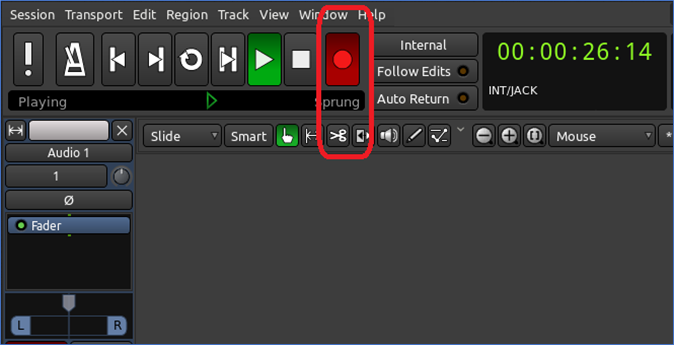
First, choose the right software. Popular choices include GarageBand, Ableton Live, and FL Studio. Open your software and create a new project. Connect your instrument to the laptop. Use an audio interface for the best sound quality. Now, set up a new track for recording. Hit the record button and start playing. It’s that simple!
Using Midi Controllers
MIDI controllers are great for adding digital instruments. They can be keyboards, drum pads, or other devices. Connect your MIDI controller to the laptop. Open your music software. Create a new MIDI track. Select the instrument you want to play. This could be a piano, drum kit, or synthesizer. Press record and start playing the notes. You can edit the recorded MIDI notes later. Adjust the timing, pitch, and other parameters.
By following these steps, you can create your first music track. Experiment with different instruments and sounds. Enjoy the process and make it your own!
Editing And Mixing
Editing and mixing are crucial steps in music production. After recording, the raw audio needs refinement. This process involves removing errors, balancing sound levels, and adding effects. It helps transform a basic track into a polished piece. Let’s dive into basic editing techniques and applying effects.
Basic Editing Techniques
Start by trimming any unwanted sections. Cut out mistakes or long pauses. Use the split tool to segment the track. This makes it easier to move parts around. Adjust the volume levels to ensure consistency. Normalize the audio to match other tracks. Remove background noise using noise reduction tools. This step is crucial for clarity.
Next, align the beats and rhythms. Ensure all instruments and vocals sync well. Use the gridlines for precise adjustments. Crossfade between segments to avoid abrupt transitions. This creates a smoother flow. Utilize the undo function often. Mistakes happen, and it’s easy to fix them. Save your work regularly to prevent data loss.
Applying Effects
Effects can enhance your track significantly. Start with equalization (EQ). Adjust the frequencies to balance the sound. Boost the highs for clarity. Lower the mids to reduce muddiness. Add reverb to create a sense of space. This makes the track feel more natural. Use compression to control dynamic range. This ensures no part is too loud or too soft.
Experiment with delay for an echo effect. This can add depth. Chorus effects can thicken the sound. Perfect for vocals and guitars. Avoid overusing effects. Too many can clutter the mix. Always listen to the track with fresh ears. Take breaks and return to it. You might notice things you missed before.
Mastering Your Music
Mastering your music is the final step in the recording process. This stage ensures that your track sounds polished and professional. It involves adjusting audio levels, enhancing sound quality, and preparing your track for distribution. Let’s dive into the essential aspects of mastering your music on a laptop.
Finalizing Audio Levels
Adjust the audio levels to ensure a balanced sound. This step is crucial for a professional finish. Follow these steps:
- Open your mixing software.
- Check the volume of each track.
- Ensure no track is too loud or too quiet.
- Use the faders to balance the levels.
Tip: Use headphones to hear all details clearly. This helps in making precise adjustments.
Exporting Your Track
After finalizing the audio levels, it’s time to export your track. This process converts your project into a single audio file. Follow these steps:
- Open the export menu in your software.
- Select the desired file format (e.g., MP3, WAV).
- Choose the export quality (higher quality for better sound).
- Click the export button.
Tip: Save your project before exporting. This helps in preventing data loss.
Collaborating With Others
Collaborating with others while recording music on your laptop can be very rewarding. It allows you to share ideas and create unique sounds. Working with other musicians, producers, and sound engineers can elevate your music project. This section will guide you on how to collaborate effectively.
Online Collaboration Tools
Many tools can help you collaborate online. Some popular ones include Soundtrap, BandLab, and Splice. These platforms allow you to work on music projects with others, no matter where they are. You can share your tracks, edit together, and provide feedback in real-time.
Soundtrap is user-friendly and offers a wide range of instruments. BandLab provides unlimited projects and storage. Splice has a vast library of samples and loops. Choose the tool that best fits your needs.
Sharing Project Files
Sharing project files is crucial for collaboration. Use cloud storage services like Google Drive, Dropbox, or OneDrive. These platforms make it easy to share large files and ensure everyone has the latest version.
Ensure your project files are well-organized. Label tracks clearly and include any necessary notes. This will help your collaborators understand your work better. Regularly update your shared files to keep everyone in the loop.
Troubleshooting Common Issues
When recording music on a laptop, you might face some common issues. These can stop you from creating your best work. This section will help you troubleshoot and fix these problems.
Latency Problems
Latency is a delay between playing a note and hearing it. This can make recording music hard. Here are some tips to fix latency problems:
- Update your drivers: Ensure your sound card drivers are up to date.
- Use ASIO drivers: These drivers are designed for low latency.
- Adjust buffer size: Lower buffer size can reduce latency. But, too low can cause glitches.
- Close background apps: Free up resources by closing other programs.
Software Crashes
Software crashes can be frustrating. They can cause you to lose your work. Here are some ways to prevent and fix crashes:
- Update your software: Always use the latest version.
- Check system requirements: Make sure your laptop meets the software’s needs.
- Install updates: Keep your operating system updated.
- Free up memory: Close unused apps to free RAM.
- Reinstall software: If crashes continue, reinstall the program.
By following these steps, you can reduce crashes and ensure a smoother recording experience.
Credit: recorder.easeus.com
Frequently Asked Questions
How Do I Start Recording Music On My Laptop?
To start recording music on your laptop, you’ll need a digital audio workstation (DAW) software, a good microphone, and an audio interface. Install the DAW, connect the microphone via the audio interface, and start recording. Ensure your laptop meets the software requirements.
What Software Is Best For Recording Music On A Laptop?
Popular DAWs for recording music on a laptop include Ableton Live, FL Studio, and GarageBand. These programs offer user-friendly interfaces and powerful features. Choose the one that fits your budget and needs. Many offer free trials, so you can test them before purchasing.
Do I Need An External Microphone For Laptop Recording?
While laptops have built-in microphones, an external microphone provides better sound quality. Use a USB or XLR microphone for clearer, professional recordings. An audio interface helps connect an XLR microphone to your laptop. This setup enhances your recording quality significantly.
Can I Record Music On A Laptop Without An Audio Interface?
Yes, you can record music without an audio interface, but the sound quality may suffer. A USB microphone is an alternative that doesn’t require an audio interface. However, for high-quality recordings, especially with multiple instruments, an audio interface is recommended.
Conclusion
Recording music on your laptop is easier than ever. With the right tools and software, you can create amazing tracks from home. Start by choosing a good microphone and reliable recording software. Practice and experiment with different settings. Learn the basics of editing to polish your sound.

Stay patient and enjoy the process. Anyone can create great music with dedication and creativity. Ready to start? Open your laptop and let your musical journey begin!
{ “@context”: “https://schema.org”, “@type”: “FAQPage”, “mainEntity”: [ { “@type”: “Question”, “name”: “How do I start recording music on my laptop?”, “acceptedAnswer”: { “@type”: “Answer”, “text”: “To start recording music on your laptop, you’ll need a digital audio workstation (DAW) software, a good microphone, and an audio interface. Install the DAW, connect the microphone via the audio interface, and start recording. Ensure your laptop meets the software requirements.” } } , { “@type”: “Question”, “name”: “What software is best for recording music on a laptop?”, “acceptedAnswer”: { “@type”: “Answer”, “text”: “Popular DAWs for recording music on a laptop include Ableton Live, FL Studio, and GarageBand. These programs offer user-friendly interfaces and powerful features. Choose the one that fits your budget and needs. Many offer free trials, so you can test them before purchasing.” } } , { “@type”: “Question”, “name”: “Do I need an external microphone for laptop recording?”, “acceptedAnswer”: { “@type”: “Answer”, “text”: “While laptops have built-in microphones, an external microphone provides better sound quality. Use a USB or XLR microphone for clearer, professional recordings. An audio interface helps connect an XLR microphone to your laptop. This setup enhances your recording quality significantly.” } } , { “@type”: “Question”, “name”: “Can I record music on a laptop without an audio interface?”, “acceptedAnswer”: { “@type”: “Answer”, “text”: “Yes, you can record music without an audio interface, but the sound quality may suffer. A USB microphone is an alternative that doesn’t require an audio interface. However, for high-quality recordings, especially with multiple instruments, an audio interface is recommended.” } } ] }As an Amazon Associate, Cleanestor earns from qualifying purchases at no additional cost to you.