
Using a Behringer audio interface can seem challenging at first. But it’s easier than you think.
With the right guidance, you’ll be up and running in no time. A Behringer audio interface is a fantastic tool for recording music, podcasts, and more. It connects your instruments and microphones to your computer. This lets you record high-quality audio.
In this blog post, we will walk you through the steps to set up and use your Behringer audio interface. We will cover everything from connecting cables to adjusting settings. By the end, you will feel confident in your ability to create great audio recordings. Let’s get started!
Credit: www.youtube.com
Introduction To Behringer Audio Interface
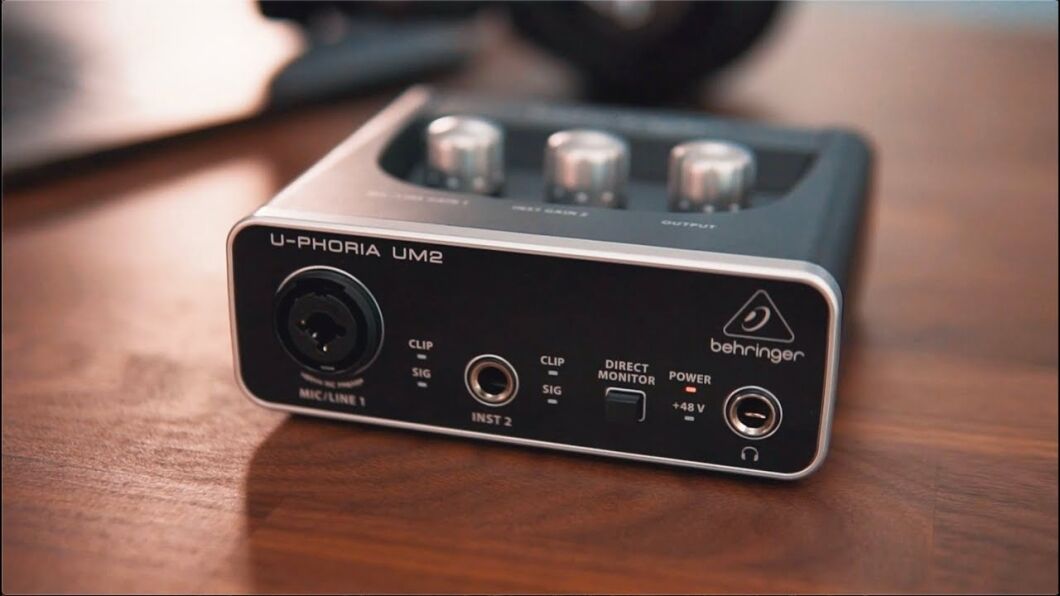
Behringer audio interfaces are popular for their quality and affordability. They suit both beginners and professionals in the audio industry. This guide will help you understand how to use Behringer audio interfaces effectively.
Overview
Behringer audio interfaces connect your instruments and microphones to your computer. They convert analog signals to digital audio. This process allows you to record, edit, and produce music on your computer. These interfaces are compatible with most digital audio workstations (DAWs).
Key Features
Behringer audio interfaces come with various features. They often include multiple input and output options. This flexibility allows you to connect various audio devices. Some models offer phantom power for condenser microphones. They also have built-in preamps for better sound quality.
Many Behringer interfaces support high-resolution audio. This feature ensures clear and detailed recordings. They are also USB-powered. This means you can use them anywhere without needing an external power source. Additionally, they are compact and portable, which is great for mobile setups.
Behringer interfaces usually come with user-friendly software. This software helps you with setup and configuration. It also provides tools for mixing and editing your recordings. The combination of hardware and software makes Behringer a great choice for anyone wanting to create high-quality audio.
Setting Up Your Behringer Audio Interface
Getting started with your Behringer audio interface is easier than you think. This guide will help you set up your device quickly. Follow these steps, and you’ll be making music in no time. Let’s dive into the setup process.
Unboxing And Initial Setup
Begin by unboxing your Behringer audio interface. Carefully remove all items from the box. You should find the audio interface, a USB cable, and a user manual. Keep everything in one place to avoid losing small items.
Next, inspect the audio interface for any visible damage. Ensure all knobs and ports are intact. If you spot any issues, contact the seller immediately.
Place the audio interface on a stable surface near your computer. Make sure it’s within reach of your USB ports and other equipment. This will make the connection process smooth.
Connecting To Your Computer
Now, it’s time to connect the audio interface to your computer. Use the provided USB cable for this step. Insert one end of the USB cable into the audio interface.
Plug the other end of the USB cable into your computer’s USB port. Ensure the connection is secure. Your computer should recognize the device automatically.
Open your computer’s sound settings. Select the Behringer audio interface as the input and output device. This will allow your computer to use the interface for recording and playback.
Finally, install any necessary drivers. Visit the Behringer website to download the latest drivers. Follow the installation instructions carefully. Restart your computer to complete the setup.
Now, your Behringer audio interface is ready to use. Enjoy creating and recording your music!
Installing Necessary Drivers
Installing the necessary drivers is crucial for your Behringer Audio Interface to function properly. Without the right drivers, your device won’t communicate effectively with your computer. This section will guide you through the process step by step.
Downloading Drivers
First, visit the Behringer website. Navigate to the support section. Search for your specific audio interface model. Once you find it, look for the drivers section. Download the latest drivers compatible with your operating system.
Installation Process
Open the downloaded driver file. Follow the on-screen instructions to start the installation. Agree to the terms and conditions. Select the installation location if prompted. Click on ‘Install’ and wait for the process to complete. Restart your computer to finalize the installation. Your Behringer Audio Interface is now ready for use.
Configuring Audio Settings
Configuring audio settings on your Behringer audio interface is crucial. It ensures optimal sound quality and smooth performance. To get the best results, you need to adjust input and output levels, set the sample rate, and configure the buffer size.
Adjusting Input And Output Levels
First, connect your Behringer audio interface to your computer. Open your preferred digital audio workstation (DAW). Locate the input and output settings. Adjust the input level using the gain knob on your interface. Ensure the signal is strong but not clipping. For output levels, use the master volume control. This ensures your playback is clear and not too loud.
Setting Sample Rate And Buffer Size
Next, set the sample rate and buffer size in your DAW. A higher sample rate provides better sound quality. Common options are 44.1 kHz, 48 kHz, and 96 kHz. Choose the one that suits your project needs. Adjust the buffer size to balance latency and performance. A lower buffer size reduces latency but increases CPU load. A higher buffer size reduces CPU load but increases latency. Experiment to find the best settings for your system.
Using The Behringer Control Panel
The Behringer audio interface comes with a powerful tool – the Control Panel. This software allows you to manage and customize your audio settings. Whether you are recording a podcast or mixing music, the Control Panel offers essential features to enhance your experience.
Overview Of The Control Panel
The Control Panel is the heart of your Behringer audio interface. It displays all the available settings and options. You can monitor levels, adjust inputs and outputs, and tweak various parameters. The layout is user-friendly and intuitive, making it easy to navigate.
On the main screen, you will see different sections for different settings. These sections include input gain, output levels, and advanced settings. Each section is clearly labeled, so you know exactly what you are adjusting.
Customizing Your Settings
Customizing your settings is simple with the Behringer Control Panel. Start by selecting the input or output channel you want to adjust. Use the sliders to set the gain or volume levels. You can also mute channels or solo them to hear only one channel at a time.
For more advanced options, click on the settings icon. Here, you can adjust parameters like sample rate and buffer size. These settings help you optimize your audio performance. Experiment with different settings to find what works best for your setup.
The Control Panel also allows you to save your settings. This feature is handy if you have multiple projects. Save different profiles and switch between them easily. This ensures you always have the right settings for each task.
Recording With The Behringer Audio Interface
Recording with the Behringer Audio Interface can transform your music projects. With its user-friendly design, capturing high-quality sound becomes easy. This section will guide you through the recording process. Learn how to set up your software and use effective recording techniques.
Setting Up Your Recording Software
First, install the drivers that came with your Behringer Audio Interface. Connect the interface to your computer using a USB cable. Open your recording software, such as Ableton Live or Audacity. Go to the settings menu and select the Behringer Audio Interface as your input and output device. Adjust the sample rate to match your project’s needs, typically 44.1 kHz or 48 kHz.
Ensure your audio channels are configured correctly. This setup allows you to record multiple tracks simultaneously. Check your levels to avoid clipping. Keep the input levels in the green range on the meter. Now, you are ready to record.
Recording Techniques
Position your microphone correctly for the best sound capture. Place it close to the sound source, but not too close. This helps to avoid distortion. Use a pop filter if recording vocals to reduce plosive sounds. Choose the right recording environment. A quiet room with minimal background noise works best.
Start recording by pressing the record button in your software. Play your instrument or sing into the microphone. Monitor the levels and make adjustments as needed. Stop the recording once you have finished. Listen to the playback to check the quality. If necessary, re-record parts to improve the final product.
Save your recordings regularly to avoid losing your work. Name your files clearly to keep them organized. Experiment with different microphone placements and settings to find the best sound for your project.
Troubleshooting Common Issues
Using a Behringer audio interface can enhance your music production. Yet, users often face common issues. Here, we tackle some of these problems. This guide will help you resolve them effectively.
No Sound Issues
First, check your connections. Ensure all cables are securely plugged in. Verify your audio interface is turned on and connected to your computer. Open your digital audio workstation (DAW). Confirm the interface is selected as the audio device. Sometimes, drivers may need updating. Visit Behringer’s website to download the latest drivers. Restart your computer after installing.
Latency Problems
Latency can disrupt your recording experience. Start by lowering your buffer size in the DAW’s audio settings. A smaller buffer size reduces latency. However, it may strain your CPU. Balance is key. If issues persist, check your computer’s performance. Close unnecessary programs. Ensure your computer meets the required specifications. Updating your drivers can also help. Regularly check for updates on Behringer’s website. This ensures your interface runs smoothly.

Credit: www.behringer.com
Maintenance And Care
Proper maintenance and care of your Behringer audio interface ensure long-lasting performance. Regular cleaning and correct storage are essential. This guide helps you keep your equipment in top condition.
Cleaning Your Interface
Dust and dirt can affect your audio quality. Clean your Behringer audio interface regularly. Follow these steps:
- Turn off and unplug your interface.
- Use a soft, dry cloth to wipe the surface.
- For stubborn dirt, dampen the cloth slightly with water. Never use harsh chemicals.
- Clean the connectors gently with a cotton swab.
Keep your interface covered when not in use. This helps prevent dust buildup. A clean interface provides better sound quality and extends its life.
Storing Your Equipment
Proper storage protects your audio interface from damage. Use these tips:
- Store in a cool, dry place. Avoid extreme temperatures.
- Keep it in a padded case to prevent physical damage.
- Wrap cables loosely to avoid tangling and breaking.
- Label your equipment to keep track of all components.
Correct storage practices help maintain the condition of your audio interface. This ensures it performs well every time you use it.

Credit: www.sweetwater.com
Frequently Asked Questions
How Do I Set Up A Behringer Audio Interface?
Setting up a Behringer audio interface is simple. Connect it to your computer via USB. Install necessary drivers from Behringer’s website. Open your audio software, select the interface as your input/output device, and you’re ready to record.
What Software Works With Behringer Audio Interfaces?
Behringer audio interfaces work with most DAWs like Ableton Live, Pro Tools, and FL Studio. Make sure to select the interface within your DAW’s audio settings for proper functionality.
How Do I Update Behringer Audio Interface Drivers?
To update drivers, visit Behringer’s official website. Navigate to the “Downloads” section, find your audio interface model, and download the latest drivers. Install the drivers following the on-screen instructions.
Why Is My Behringer Audio Interface Not Working?
If your Behringer audio interface isn’t working, check connections and driver installation. Ensure the interface is selected in your DAW’s settings. Restart your computer if issues persist.
Conclusion
Using a Behringer audio interface can enhance your sound projects. Follow the steps, and you’ll get great results. Practice makes perfect, so keep experimenting. Troubleshooting tips help resolve common issues quickly. With some patience, you’ll become more confident. Enjoy the process and the improved audio quality.

Keep learning and exploring new features. Happy recording!
{ “@context”: “https://schema.org”, “@type”: “FAQPage”, “mainEntity”: [ { “@type”: “Question”, “name”: “How do I set up a Behringer audio interface?”, “acceptedAnswer”: { “@type”: “Answer”, “text”: “Setting up a Behringer audio interface is simple. Connect it to your computer via USB. Install necessary drivers from Behringer’s website. Open your audio software, select the interface as your input/output device, and you’re ready to record.” } } , { “@type”: “Question”, “name”: “What software works with Behringer audio interfaces?”, “acceptedAnswer”: { “@type”: “Answer”, “text”: “Behringer audio interfaces work with most DAWs like Ableton Live, Pro Tools, and FL Studio. Make sure to select the interface within your DAW’s audio settings for proper functionality.” } } , { “@type”: “Question”, “name”: “How do I update Behringer audio interface drivers?”, “acceptedAnswer”: { “@type”: “Answer”, “text”: “To update drivers, visit Behringer’s official website. Navigate to the \”Downloads\” section, find your audio interface model, and download the latest drivers. Install the drivers following the on-screen instructions.” } } , { “@type”: “Question”, “name”: “Why is my Behringer audio interface not working?”, “acceptedAnswer”: { “@type”: “Answer”, “text”: “If your Behringer audio interface isn’t working, check connections and driver installation. Ensure the interface is selected in your DAW’s settings. Restart your computer if issues persist.” } } ] }As an Amazon Associate, Cleanestor earns from qualifying purchases at no additional cost to you.