Inserts on an audio interface can enhance your sound quality. They offer flexibility in mixing and recording.
Understanding how to use inserts is crucial for achieving professional audio results. Inserts allow you to add external effects or processors directly into your signal path. This can improve your recording and mixing experience. Whether you’re a beginner or a seasoned pro, knowing how to use these features can make a big difference.
This guide will walk you through the basics, helping you to get the most out of your audio interface. Let’s dive in and explore how to use inserts effectively, step by step.
Introduction To Audio Interface Inserts
Audio interface inserts are vital tools for audio production. They let you connect external hardware to your audio interface. This can greatly enhance your sound quality. Understanding inserts can improve your recordings and mixes.
Basics Of Audio Interfaces
An audio interface is a device that connects your instruments or microphones to your computer. It converts analog signals to digital signals and vice versa. This allows your computer to process the audio data. Audio interfaces come with various features, including preamps, inputs, and outputs.
Here are some key components:
- Preamps: Amplify the signal from your microphone or instrument.
- Inputs: Where you plug in your microphones and instruments.
- Outputs: Send the processed signal to speakers or headphones.
Purpose Of Inserts
Inserts on an audio interface allow you to add external effects or processors. You can connect devices like compressors, equalizers, or reverb units. This is useful for shaping your sound before it enters your computer. Inserts can be found on many professional audio interfaces.
Here is a simple table to illustrate the benefits:
| Benefit | Description |
|---|---|
| Flexibility | Connect various external devices for different effects. |
| Sound Quality | Improve the audio signal before recording. |
| Control | Shape your sound with precision using external gear. |
Using inserts can make your recordings sound more professional. They give you the ability to process audio signals in a more refined way.

Credit: www.youtube.com
Types Of Inserts
Understanding the different types of inserts on an audio interface is crucial for any recording setup. Inserts allow you to add external effects and processing to your audio signal. They can be either analog or digital, each offering unique advantages.
Analog Inserts
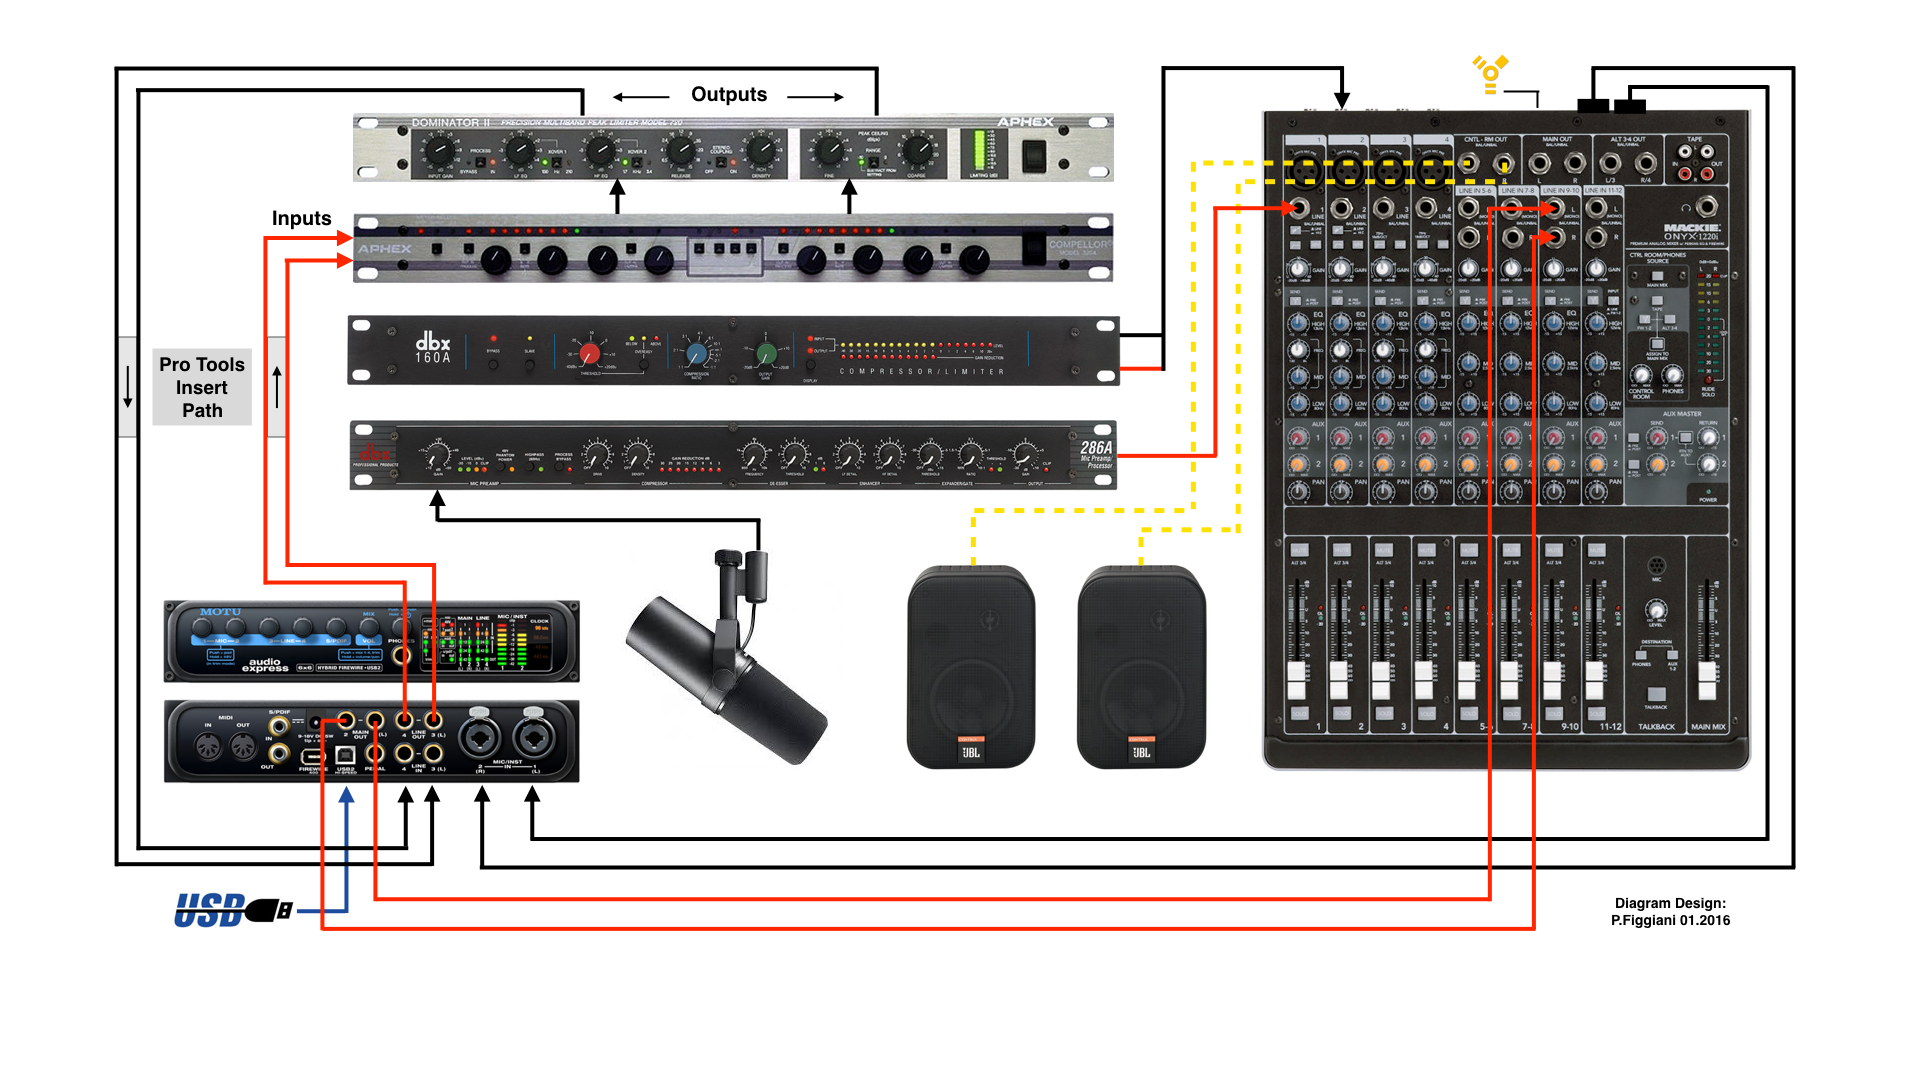
Analog inserts are used with outboard gear like compressors, EQs, and reverb units. They work by sending the audio signal out of the audio interface, processing it, and then bringing it back in. This process involves the physical connection of cables.
Here’s how analog inserts typically work:
- The audio signal leaves the interface through the send jack.
- It goes through the external hardware, which processes the signal.
- The processed signal returns to the interface through the return jack.
Analog inserts are preferred for their warmth and character. They are great for those who love the traditional sound of analog gear.
Digital Inserts
Digital inserts involve software-based processing. They use plugins within your digital audio workstation (DAW). The main advantage of digital inserts is their convenience and flexibility.
Steps for using digital inserts:
- Open your DAW and choose the track you want to process.
- Insert a plugin on the track.
- Adjust the plugin settings to your preference.
Digital inserts do not require physical cables. This makes them easy to use and ideal for those working in a digital environment. They also allow for quick changes and experimentation with different effects.
Comparing both types:
| Type | Advantages | Disadvantages |
|---|---|---|
| Analog | Warmth, Character | Requires physical setup |
| Digital | Convenience, Flexibility | Can lack analog warmth |
Choosing between analog and digital inserts depends on your workflow and sound preferences. Both have their unique benefits.
Connecting Inserts To Audio Interface
Connecting inserts to your audio interface may seem tricky. But, it’s simpler than you think. Inserts are useful for adding effects to your audio. With the right cables and steps, you can easily connect them.
Required Cables
First, you need the right cables. A TRS cable is a must. This cable has two rings on the plug. It carries both the send and return signals. You also need an insert cable. One end has a TRS plug, the other end has two TS plugs. These cables split the signal for send and return.
Step-by-step Connection Guide
Now, let’s connect the cables. Start by plugging the TRS end into the insert jack of your audio interface. Next, take the two TS ends. One TS plug is for the send signal. Connect it to the input of your external device. The other TS plug is for the return signal. Connect it to the output of your external device.
Ensure each connection is secure. Test the setup by playing some audio. Adjust settings on your external device as needed. You should hear the effect in your audio.
Following these steps ensures a smooth connection. Your audio will sound better with the added effects.
Using Inserts With Software
Using inserts with software can enhance your audio interface experience. This process allows you to incorporate external effects seamlessly. You can achieve a polished, professional sound in your recordings.
Software Compatibility
Ensure your audio interface supports insert functions. Most modern interfaces have this feature. Check your interface manual or website for details. Also, confirm your digital audio workstation (DAW) supports inserts. Popular DAWs like Pro Tools, Logic Pro, and Ableton Live usually do.
Setup In Daws
Open your DAW and locate the track you want to use. Find the insert point in the track settings. Connect your external gear to the audio interface inserts. In your DAW, select the correct input and output for the insert. Test the setup by playing back audio and tweaking the external effect.
Practical Applications
Practical applications of inserts on an audio interface can enhance your recording and mixing workflow. By understanding the different ways to use inserts, you can achieve better sound quality and flexibility in your projects.
Using Effects Processors
Inserts allow you to connect external effects processors like compressors or equalizers. This can be useful for adding character and color to your recordings. For instance, you can use a hardware compressor to shape your vocal tracks. Simply connect the compressor to the insert point on your audio interface. Adjust the settings on the compressor to suit your needs. This gives you more control over the dynamics of your recordings.
Inserting External Preamps
You can also use inserts to connect external preamps. External preamps can offer higher quality and different tonal characteristics. This is particularly useful for recording vocals or acoustic instruments. Connect the external preamp to the insert point on your audio interface. This setup allows you to bypass the built-in preamps. You can then take advantage of the external preamp’s unique qualities. This can result in a richer and more detailed sound.
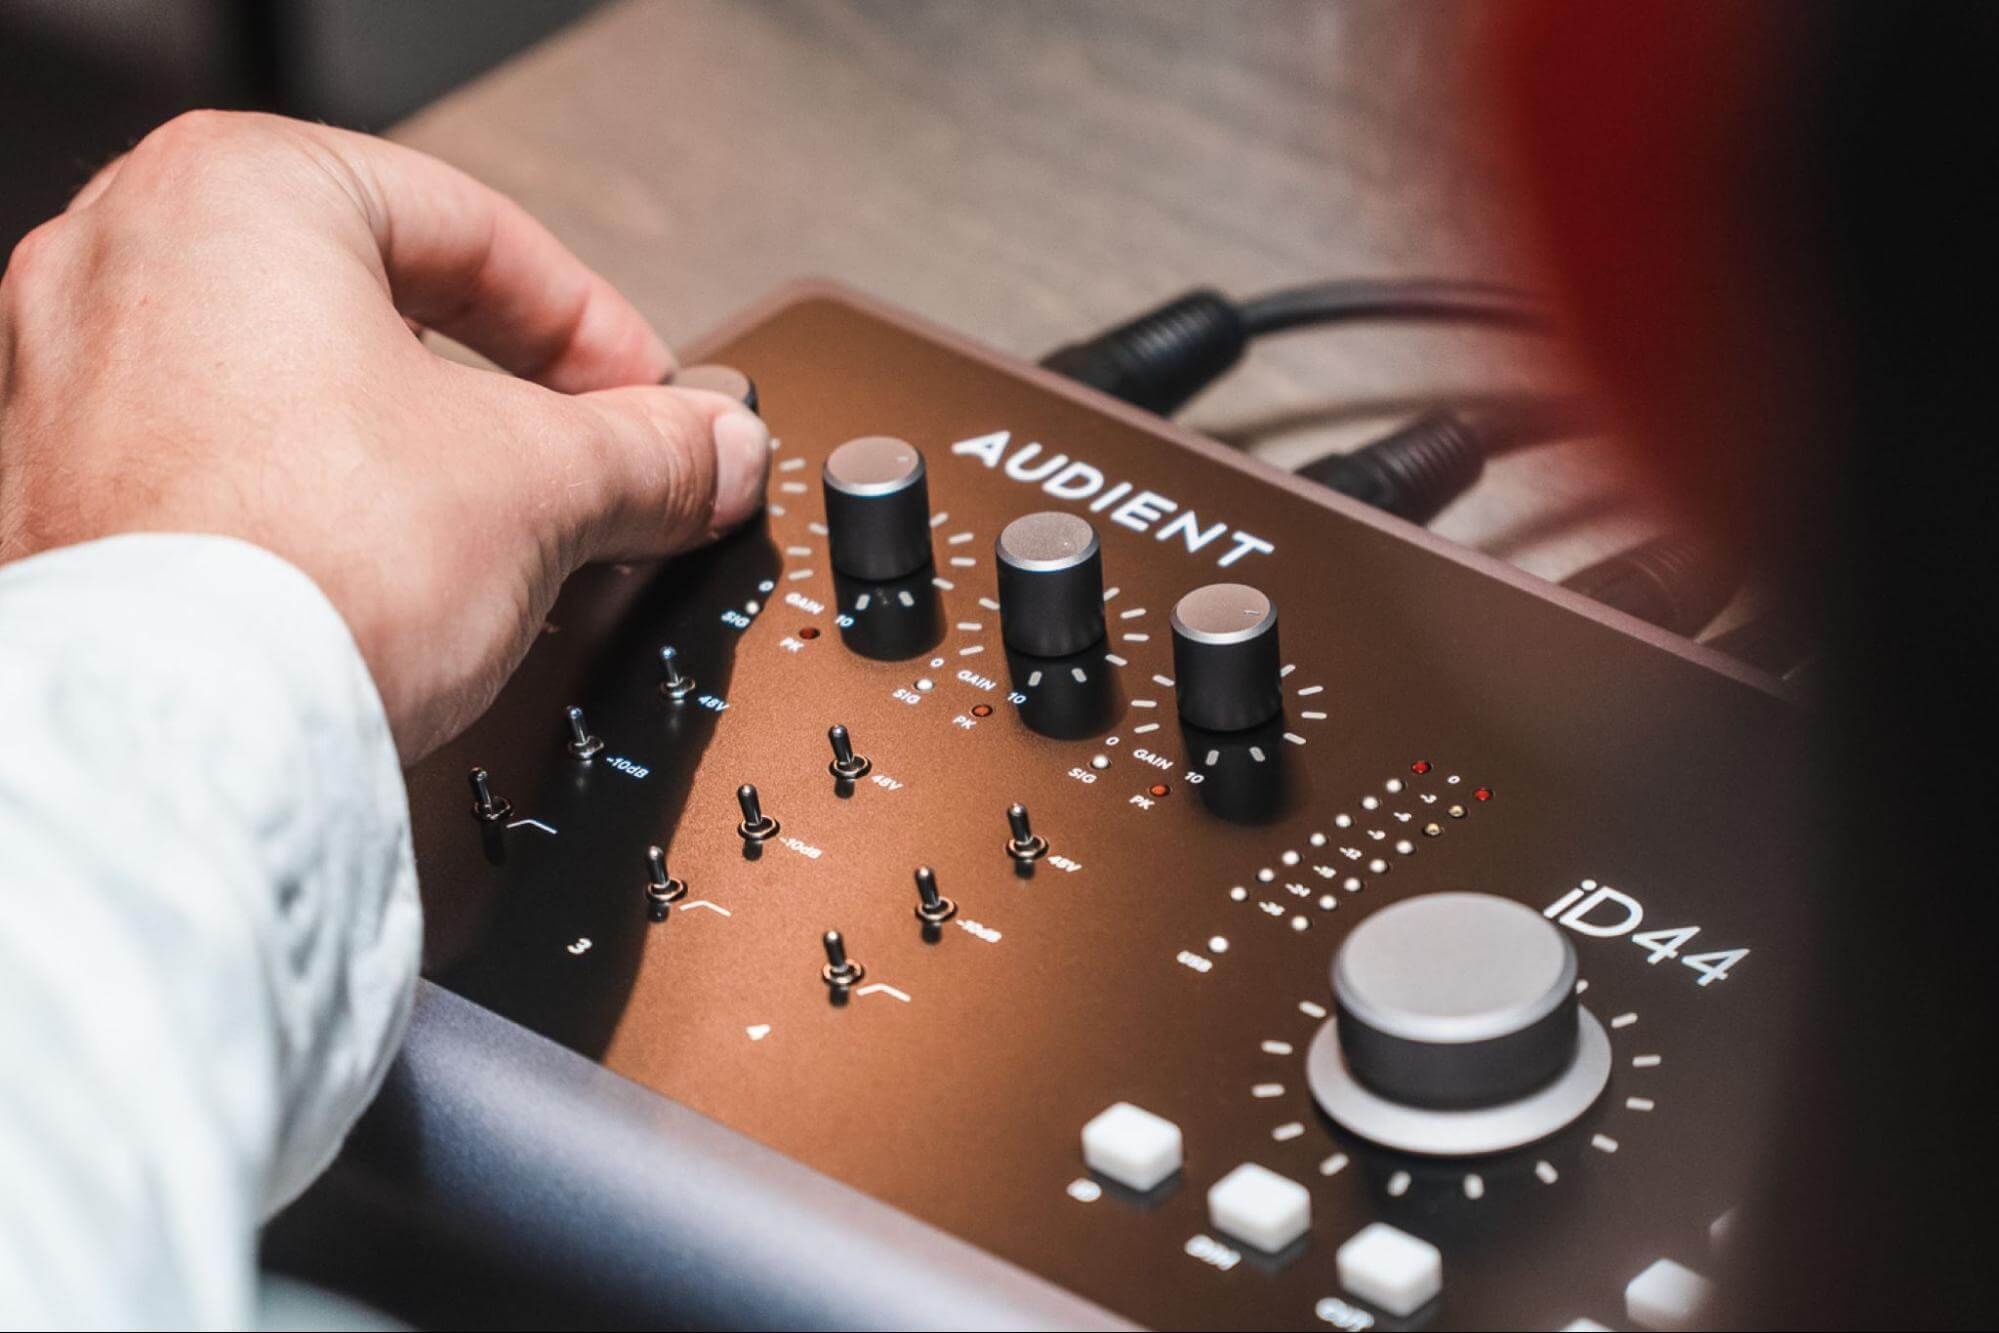
Credit: audient.com
Troubleshooting Common Issues
While using inserts on an audio interface can enhance your audio quality, issues may arise. Here, we address common troubleshooting scenarios you might encounter. Let’s dive into how to resolve problems like no signal and distorted sound.
No Signal
Experiencing no signal can be frustrating. Here are a few steps to diagnose and fix this issue:
- Check Connections: Ensure all cables are securely connected. A loose cable can cause signal loss.
- Confirm Power: Verify that your audio interface and connected devices are powered on.
- Input and Output Settings: Double-check the input and output settings on your audio interface and software. Incorrect settings can lead to no signal.
- Test with Different Cables: Use different cables to rule out faulty ones.
If the signal is still absent, consider consulting your audio interface’s manual. It might offer specific troubleshooting tips.
Distorted Sound
Distorted sound can ruin a recording. Follow these steps to troubleshoot distortion issues:
- Check Levels: Ensure the input gain is not too high. High gain can cause distortion.
- Inspect Cables: Damaged cables can introduce noise and distortion. Replace if necessary.
- Review Software Settings: Confirm that your DAW’s settings match your audio interface’s specifications.
- Disable Effects: Turn off any effects or plugins to isolate the issue.
Use these steps to identify and fix distorted sound. Proper gain staging is critical to avoid distortion.
Tips For Optimal Use
Using inserts on an audio interface can enhance your sound quality. Knowing the best tips for optimal use can make a big difference. Here, we’ll discuss how to maintain signal quality and balance levels for the best results.
Maintaining Signal Quality
Signal quality is crucial for clear audio. Always use high-quality cables for connections. Cheap cables may cause noise and interference. Keep your cables short to avoid signal loss. Long cables can degrade the audio signal. Check connections regularly to ensure they are secure. Loose connections can affect sound quality.
Use proper grounding techniques to reduce hum and buzz. Ground loops can introduce unwanted noise. Ensure your equipment is properly grounded. This will keep your signal clean and clear. Pay attention to the gain staging. Proper gain staging prevents distortion and maintains clarity. Set your levels carefully at each stage of the signal path.
Balancing Levels
Balancing levels is key for a well-mixed sound. Start with the input gain on your audio interface. Set it to a level where the signal is strong but not clipping. Clipping causes distortion and can damage your equipment. Use the level meters on your interface to monitor the input signal.
Adjust the output levels on your external gear. Make sure they match the levels on your audio interface. This ensures a consistent signal flow. When using effects, balance the wet and dry signals. Too much effect can drown out the original sound. Keep a good mix for a natural, polished sound.
Regularly check and adjust levels during your sessions. Changes in one part of the signal chain can affect the overall balance. Keep an eye on your meters and trust your ears. Consistent level management results in better recordings and mixes.
Credit: proaudioclube.com
Advanced Techniques
Exploring advanced techniques for using inserts on an audio interface can elevate your sound production. These methods can create unique and professional effects, enhancing your overall mix. Let’s dive into some advanced techniques like parallel processing and sidechain compression.
Parallel Processing
Parallel processing allows you to blend the original signal with a processed version. This technique can add depth and complexity to your mix. To achieve this:
- Send a copy of your audio to an insert.
- Apply the desired effects to the insert signal.
- Mix the processed signal back with the original signal.
This method is often used for compression and reverb. It helps maintain the original dynamics while adding a layer of processed sound. Use this technique to enhance vocals, drums, and other instruments.
Sidechain Compression
Sidechain compression is a powerful tool for managing the dynamic range of your mix. It involves using the signal from one track to control the compression applied to another track. Here’s how to set it up:
- Select the track you want to compress.
- Insert a compressor plugin.
- Set the sidechain input to the track you want to trigger the compression.
This technique is commonly used in dance music for the pumping effect. It helps the kick drum stand out by ducking the volume of other elements. It’s also useful in voiceovers to ensure the voice remains clear over background music.
Both parallel processing and sidechain compression can add a professional touch to your audio projects. Experiment with these techniques to find what works best for your style.
Frequently Asked Questions
What Is An Insert On An Audio Interface?
An insert on an audio interface allows you to connect external processors. This lets you add effects like compression or equalization directly into the signal path.
How Do You Use Inserts On An Audio Interface?
To use inserts, connect the external processor’s input and output to the insert jack. This integrates the effect into your recording chain.
Can I Use Multiple Inserts Simultaneously?
Yes, you can use multiple inserts if your audio interface has multiple insert points. This allows for more complex signal processing.
Why Are Inserts Important In Audio Recording?
Inserts are important because they allow real-time processing of audio signals. This improves the quality and versatility of your recordings.
Conclusion
Understanding how to use inserts on your audio interface can enhance your recordings. This process allows for better signal processing and sound quality. With practice, you can integrate external gear seamlessly. Experiment with different setups to find what works best for you.

Always refer to your audio interface manual for specific instructions. Keep learning, and soon you’ll feel more confident. Happy recording!
As an Amazon Associate, Cleanestor earns from qualifying purchases at no additional cost to you.