
Using the Zoom H4N as an audio interface is easy. It allows you to record high-quality sound directly to your computer.
In this guide, we will explain the steps to set it up. The Zoom H4N is a versatile tool for musicians, podcasters, and content creators. It can record live performances, interviews, or voiceovers with excellent clarity. Connecting it to your computer as an audio interface opens up many possibilities.
You can use your favorite recording software to capture and edit audio in real-time. This setup is perfect for home studios, remote work, or on-the-go recording. Understanding how to use the Zoom H4N as an audio interface can improve your recording experience and elevate your projects. Let’s dive into the process and make your recordings sound professional.
Credit: zoomcorp.com
Introduction To Zoom H4n
The Zoom H4N is a portable audio recorder. It is popular for its high-quality sound and easy-to-use features. This device is perfect for musicians, podcasters, and filmmakers. It can also be used as an audio interface. This means you can connect it to your computer for recording.
Features Overview
The Zoom H4N offers many useful features. Here are some of the key ones:
- Built-in Stereo Microphones: The H4N has two high-quality mics. They can capture clear and detailed sound.
- Four-Channel Recording: You can record up to four tracks at once. This is great for capturing multiple sound sources.
- Multiple Inputs: The device has XLR/TRS combo inputs. This allows you to connect different types of microphones and instruments.
- Phantom Power: The H4N can provide phantom power to condenser mics. This is essential for professional recording.
- SD Card Slot: You can store recordings on an SD card. This makes it easy to transfer files to your computer.
- USB Connectivity: The H4N can connect to your computer via USB. This allows you to use it as an audio interface.
Why Use As An Audio Interface
Using the Zoom H4N as an audio interface has many benefits.
- High-Quality Recordings: The H4N provides clear and professional sound quality. This is better than most built-in computer microphones.
- Versatility: You can connect different mics and instruments. This makes it suitable for various recording needs.
- Portability: The device is small and easy to carry. You can take it anywhere for on-the-go recordings.
- Ease of Use: The H4N is user-friendly. Even beginners can set it up quickly.
These features make the Zoom H4N a valuable tool for anyone who needs high-quality audio recordings.

Credit: www.amazon.com
Setting Up Your Zoom H4n
Set up your Zoom H4N as an audio interface by connecting it to your computer via USB. Select the “Audio Interface” mode on the device. Follow the on-screen instructions to complete the setup.
Getting the best audio quality is easy with the Zoom H4N. Before you start recording, you need to set it up correctly. This guide will walk you through the steps.Unboxing And Initial Setup
First, unbox your Zoom H4N. Inside, you will find the recorder, a windscreen, a USB cable, and a pair of batteries. Take a moment to inspect everything. Ensure all items are present. Next, insert the batteries into the device. Open the back cover and place the batteries as shown. If you prefer, you can use an AC adapter instead. This is not included in the box. Now, turn on the Zoom H4N. Press the power button on the left side. The screen will light up, and the device will start.Powering The Device
The Zoom H4N can run on two AA batteries. These usually last around 6 hours. For longer sessions, consider using an AC adapter. This ensures you do not run out of power. To use the AC adapter, connect it to the DC input. This is on the right side of the device. Plug the other end into a power outlet. Your Zoom H4N will now run continuously. Remember to always check the power status. The screen shows the battery level. If it is low, change the batteries or switch to the AC adapter. This ensures your recording session goes smoothly. “`Connecting Zoom H4n To Your Computer
Connecting your Zoom H4N to your computer can enhance your audio recording experience. This process transforms your Zoom H4N into a versatile audio interface. Follow these simple steps to get started and enjoy high-quality audio recording.
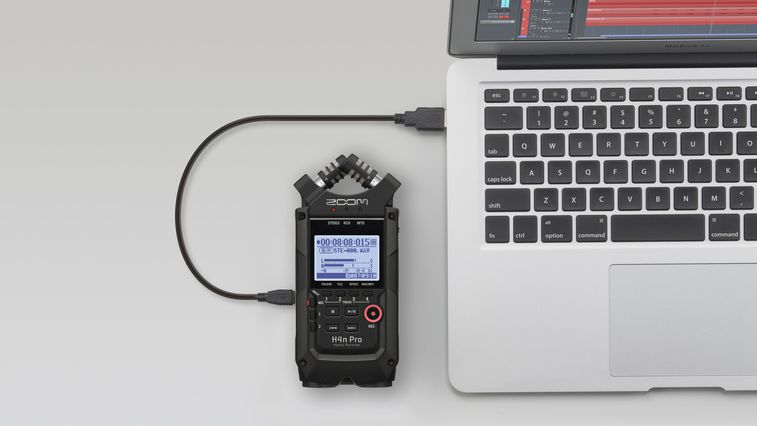
Usb Connection
First, ensure your Zoom H4N is powered on. Locate the USB port on the side of the device. Connect one end of the USB cable to the Zoom H4N. Plug the other end into your computer’s USB port. Your computer should recognize the device.
Installing Drivers
Next, you need to install the necessary drivers. Visit the Zoom website to download the latest drivers. Follow the on-screen instructions to install them. Restart your computer after installation. This ensures your Zoom H4N functions properly as an audio interface.
Configuring Audio Settings
Configuring audio settings on the Zoom H4N is vital for optimal sound quality. The device can be used as an audio interface, providing excellent recording capabilities. Follow this guide to set up the Zoom H4N as an audio interface effectively.
Selecting Interface Mode
First, you need to switch the Zoom H4N to interface mode. Here’s how:
- Turn on the Zoom H4N.
- Press the Menu button.
- Scroll down to USB and press the Enter button.
- Select Audio Interface and press Enter again.
- Choose your computer’s operating system, either Windows or Mac.
These steps will put the Zoom H4N into interface mode, ready for further configuration.
Adjusting Input Levels
Proper input levels ensure that your recordings are clear and free of distortion. Follow these steps to adjust the input levels:
- Press the Input button on the side of the Zoom H4N.
- Use the Jog Dial to select the input source: MIC, Guitar/Bass, or Line.
- Adjust the input level using the Volume buttons.
Here is a quick reference for input levels:
| Input Source | Recommended Level |
|---|---|
| MIC | 40-50 |
| Guitar/Bass | 50-60 |
| Line | 30-40 |
Monitor the input levels on the screen to avoid clipping, which can cause distortion. Adjust until the levels are within the safe range.
Using Zoom H4n With Recording Software
Using the Zoom H4N as an audio interface can enhance your recording setup. This device works well with various recording software, making it versatile. Let’s dive into how to use the Zoom H4N with recording software.
Compatible Software Options
The Zoom H4N supports many recording programs. Popular options include Audacity, GarageBand, and Adobe Audition. Each software offers unique features. Choose based on your needs and preferences.
Audacity is free and user-friendly. GarageBand is great for Mac users. Adobe Audition offers advanced tools for professionals. Ensure your software is up-to-date for the best performance.
Configuring Software Settings
First, connect your Zoom H4N to your computer using a USB cable. Turn on the device and select “Audio Interface” mode. Choose “Stereo Mix” for simple recordings. For more control, select “Multi-Track.”
Open your recording software and go to the audio settings. Select the Zoom H4N as your input device. Adjust the sample rate and bit depth. Common settings are 44.1 kHz and 16-bit. Check your software’s manual for specific instructions.
Test your setup by recording a short clip. Listen for any issues. Adjust levels and settings as needed. This ensures clear and professional audio. You are now ready to start recording with your Zoom H4N and software.
Tips For Optimal Audio Quality
Achieving optimal audio quality with your Zoom H4N as an audio interface requires attention to several important details. Proper microphone placement and minimizing noise and distortion are key factors. Below, we’ll cover some essential tips for each aspect.
Microphone Placement
Position your microphone at the right distance from the sound source. Too close can cause distortion. Too far can result in weak audio. Experiment with different distances to find the sweet spot.
Ensure the microphone is at an angle to the sound source. This helps capture a more natural sound. Avoid placing the microphone directly in front of loud instruments. This can prevent clipping and distortion.
Reducing Noise And Distortion
Use a pop filter to reduce plosive sounds. These include hard ‘p’ and ‘b’ sounds that can cause spikes in audio levels. A pop filter can help smooth out these harsh sounds.
Minimize background noise by recording in a quiet room. Turn off any devices that can cause hums or buzzes. Use noise reduction features on the Zoom H4N to further clean up the audio.
Check your input levels before recording. Ensure they are not too high, which can cause distortion. Adjust the levels on the Zoom H4N to achieve a balanced sound.
Troubleshooting Common Issues
Using the Zoom H4N as an audio interface can be a fantastic way to improve your audio quality. But sometimes, things don’t go as planned. You might face some common issues. This section will help you fix the most frequent problems. Let’s dive into the details.
Connection Problems
First, check if your USB cable is working. A faulty cable can disrupt the connection. Try another USB port on your computer. Sometimes, ports can fail. Ensure the H4N is in the right mode. It should be set to “Audio Interface” mode. Check your computer’s settings. Ensure it recognizes the H4N as an audio device.
Audio Quality Issues
Poor audio quality can be frustrating. First, check your gain settings. The gain should not be too high. This can cause distortion. Ensure your recording environment is quiet. Background noise can affect audio quality. Use good quality headphones to monitor the sound. Sometimes, the issue is with your monitoring device. Lastly, check for firmware updates. Outdated firmware can cause audio issues.
Advanced Features And Functions
The Zoom H4N offers advanced features and functions that make it more than a simple audio recorder. It excels as an audio interface with sophisticated capabilities. These features can greatly enhance your recording experience. Let’s delve into some of these advanced aspects.
Multi-track Recording
One of the standout features of the Zoom H4N is its multi-track recording capability. This feature allows you to record up to four separate audio tracks simultaneously. You can later mix and edit these tracks for a professional-quality output.
Here’s how you can use the multi-track recording feature:
- Set the H4N to Multi-Track Mode.
- Connect your instruments or microphones to the input jacks.
- Adjust the input levels using the gain knobs.
- Press the Record button to start recording.
This feature is perfect for recording musical performances, podcasts, or any situation where multiple audio sources need to be captured.
Using Effects And Filters
The Zoom H4N is equipped with a variety of effects and filters that can be applied during recording or in post-production. These effects include compression, limiting, reverb, and more.
To use these effects:
- Navigate to the Effects Menu on the H4N.
- Select the desired effect or filter.
- Adjust the settings to suit your needs.
- Apply the effect to your recording.
These effects can enhance your recordings by reducing noise, adding depth, or achieving a specific sound. Using the right combination of filters and effects can make a significant difference in the final quality of your audio.
Here’s a quick table of some common effects and their uses:
| Effect | Use |
|---|---|
| Compression | Balances audio levels |
| Reverb | Adds space and depth |
| Limiter | Prevents audio clipping |
Experimenting with these effects can help you find the perfect sound for your projects.
Conclusion And Final Thoughts
Using the Zoom H4N as an audio interface can improve your recordings. It offers quality sound and versatility for different audio needs. Whether for podcasting, music production, or video work, this device helps you achieve clear and professional results.
In this section, we will summarize the key points and provide additional resources for further reading.
Summary Of Key Points
The Zoom H4N is a handy tool for various audio tasks. You can use it as an audio interface to connect directly to your computer. It offers two XLR/TRS combo inputs and built-in microphones. This allows for multiple recording options. The device is easy to set up and use. Just connect it via USB, select it in your audio settings, and start recording. It also supports phantom power for condenser microphones. This makes it suitable for different types of microphones.
Additional Resources
If you want to learn more about using the Zoom H4N, check out the official user manual. You can also find many tutorials online. Websites like YouTube have video guides that can help you with the setup process. Audio forums are another good place to ask questions and get advice from other users. Look for communities that focus on podcasting, music production, or audio recording. They often have sections dedicated to equipment and software tips.

Credit: www.youtube.com
Frequently Asked Questions
How Do I Connect Zoom H4n To My Computer?
To connect Zoom H4N, use a USB cable. Plug it into your computer. Select “Audio Interface” on the Zoom H4N. Choose the correct input/output settings on your computer.
What Settings Are Needed On Zoom H4n?
Select “Audio Interface” mode on Zoom H4N. Choose “Stereo Mix” or “Multi Track. ” Adjust input/output settings as needed.
Can I Use Zoom H4n With Any Daw?
Yes, Zoom H4N works with most DAWs. Ensure your DAW recognizes the Zoom H4N as an audio interface. Configure input/output settings accordingly.
Do I Need Drivers For Zoom H4n?
No drivers are needed for Zoom H4N on Mac. Windows users may need to download drivers from Zoom’s official website. Install and configure them properly.
Conclusion
Using the Zoom H4N as an audio interface is simple. Follow the steps carefully. Connect the device to your computer. Adjust the settings as needed. Record high-quality audio with ease. The Zoom H4N enhances your recording experience. It’s perfect for podcasts, music, and more.

Enjoy clear, professional sound. Now, you’re ready to create amazing audio content. Happy recording!
{ “@context”: “https://schema.org”, “@type”: “FAQPage”, “mainEntity”: [ { “@type”: “Question”, “name”: “How do I connect Zoom H4N to my computer?”, “acceptedAnswer”: { “@type”: “Answer”, “text”: “To connect Zoom H4N, use a USB cable. Plug it into your computer. Select \”Audio Interface\” on the Zoom H4N. Choose the correct input/output settings on your computer.” } } , { “@type”: “Question”, “name”: “What settings are needed on Zoom H4N?”, “acceptedAnswer”: { “@type”: “Answer”, “text”: “Select \”Audio Interface\” mode on Zoom H4N. Choose \”Stereo Mix\” or \”Multi Track.\” Adjust input/output settings as needed.” } } , { “@type”: “Question”, “name”: “Can I use Zoom H4N with any DAW?”, “acceptedAnswer”: { “@type”: “Answer”, “text”: “Yes, Zoom H4N works with most DAWs. Ensure your DAW recognizes the Zoom H4N as an audio interface. Configure input/output settings accordingly.” } } , { “@type”: “Question”, “name”: “Do I need drivers for Zoom H4N?”, “acceptedAnswer”: { “@type”: “Answer”, “text”: “No drivers are needed for Zoom H4N on Mac. Windows users may need to download drivers from Zoom’s official website. Install and configure them properly.” } } ] }
As an Amazon Associate, Cleanestor earns from qualifying purchases at no additional cost to you.