
Using the Zoom R16 as an audio interface can transform your recording setup. This device is versatile and user-friendly, perfect for home studios.
The Zoom R16 is more than just a recorder; it can act as a powerful audio interface. This means you can connect it to your computer and use it for recording and mixing audio tracks. Whether you are a musician, podcaster, or audio engineer, the Zoom R16 offers a flexible and portable solution.
It supports multiple channels and provides high-quality sound. In this guide, we will walk you through the steps to set it up and get the best out of your Zoom R16. By the end, you will be ready to use this tool for all your audio projects.
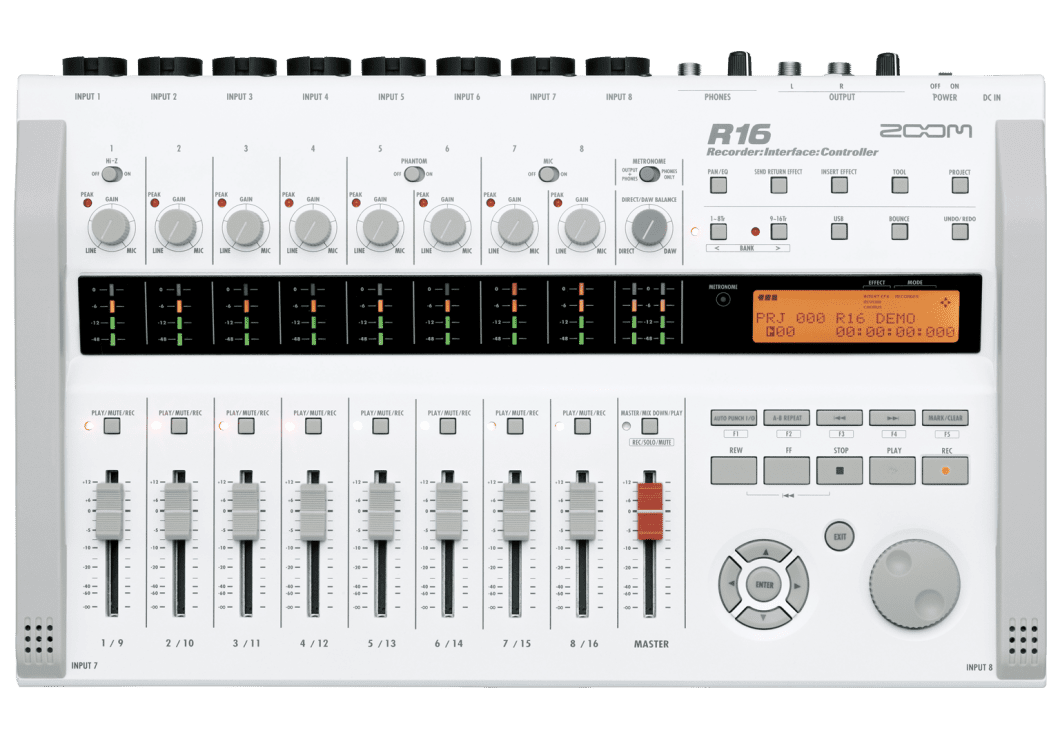
Credit: zoomcorp.com
Introduction To Zoom R16
The Zoom R16 is an innovative device designed for musicians and producers. It combines a multi-track recorder, audio interface, and control surface. This versatile tool is perfect for both studio and live settings. Users can record, edit, and mix their music projects with ease.
Features Overview
The Zoom R16 offers a range of features. It has 16-track playback and 8-track simultaneous recording. The device supports SD cards up to 32GB. This provides ample storage for your recordings. It also includes built-in stereo condenser mics. These mics capture high-quality audio without external equipment.
Additionally, the Zoom R16 has eight combo inputs. These inputs support both XLR and 1/4″ connections. Each input has its own gain control and phantom power. The device also includes an onboard tuner and metronome. These features help you stay in tune and on time during recordings.
Benefits Of Using As Audio Interface
Using the Zoom R16 as an audio interface offers many benefits. It connects to your computer via USB. This allows you to record directly into your DAW. The device provides high-resolution audio. This ensures your recordings are clear and detailed.
The Zoom R16 is also portable. You can take it anywhere and record on the go. Its compact design makes it easy to carry. The device is powered by AA batteries or an AC adapter. This flexibility allows you to record in various locations. You are not limited to a studio setting.
Finally, the Zoom R16 is user-friendly. Its intuitive layout makes it easy to navigate. Even beginners can start recording quickly. The device includes many features found in more expensive equipment. This makes it a cost-effective choice for musicians and producers.
Setting Up Zoom R16
The Zoom R16 is a versatile audio interface. With it, you can record high-quality audio and use it for various projects. This guide will help you set it up correctly. Let’s get started with the basic setup.
Unboxing And Initial Setup
Start by unboxing your Zoom R16. Ensure you have all the components:
- Zoom R16 unit
- USB cable
- Power adapter
- Manual and driver CD
Next, follow these steps:
- Place the Zoom R16 on a stable surface.
- Connect the power adapter to the Zoom R16.
- Plug the power adapter into an electrical outlet.
- Power on the Zoom R16 by pressing the Power button.
Make sure the display lights up. This indicates the device is ready for the next steps.
Connecting To Computer
To use the Zoom R16 as an audio interface, connect it to your computer. Follow these steps:
- Use the provided USB cable.
- Connect one end of the USB cable to the Zoom R16.
- Connect the other end to an available USB port on your computer.
Once connected, your computer should recognize the Zoom R16. You may need to install drivers. Refer to the manual or CD provided.
To ensure proper setup, check the following:
- The Zoom R16 appears in your computer’s audio settings.
- Audio input and output are set to the Zoom R16.
Now, you are ready to use the Zoom R16 as an audio interface. Start by launching your preferred audio software. Configure the audio settings to use the Zoom R16. Happy recording!
Installing Necessary Drivers
To use the Zoom R16 as an audio interface, you need to install necessary drivers. These drivers help your computer recognize the Zoom R16. Without them, the device won’t work correctly. The process involves downloading and installing the correct drivers. This section will guide you through the steps.
Downloading Drivers
First, visit the official Zoom website. Navigate to the Support or Downloads section. Look for the Zoom R16 drivers. Make sure to choose the drivers that match your operating system. Click the download link to save the driver file to your computer.
Installation Process
Locate the downloaded driver file on your computer. Double-click the file to start the installation process. Follow the on-screen instructions carefully. You may need to restart your computer once the installation is complete. After restarting, connect your Zoom R16 to the computer using a USB cable. Your computer should now recognize the device as an audio interface.
Configuring Audio Settings
Configuring audio settings on the Zoom R16 is essential for optimal performance. Proper configuration ensures clear sound quality and smooth operation. Here’s a step-by-step guide to get you started.
Adjusting Input/output Settings
First, ensure all connections are secure. Then, power on your Zoom R16. Access the Input/Output Settings menu from the main screen.
- Select Audio Interface mode.
- Choose your desired input channels. The R16 offers up to 8 inputs.
- Select the output channels. Typically, outputs 1 and 2 are the main outputs.
Adjust the gain levels for each input. Ensure levels are not too high to avoid distortion. Use the physical knobs on the R16 for precise control.
Setting Sample Rate And Buffer Size
Next, set the sample rate and buffer size for your audio interface.
| Setting | Options | Recommendation |
|---|---|---|
| Sample Rate | 44.1kHz, 48kHz, 96kHz | 44.1kHz for standard use |
| Buffer Size | 64, 128, 256, 512, 1024 | 128 for low latency |
Navigate to the Sample Rate option in the settings menu. Choose 44.1kHz for regular recording. For professional use, you might select 48kHz or 96kHz.
Then, go to Buffer Size settings. A lower buffer size reduces latency but can cause glitches. Start with 128 samples, then adjust as needed.
Using With Daw Software
Using the Zoom R16 as an audio interface with your DAW software can enhance your recording experience. It offers a straightforward setup process and seamless integration. This section will guide you through the steps to configure your DAW software to work with the Zoom R16. Let’s start by exploring compatible DAWs and then move on to configuring DAW preferences.
Compatible Daws
The Zoom R16 is compatible with various DAW software. Popular choices include Ableton Live, Pro Tools, and Cubase. It also works well with Logic Pro and Reaper. These DAWs support multiple tracks and offer excellent recording features.
Before you start, ensure your DAW software is installed and updated. Compatibility ensures smooth operation and access to advanced features.
Configuring Daw Preferences
Open your DAW software. Navigate to the preferences or settings menu. This is usually found under “Options” or “Edit” in the menu bar.
Select the audio settings section. Here, you need to choose the Zoom R16 as your audio interface. This step is crucial for your DAW to communicate with the Zoom R16.
Set the input and output options to the Zoom R16. This ensures that all audio goes through the interface. Adjust the buffer size for optimal performance. A smaller buffer size reduces latency but requires more CPU power.
Test the connection by creating a new project. Add an audio track and select the input source. You should see the Zoom R16 listed. Arm the track for recording and test the input levels.
If everything is set up correctly, you are ready to start recording. Experiment with different settings to find the best configuration for your workflow.

Credit: www.edbusacker.com
Recording Audio
Using the Zoom R16 as an audio interface opens up many possibilities for recording. This versatile device allows you to connect microphones, instruments, and other audio equipment. It is perfect for both beginners and experienced users. Let’s break down the process into simple steps.
Connecting Microphones And Instruments
The first step is to connect your microphones and instruments to the Zoom R16. Follow these steps:
- Locate the input jacks on the front panel.
- Plug your microphones into the XLR inputs. Ensure they are secure.
- Connect instruments using the 1/4-inch TRS jacks.
Make sure your connections are tight. Loose connections can cause issues.
For better audio quality, use high-quality cables. They help reduce noise and interference.
Recording Tracks
After connecting your microphones and instruments, you can start recording tracks. Here’s a step-by-step guide:
- Turn on the Zoom R16. Wait for it to boot up.
- Press the REC button to arm the tracks you want to record.
- Adjust the gain levels for each track. Ensure they are not too high or too low.
- Press the PLAY button to start recording.
- Perform your audio piece. The Zoom R16 will capture it.
- Press the STOP button once you are done.
Review your recordings. If needed, adjust the settings and record again.
Save your tracks regularly. This prevents data loss in case of power failure.
Using the Zoom R16, you can record multiple tracks simultaneously. This feature is great for bands and live sessions.
Troubleshooting Common Issues
When using the Zoom R16 as an audio interface, you might face some common issues. These problems can be frustrating, but they are often easy to fix. Let’s explore some solutions to these issues.
Connection Problems
One common issue is the Zoom R16 not connecting to your computer. Here are some steps to solve this:
- Ensure the USB cable is properly connected to both the Zoom R16 and your computer.
- Check if the Zoom R16 is turned on.
- Verify that your computer recognizes the device in the system settings.
- Try using a different USB port on your computer.
- Restart your computer and the Zoom R16.
If these steps do not work, update your Zoom R16 drivers. Visit the Zoom website for the latest drivers.
Audio Latency Solutions
Audio latency can disrupt your recording experience. Here are some ways to reduce latency:
- Lower the buffer size in your audio software settings.
- Close other applications running on your computer.
- Use a direct connection to the computer, avoiding USB hubs.
- Ensure your computer meets the minimum system requirements for the Zoom R16.
For detailed adjustments, refer to the manual of your digital audio workstation (DAW).

Credit: www.youtube.com
Advanced Tips And Tricks
The Zoom R16 is a versatile tool for musicians and podcasters. This section shares advanced tips and tricks. These tips help you use the Zoom R16 as an audio interface effectively.
Using Built-in Effects
The Zoom R16 offers various built-in effects. These effects enhance your recordings. Here is how you can use them:
- Navigate to the Effect menu on your Zoom R16.
- Select the desired effect from the list.
- Adjust the parameters to suit your needs.
- Enable the effect to apply it to your recording.
Use reverb for vocals. Use compression for drums. Experiment with different effects. Find what works best for your project.
Optimizing Performance
To get the best performance from your Zoom R16, follow these tips:
- Keep the firmware updated. Check the Zoom website for updates.
- Use high-quality cables. Poor cables can cause noise and interference.
- Set the sample rate and buffer size. These settings can be found in your DAW.
Using a proper power source is important. The Zoom R16 can run on batteries or an AC adapter. Use the AC adapter for long sessions.
Minimize background noise. Record in a quiet room. Use a pop filter for vocals. These steps ensure clean recordings.
Frequently Asked Questions
What Is The Zoom R16?
The Zoom R16 is a portable, multi-track recorder. It also functions as an audio interface and a control surface.
How To Connect Zoom R16 To A Computer?
To connect the Zoom R16, use a USB cable. Ensure the device is in “Audio Interface” mode.
Can Zoom R16 Work With Daw Software?
Yes, the Zoom R16 is compatible with most DAW software. It supports multi-track recording and playback.
How To Set Up Zoom R16 As Audio Interface?
Connect the Zoom R16 via USB. Install necessary drivers and select it in your DAW’s audio settings.
Conclusion
Using the Zoom R16 as an audio interface is quite simple. Follow the steps mentioned, and you’ll be recording in no time. This device offers great flexibility for both beginners and pros. Experiment with different settings to find what works best for you.

Enjoy the seamless experience of high-quality audio. Remember, practice makes perfect. Don’t hesitate to explore all its features. Happy recording!
{ “@context”: “https://schema.org”, “@type”: “FAQPage”, “mainEntity”: [ { “@type”: “Question”, “name”: “What is the Zoom R16?”, “acceptedAnswer”: { “@type”: “Answer”, “text”: “The Zoom R16 is a portable, multi-track recorder. It also functions as an audio interface and a control surface.” } } , { “@type”: “Question”, “name”: “How to connect Zoom R16 to a computer?”, “acceptedAnswer”: { “@type”: “Answer”, “text”: “To connect the Zoom R16, use a USB cable. Ensure the device is in \”Audio Interface\” mode.” } } , { “@type”: “Question”, “name”: “Can Zoom R16 work with DAW software?”, “acceptedAnswer”: { “@type”: “Answer”, “text”: “Yes, the Zoom R16 is compatible with most DAW software. It supports multi-track recording and playback.” } } , { “@type”: “Question”, “name”: “How to set up Zoom R16 as audio interface?”, “acceptedAnswer”: { “@type”: “Answer”, “text”: “Connect the Zoom R16 via USB. Install necessary drivers and select it in your DAW’s audio settings.” } } ] }As an Amazon Associate, Cleanestor earns from qualifying purchases at no additional cost to you.