FL Studio, a popular digital audio workstation, uses FLP files. These files store project data, including track settings and arrangement.
FLP files are crucial for music producers working with FL Studio. They contain everything needed to recreate a song or project. Imagine having a digital notebook where you jot down all musical ideas, settings, and adjustments. That’s what an FLP file does for your music.
It saves your progress, keeps your track layout, and stores the effects you’ve added. This makes it easy to pick up where you left off or share your work with others. Understanding FLP files is essential for maximizing your efficiency and creativity in FL Studio.
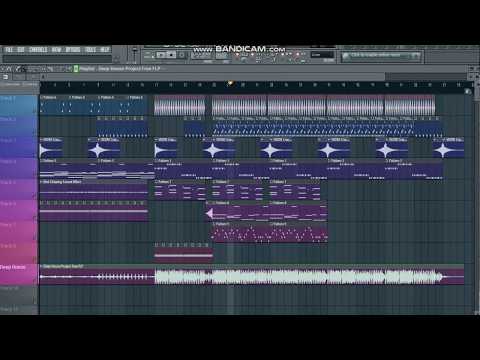
Credit: www.toneden.io
Introduction To Flp Files
FL Studio is a popular digital audio workstation (DAW) known for its user-friendly interface and powerful features. One of the essential file formats in FL Studio is the FLP file. Understanding FLP files is crucial for anyone using FL Studio for music production.
Brief History
FL Studio, originally known as FruityLoops, was released in 1998. It quickly gained popularity among music producers. The FLP file format stands for FruityLoops Project. It is the native project file format for FL Studio. This format allows users to save their work, including all tracks, patterns, and settings. Over the years, FL Studio has evolved, but the FLP file remains a core component.
Importance In Music Production
FLP files are vital for preserving your music projects. They store every detail of your work. This includes audio samples, instrument settings, and effects. Using FLP files, you can revisit and edit your projects anytime. This flexibility is crucial for refining your music. Collaboration becomes easier with FLP files. You can share your projects with other FL Studio users. They can open, review, and modify your work.
Creating Flp Files
Creating FLP files in FL Studio is essential for any music producer. FLP files are the project files used in FL Studio, which store all the information about your project. This includes your sounds, arrangements, and effects. Understanding how to create and save these files can streamline your workflow and protect your work. Below, we will explore the steps involved in starting a new project and saving your work in FL Studio.
Starting A New Project
To start a new project in FL Studio, follow these simple steps:
- Open FL Studio on your computer.
- Click on File in the top menu.
- Select New from the drop-down menu.
This will create a blank canvas where you can begin creating your music. You can add instruments, loops, and effects to build your track. Experiment with different sounds and arrangements to find what works best.
Saving Your Work
Saving your work is crucial to ensure you do not lose any progress. To save your project as an FLP file, follow these steps:
- Click on File in the top menu.
- Select Save As from the drop-down menu.
- Choose a location on your computer to save the file.
- Name your file and make sure the extension is .flp.
- Click Save.
It is a good habit to save your work frequently. This protects your progress from unexpected issues. Use the keyboard shortcut Ctrl + S to quickly save your project as you work.
Creating and saving FLP files in FL Studio ensures your music projects are safe. This allows for easy access and editing in the future. Following these steps can help you stay organized and efficient in your music production journey.
Components Of An Flp File
An FLP file is a project file created with FL Studio. This file contains all the data needed to reproduce a musical piece. Understanding the components of an FLP file helps in navigating and using FL Studio effectively. Let’s explore the main components of an FLP file.
Tracks And Patterns
Tracks and patterns are the building blocks of an FLP file. Tracks hold individual sounds, such as drums or vocals. Each track can have unique settings and effects. Patterns contain sequences of notes and events. You can arrange these patterns to create a complete song. They allow for flexibility and creativity in music composition.
Plugins And Samples
Plugins and samples are essential in shaping the sound in an FLP file. Plugins are software tools that generate or manipulate audio. They include virtual instruments and effects. Samples are pre-recorded sounds you can use in your project. Together, plugins and samples provide endless possibilities for sound design.
Editing Flp Files
Editing FLP files in FL Studio opens a world of possibilities. This is where you can make your music come to life. From arranging beats to adding effects, the editing process is key.
Navigating The Interface
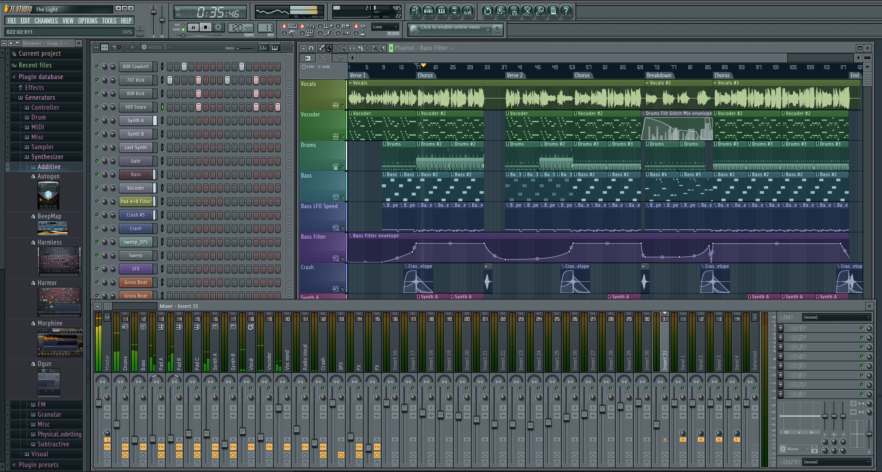
The interface of FL Studio is user-friendly once you get the hang of it. The main window includes several panels like the Channel Rack, Playlist, Mixer, and Browser.
The Channel Rack is where you manage your instruments and samples. Each channel can hold one instrument or sample.
The Playlist is where you arrange your patterns and create the structure of your song. You can drag and drop patterns to build your track.
The Mixer lets you control the volume and effects of each channel. This is essential for balancing your mix.
The Browser helps you find samples, presets, and other files quickly. You can drag items from the Browser directly into the Channel Rack or Playlist.
Using The Piano Roll
The Piano Roll is a powerful tool for creating melodies and chords. It allows for precise editing of notes and velocities.
To open the Piano Roll, double-click a pattern in the Channel Rack. You will see a grid where you can add and edit notes.
Use the Draw tool to add notes to the grid. You can click and drag to adjust the length of the notes.
The Paint tool allows you to quickly add multiple notes in a row. This is useful for creating repetitive patterns.
You can also adjust the velocity of each note. Lower velocities produce softer sounds, while higher velocities produce louder sounds.
Advanced users can use the Slide tool to create smooth transitions between notes. This is great for creating glides and pitch bends.
Overall, mastering the Piano Roll can greatly enhance your music production skills. It is essential for creating complex melodies and harmonies.
Exporting And Sharing Flp Files
Exporting and sharing FLP files in FL Studio is essential for collaboration and finalizing projects. This section will guide you through the steps involved in rendering audio and working with others to create amazing music.
Rendering Audio
Once you finish your project, you need to render the audio. Rendering converts your project into a single audio file.
- Open your project in FL Studio.
- Click on File and then Export.
- Select the format you want, such as MP3, WAV, or FLAC.
- Adjust the settings like bitrate and sample rate.
- Click Start to begin rendering.
Rendering audio ensures that your music can be played on any device. It also makes sharing easier.
Collaborating With Others
Sharing your FLP files allows you to collaborate with other producers. Follow these steps to share your project:
- Save your project by clicking File and then Save As.
- Choose a location on your computer to save the FLP file.
- Compress the project folder to include any samples and plugins used.
- Share the compressed folder via email or cloud storage services.
Collaborating with others is a great way to improve your skills and get new ideas. Always include all necessary files for a smooth collaboration process.
Credit: cymatics.fm
Common Issues And Solutions
Working with FLP files in FL Studio can be exciting and rewarding. Yet, users often face common issues that can disrupt their workflow. Understanding these problems and their solutions can save time and frustration. This section covers some of the most frequent issues users encounter.
File Corruption
File corruption can occur for many reasons. Power outages, software crashes, and hardware failures are just a few. Corrupted files can prevent your project from opening or functioning properly. This can be a huge setback.
To address file corruption, always save your work frequently. Use the ‘Save As’ feature to create multiple versions of your project. This way, if one file gets corrupted, you have backups. FL Studio also has an autosave feature. Make sure it is enabled. This feature automatically saves your work at regular intervals.
Missing Plugins
Missing plugins can create a significant issue. When you open a project, FL Studio may notify you that certain plugins are missing. This can be frustrating, especially if those plugins are essential to your project.
To solve this, ensure all plugins used in your project are installed and up to date. You can use the ‘Plugin Manager’ in FL Studio to check for missing plugins. If a plugin is missing, reinstall it from the original source. Another tip is to use the ‘Make Unique’ feature. This allows you to save specific plugin settings as individual files. This way, you can easily restore them if they go missing.
Advanced Techniques
In the world of music production, mastering FL Studio involves understanding advanced techniques. These techniques elevate your music to a professional level. Let’s explore some key advanced techniques in FL Studio.
Automation Clips
Automation clips are essential for dynamic sound changes. They allow you to control parameters over time. These can include volume, panning, and effects. To create an automation clip, right-click a control. Select “Create Automation Clip”. The clip appears in the playlist. You can then draw curves to automate the parameter. This adds movement and interest to your track.
Use automation clips to make your music more expressive. For instance, automate the filter cutoff. This can create a sweeping effect. Or automate reverb for a spacious sound. The possibilities are endless.
Mixer Routing
Mixer routing is another advanced technique. It involves sending audio signals through different mixer tracks. This helps in organizing and processing sounds. Start by selecting a mixer track. Then, assign your sound to that track. You can do this in the Channel Rack. Click on the track number to route it.
You can also create sub-mixes. Send multiple sounds to one mixer track. Apply effects to the group. This saves CPU and streamlines your workflow. For example, route all drums to one track. Then, add compression or EQ to the entire drum group.
Mixer routing also allows for sidechain compression. Route a kick drum to the sidechain input. This can create a pumping effect. It’s common in electronic dance music.
Resources And Community
The FL Studio community is vast and supportive. Whether you are just starting or have been using FL Studio for years, there are many resources to help you. You can learn new techniques, solve problems, and share your creations.
Online Tutorials
There are countless online tutorials available for FL Studio. These can help you understand the basics and advanced features. You can find tutorials on:
- Creating beats
- Mixing and mastering
- Using plugins
Platforms like YouTube have many channels dedicated to FL Studio tutorials. Some of the popular channels include:
- Image-Line (the creators of FL Studio)
- Busy Works Beats
- In The Mix
Forums And Groups
Joining forums and groups can be very helpful. They are places where you can ask questions, share tips, and get feedback. Some popular forums and groups include:
- Image-Line Forum
- Reddit’s FL_Studio
- Facebook Groups
These communities are active and filled with experienced users. They can provide valuable insights and support. You can also find local groups that meet in person. This is a great way to connect with other FL Studio users in your area.
Credit: soundcloud.com
Frequently Asked Questions
What Is An Flp File In Fl Studio?
An FLP file is a project file created in FL Studio. It contains all the data for a music project, such as audio samples, MIDI data, and plugin settings.
How Do I Open An Flp File?
To open an FLP file, launch FL Studio and use the File menu. Select “Open” and choose your FLP file.
Can I Convert An Flp File To Mp3?
Yes, you can convert an FLP file to MP3 in FL Studio. Use the export function and select MP3 as the format.
Is Fl Studio Free?
FL Studio offers a trial version for free. However, to access all features, a paid version is required.
Conclusion
Understanding FLP files in FL Studio is essential for music producers. They save your project and settings, making it easier to edit later. Organize and manage your music projects efficiently. Experiment with sounds and arrangements. Keep learning and exploring FL Studio features.

Practice regularly to improve your skills. Happy music making!
As an Amazon Associate, Cleanestor earns from qualifying purchases at no additional cost to you.