Automation in FL Studio is a powerful tool. It allows you to control various parameters over time.
This feature enhances creativity and precision in music production. FL Studio, a popular digital audio workstation, offers many features. Among these, automation stands out for its ability to bring dynamic changes to your music. Whether you’re adjusting volume, panning, or effects, automation helps you control these elements effortlessly.
It can transform a simple track into something more complex and engaging. Automation in FL Studio is essential for producers who want to add movement and emotion to their tracks. It lets you fine-tune every detail, making your music sound more professional and polished. Ready to dive into the world of automation? Let’s explore how this feature can elevate your music production game.
Introduction To Automation
Automation in FL Studio is a powerful feature that can elevate your music production to new heights. It allows you to control various parameters over time, adding dynamics and complexity to your tracks. Understanding automation is crucial for any music producer who wants to create professional and polished music.
Definition
Automation in FL Studio refers to the ability to record and edit changes to parameters over time. These parameters can include volume, panning, filter cutoff, and many others. By automating these elements, you can create intricate and evolving soundscapes. This feature is essential for adding movement and interest to your music.
Importance In Music Production
Automation is vital in music production for several reasons:
- Dynamic Control: It allows you to change the dynamics of your track seamlessly.
- Precision: You can make precise adjustments to parameters that would be impossible to do manually.
- Creativity: It opens up new creative possibilities and helps you express your musical ideas more fully.
By mastering automation, you can take your music production skills to the next level. It is a tool that can make your tracks sound more professional and engaging.
Credit: slimegreenbeats.com
Basic Concepts
Automation in FL Studio is a powerful tool for music producers. It allows you to control various parameters over time. These parameters include volume, panning, and effects. Understanding the basic concepts of automation is key.
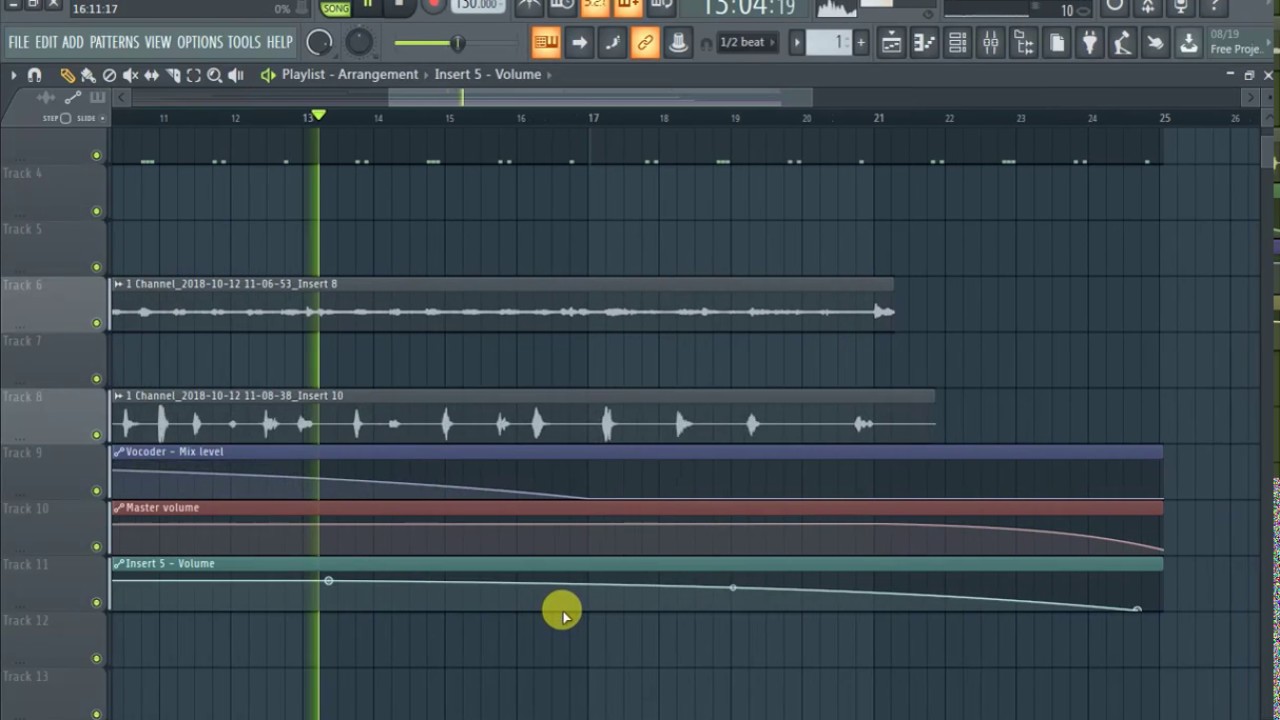
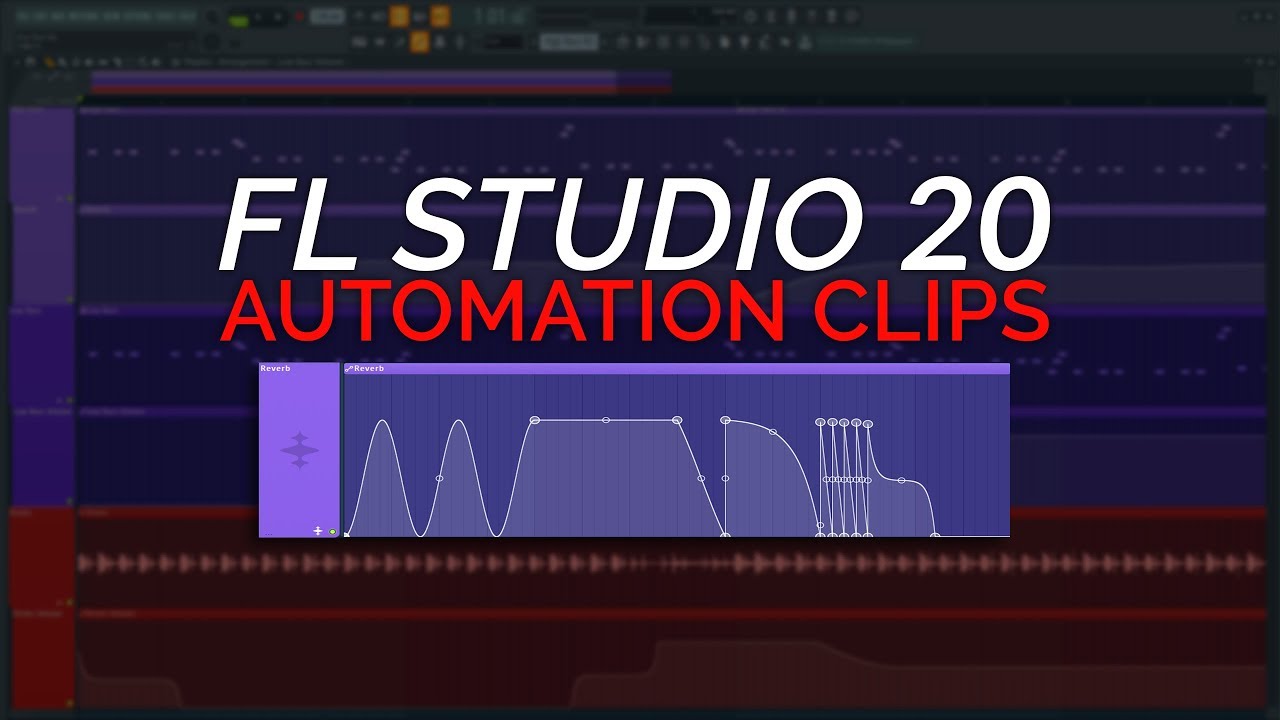
Automation Clips
Automation clips are essential in FL Studio. They represent changes in parameter values. You can create automation clips for any parameter. This includes volume, panning, and effects. An automation clip is a visual representation. It shows how a parameter changes over time.
To create an automation clip, right-click on a parameter. Select “Create Automation Clip.” This will add a new clip to the playlist. You can edit this clip to shape the parameter’s behavior. This control makes your music dynamic and expressive.
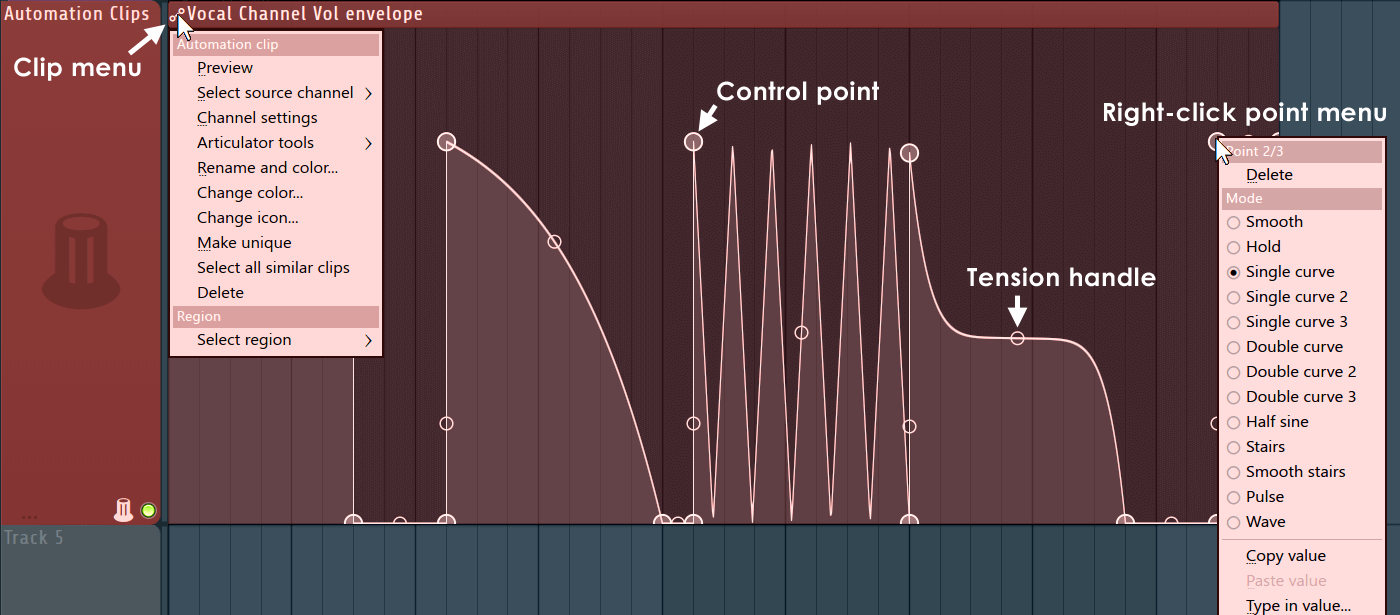
Control Points
Control points are the building blocks of automation clips. They define the changes in parameter values. Each control point has a position and a value. The position is where the change happens in the timeline. The value is the parameter’s level at that point.
You can add control points by right-clicking on the automation clip. Move them to adjust the parameter’s value. This allows precise control over your automation. Control points make it easy to create gradual changes or sudden shifts. This flexibility enhances your creative process.
Creating Automation Clips
Creating automation clips in FL Studio is a powerful way to control your music. Automation allows you to manipulate various parameters over time, adding dynamism and expression to your tracks. It helps you make your music more engaging and professional.
Steps To Create
First, right-click on the knob or slider you want to automate. Choose “Create Automation Clip” from the menu. This action will create an automation clip in your playlist. You can then edit this clip to control the parameter over time.
Next, navigate to the playlist window. You will see the automation clip there. Use the pencil tool to draw points on the clip. These points will change the parameter value at different times.
To fine-tune the automation, adjust the points and curves. Right-click on points to change their types. Use linear, smooth, or hold types to create different effects.
Common Uses
Volume automation is one of the most common uses. It helps create fade-ins and fade-outs. It also allows you to control the loudness of different sections.
Filter automation is another popular use. It helps in creating sweeps and builds. By automating the cutoff frequency, you can make your track more interesting.
Pan automation helps in creating a sense of space. By moving sounds left and right, you can make your mix sound wider.
Reverb and delay automation add depth to your tracks. By controlling these effects, you can make certain parts stand out.
Pitch automation is useful for creating risers and drops. It helps to build tension and release in your music.
Editing Automation Clips
Automation in FL Studio allows you to control various parameters over time. This can create dynamic changes in your music. Automation clips are visual representations of these changes. Learning to edit them effectively is crucial for achieving the desired sound.
Adjusting Control Points
Control points are the small dots on an automation clip. They mark changes in the parameter value. Click and drag these points to adjust them. This will change the parameter’s behavior over time. You can add new control points by right-clicking on the automation clip. Removing points is just as easy. Right-click on the control point and select ‘Delete’.
Smoothing Transitions
Smooth transitions between control points create a more natural sound. Sharp changes can be jarring to the listener. To smooth a transition, click and drag the curve between two points. You can also use the ‘Hold’ and ‘Smooth’ tools found in the toolbar. These tools adjust the curve automatically. Smooth transitions are especially important in volume and pitch automation.
Advanced Techniques
In FL Studio, automation can take your music production to the next level. Advanced techniques allow you to add complexity and depth to your tracks. Let’s dive into some advanced methods to enhance your automation skills.
Layering Automation Clips
Layering automation clips can give your track a unique feel. By stacking multiple automation clips, you can control different parameters at the same time.
- Create a new automation clip for each parameter you want to control.
- Adjust the curves and points to create smooth transitions.
- Use the Layer tool to combine these clips.
This technique allows for more intricate sound design. You can create evolving effects and dynamic changes in your music.
Using Envelopes
Envelopes are another powerful tool in FL Studio. They let you control the shape of your automation. This can be especially useful for creating rhythmic patterns and modulating sounds.
- Open the Envelopes tab in the Channel Settings window.
- Choose the parameter you want to automate.
- Draw the envelope shape to control the parameter over time.
With envelopes, you can create precise and repeatable changes. This gives you more control over your sound design. Experiment with different shapes and curves to find what works best for your music.
By mastering these advanced techniques, you can elevate your production skills. Layering automation clips and using envelopes open up new possibilities in your tracks. Start experimenting today to see how these tools can enhance your music.
Credit: www.image-line.com
Automation In Mixing
Automation in mixing is a powerful tool in FL Studio. It allows you to create dynamic changes in your tracks. These changes can add depth, interest, and professionalism to your music. Automation can control various aspects of your mix. Two of the most common types are volume automation and panning automation.
Volume Automation
Volume automation lets you adjust the volume of a track over time. You can make certain parts louder or quieter. This helps to create a sense of movement in your music. You can use volume automation to highlight important parts of your track. It can also help balance your mix.
To create volume automation, right-click on the volume knob. Select “Create Automation Clip.” A new clip will appear in your playlist. You can then draw the volume changes you want. Experiment with different shapes and curves. This will give your track a more professional sound.
Panning Automation
Panning automation controls the position of a sound in the stereo field. You can move a sound from left to right or vice versa. This creates a sense of space and movement. It can make your mix more interesting and dynamic.
To create panning automation, right-click on the pan knob. Select “Create Automation Clip.” A new clip will appear in your playlist. Draw the panning changes you want. Try moving sounds back and forth. This can create a sense of motion in your track.
Using volume and panning automation together can enhance your mix. It adds depth and interest. Your tracks will sound more polished and professional.
Automation In Effects
Automation in FL Studio allows you to control various parameters over time. This is key for creating dynamic and expressive tracks. By automating effects, you can add movement and interest to your music. Let’s explore how you can automate filters and reverb in FL Studio to elevate your sound.
Automating Filters
Filters shape the frequency content of your sounds. Automating filters can create sweeping effects and transitions. Here’s a simple guide:
- Right-click the filter knob.
- Select Create automation clip.
- Adjust the automation curve in the playlist.
This process allows you to create interesting builds and drops. For example, you can automate a low-pass filter to gradually open up. This reveals more high frequencies, adding excitement before a chorus.
Automating Reverb
Reverb adds space and depth to your sounds. Automating reverb can help you create dramatic effects. Follow these steps:
- Right-click the reverb wet level knob.
- Select Create automation clip.
- Draw your desired automation curve.
For instance, you can increase reverb during a breakdown. This makes the sound feel distant and dreamy. Then reduce it sharply when the beat drops back in. This creates a sense of space and impact.
Experiment with different automation shapes and timings. This will help you find the perfect balance for your track.
Credit: www.youtube.com
Tips And Tricks
Automation in FL Studio is a powerful tool for music producers. It allows you to control various parameters over time, adding movement and interest to your tracks. Here are some tips and tricks to help you get the most out of automation in FL Studio.
Creative Uses
Automation can turn a static sound into something dynamic. Here are a few creative ideas:
- Volume Automation: Create fade-ins and fade-outs for different parts of your track.
- Pan Automation: Move sounds from left to right to create a sense of space.
- Filter Automation: Add a filter sweep to build tension before a drop.
- Effect Automation: Turn effects on and off at specific points for dramatic changes.
Troubleshooting
Automation can sometimes behave in unexpected ways. Here are some common issues and solutions:
| Issue | Solution |
|---|---|
| Automation not working | Check if the automation clip is linked to the correct parameter. |
| Unexpected jumps | Make sure there are no unwanted points in your automation clip. |
| Lagging automation | Try reducing the buffer size in your audio settings. |
Remember to always save your project regularly. Automation can be complex and it’s easy to make mistakes.
Frequently Asked Questions
What Is Automation In Fl Studio?
Automation in FL Studio allows you to control parameters over time. This includes volume, panning, and effects. It enhances your music production by adding dynamic changes.
How Do You Use Automation Clips?
To use automation clips, right-click a parameter and select “Create Automation Clip. ” Edit the clip in the playlist. This controls the parameter over time.
Why Is Automation Important In Music Production?
Automation adds dynamics and variation to your tracks. It helps in creating professional-sounding music by precisely controlling effects and parameters.
Can Automation Improve Mix Quality?
Yes, automation can improve mix quality. It allows you to balance and adjust elements dynamically. This ensures a polished final product.
Conclusion
Automation in FL Studio offers great creative control and efficiency. It allows you to manipulate various parameters seamlessly. From volume to effects, everything becomes more dynamic. This tool enhances your music production workflow. You can focus more on creativity, less on repetitive tasks.

Embrace automation and elevate your music projects. Experiment and discover new possibilities. Happy music making!
{ “@context”: “https://schema.org”, “@type”: “FAQPage”, “mainEntity”: [ { “@type”: “Question”, “name”: “What is automation in FL Studio?”, “acceptedAnswer”: { “@type”: “Answer”, “text”: “Automation in FL Studio allows you to control parameters over time. This includes volume, panning, and effects. It enhances your music production by adding dynamic changes.” } } , { “@type”: “Question”, “name”: “How do you use automation clips?”, “acceptedAnswer”: { “@type”: “Answer”, “text”: “To use automation clips, right-click a parameter and select \”Create Automation Clip.\” Edit the clip in the playlist. This controls the parameter over time.” } } , { “@type”: “Question”, “name”: “Why is automation important in music production?”, “acceptedAnswer”: { “@type”: “Answer”, “text”: “Automation adds dynamics and variation to your tracks. It helps in creating professional-sounding music by precisely controlling effects and parameters.” } } , { “@type”: “Question”, “name”: “Can automation improve mix quality?”, “acceptedAnswer”: { “@type”: “Answer”, “text”: “Yes, automation can improve mix quality. It allows you to balance and adjust elements dynamically. This ensures a polished final product.” } } ] }As an Amazon Associate, Cleanestor earns from qualifying purchases at no additional cost to you.