FL Studio projects are saved in specific folders on your computer. Knowing where these files are stored can save you from headaches.
FL Studio, a popular music production software, organizes your projects efficiently. Whether you’re a beginner or a pro, understanding the file system is crucial. This knowledge helps you manage your projects better and ensures you never lose your hard work.
In this blog post, we will explore the default save locations. We will also discuss how to customize these paths to suit your workflow. By the end, you’ll have a clear understanding of where to find your FL Studio projects. Stay tuned to make your music production process smoother and more organized.

Credit: www.youtube.com
Locating Fl Studio Projects
FL Studio is a popular digital audio workstation (DAW) used by many music producers. Knowing where your FL Studio projects are saved is crucial. It helps you manage your files better and avoid losing important work. Let’s explore the default save location and how you can set up custom save paths.
Default Save Location
By default, FL Studio saves projects in a specific folder. This makes it easy to find your files. The default save location is usually:
C:\Users\[YourUsername]\Documents\Image-Line\FL Studio\ProjectsReplace [YourUsername] with your actual username. You can navigate to this folder using File Explorer. Here, you will find all your saved projects in one place.
Custom Save Paths
Sometimes, you may want to save your projects in a different location. This can help in organizing your work better. To set up a custom save path, follow these steps:
- Open FL Studio.
- Go to Options in the top menu.
- Select File Settings.
- In the Browser extra search folders section, click the folder icon.
- Choose your desired folder or create a new one.
- Click OK to save your settings.
Now, when you save a project, you can navigate to your custom folder. This method helps in keeping your projects organized and easy to access.
| Save Method | Location |
|---|---|
| Default Save | C:\Users\[YourUsername]\Documents\Image-Line\FL Studio\Projects |
| Custom Save | Your chosen folder |
Finding Projects On Windows
Finding your FL Studio projects on Windows can be essential for efficient music production. Knowing where your projects are saved helps in organizing and accessing them quickly. This section will guide you through the default folder paths and searching methods.
Default Folder Path
By default, FL Studio saves projects in a specific folder. This folder is usually located in the following path:
C:\Users\[YourUsername]\Documents\Image-Line\FL Studio\ProjectsReplace [YourUsername] with your actual Windows username. This folder contains all your FL Studio project files.
Searching For Projects
If you cannot find your projects in the default folder, use the search function:
- Press Windows Key + S to open the search bar.
- Type .flp to search for FL Studio project files.
- Press Enter to start the search.
This will display all FL Studio projects saved on your computer. You can then navigate to the file location and organize your projects.
Finding Projects On Mac
Working on a Mac and want to find your FL Studio projects? This section will guide you through the process. You will learn where projects are saved by default and how to locate them using Spotlight Search.
Default Folder Path
FL Studio saves projects in a specific default folder on your Mac. Knowing this path is key to finding your files quickly. Here is the default folder path:
/Users/YourUsername/Documents/Image-Line/FL Studio/ProjectsReplace YourUsername with your actual username. This is where you will find all your saved projects. If you have changed the default save location, check the settings in FL Studio.
Spotlight Search Tips
Spotlight Search can be a powerful tool for finding your FL Studio projects. Here are some tips to use it effectively:
- Press Command + Space to open Spotlight Search.
- Type the project name or part of it.
- Include the file extension .flp to narrow the search results.
Spotlight will show you a list of results. Look for the file with the .flp extension. Click on it to open the project in FL Studio. If you can’t find your project, try searching for the folder name FL Studio instead.
Credit: www.youtube.com
Using Fl Studio Browser
The FL Studio Browser is a powerful tool for managing your projects. It allows you to quickly access, organize, and work with your project files. This section will guide you on how to use the FL Studio Browser effectively.
Accessing Project Files
To access your project files, open the FL Studio Browser. You can find it on the left side of the FL Studio interface. Look for the Browser icon. Click on it to expand the panel.
Inside the Browser, navigate to the Projects tab. Here, you will see all your saved FL Studio projects. Click on any project file to open it in the main workspace.
Organizing Projects
Organizing your projects is crucial for workflow efficiency. In the Browser, you can create folders to categorize your projects. Right-click on the Projects tab and select Create New Folder.
Drag and drop your project files into these folders. This helps keep your workspace tidy and makes it easier to find specific projects. You can rename folders by right-clicking and selecting Rename.
For even better organization, use descriptive names for your projects and folders. This way, you can quickly identify the content of each file. Consider creating folders for different genres or project stages.
| Folder Name | Description |
|---|---|
| Completed Tracks | Projects that are fully finished |
| In Progress | Projects you are currently working on |
| Ideas | Rough drafts and new ideas |
Keeping your projects organized will save you time and improve your workflow. The FL Studio Browser makes it easy to manage your files. Take advantage of these features to streamline your music production process.
Backing Up Your Projects
Backing up your FL Studio projects is crucial. It ensures you never lose your hard work. Imagine spending hours on a track. Then, losing it all due to a system crash. Frustrating, right? To avoid this, you must back up your projects regularly. Here’s how you can do it.
Manual Backups
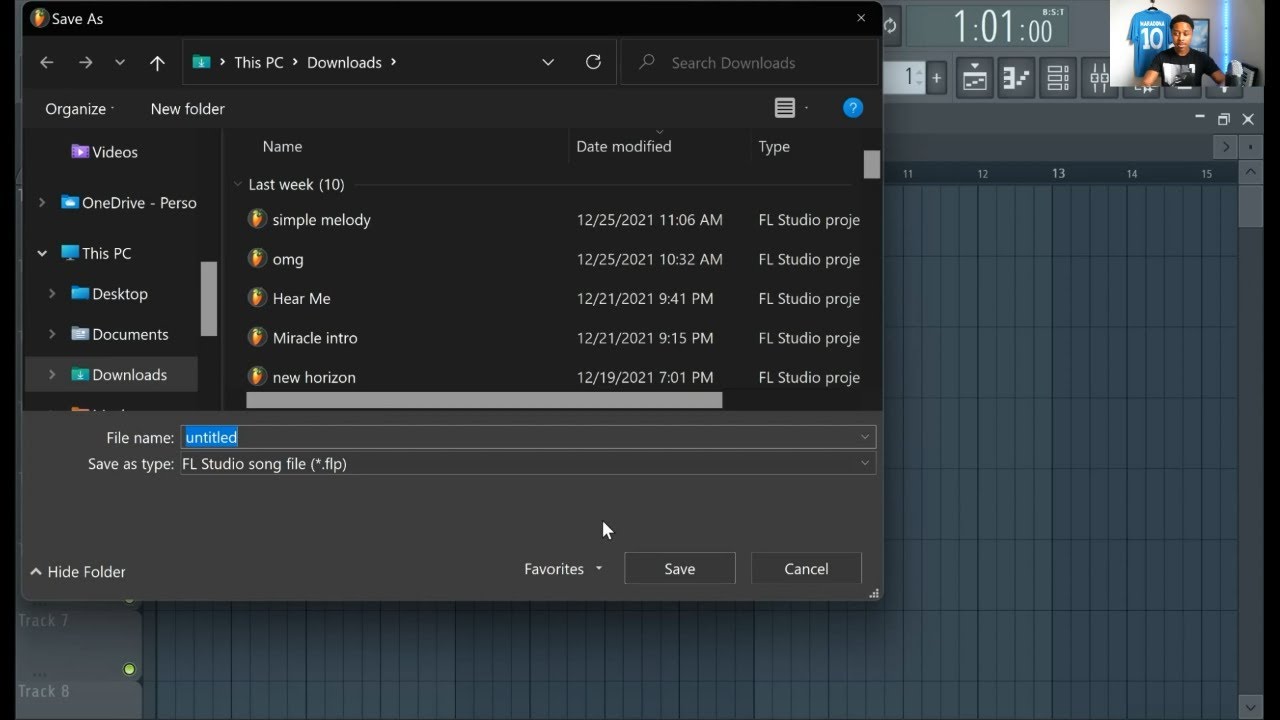
Manual backups are simple. They involve copying your project files to another location. Follow these steps:
- Open FL Studio.
- Go to the File menu.
- Select Save As.
- Choose a different folder or drive to save your project.
Repeat this process after every major change. This ensures you always have the latest version backed up. You can use an external hard drive or a USB stick. This provides an extra layer of security.
Using Cloud Storage
Cloud storage is another excellent option. It allows you to access your projects from anywhere. Here’s how to set it up:
- Create an account on a cloud storage service (e.g., Google Drive, Dropbox).
- Install the cloud service app on your computer.
- Save your FL Studio projects in the cloud folder.
This method has many benefits. Your projects are safe from hardware failures. You can also collaborate with others easily. Ensure you have a stable internet connection. This helps with smooth uploads and downloads.

Credit: itsgratuitous.com
Restoring Lost Projects
Restoring lost projects in FL Studio can be a challenging task. Many users have faced the frustration of losing hours of work. Fortunately, there are ways to recover lost projects and ensure it doesn’t happen again.
Recovery Options
FL Studio offers several recovery options. First, check the “Backup” folder. FL Studio automatically saves backup copies of your projects. These backups are usually located in the “Backup” folder within the FL Studio installation directory. You can find the most recent backups there.
Another option is the “Auto Save” feature. FL Studio periodically saves your work automatically. You can access these auto-saved files by navigating to the “Auto Save” folder. This folder is typically located in the FL Studio user data directory.
If these methods don’t work, consider using file recovery software. These tools can scan your hard drive for lost or deleted files. They may help you recover your lost FL Studio projects.
Preventing Future Loss
Preventing future loss of projects is crucial. First, always save your work regularly. Make it a habit to save your project after every significant change.
Enable the “Auto Save” feature in FL Studio. This feature can save your work at regular intervals. It reduces the risk of losing large amounts of work.
Consider using cloud storage services. Services like Google Drive or Dropbox can save your projects online. This way, you can access them from any device, and they are safe from hardware failures.
Finally, maintain a disciplined backup routine. Regularly copy your project files to an external drive. This adds an extra layer of security for your valuable work.
Managing Project Versions
Keeping track of different versions of your FL Studio projects is vital. It helps you stay organized and ensures you can revert to earlier versions if needed. This practice also allows you to experiment without fear of losing progress. Let’s dive into how you can manage project versions effectively.
Saving Multiple Versions
Saving multiple versions of your projects provides a safety net. Each time you make significant changes, save a new version. This way, you can always go back to a previous state. For instance, save versions as “ProjectName_v1,” “ProjectName_v2,” and so on. This method helps you track progress and revert if something goes wrong.
Naming Conventions
Consistent naming conventions are crucial for managing project versions. Using clear and descriptive names makes it easier to find specific versions later. Include details like dates or specific changes in the name. For example, “ProjectName_v2_BassUpdate” or “ProjectName_v3_2023-10-15.” This practice saves time and avoids confusion.
Sharing Your Projects
Sharing your FL Studio projects can be exciting. It’s a chance to showcase your work, collaborate with others, or get feedback. To ensure your project is shared correctly, it’s essential to prepare your files properly and know the best platforms for sharing.
Preparing Files For Sharing
Start by organizing your project files. Make sure all necessary audio files, samples, and plugins are included. Use FL Studio’s “Export Project Data Files” feature to gather everything in one folder. This ensures that anyone who opens your project has all the required files.
Next, compress your project folder into a ZIP file. This makes it easier to share and helps keep everything organized. Naming your ZIP file appropriately can also help the recipient understand what the project is about.
Sharing On Different Platforms
There are several platforms where you can share your FL Studio projects. One popular option is Google Drive. Upload your ZIP file to your Google Drive and share the link with your collaborators or friends.
Another option is Dropbox. Similar to Google Drive, Dropbox allows you to upload your project folder and share the link easily. Both Google Drive and Dropbox are user-friendly and widely used.
You can also share your projects on music forums or social media. Many online communities welcome project file sharing for feedback and collaboration. Be sure to check the guidelines of each platform to ensure proper sharing etiquette.
Sharing your FL Studio projects can help you connect with other music creators. It can also provide valuable feedback to improve your work.
Frequently Asked Questions
Where Are Fl Studio Projects Stored?
FL Studio projects are typically stored in the “FL Studio Projects” folder. This folder is located within the “Documents” directory on your computer.
Can I Change The Fl Studio Project Save Location?
Yes, you can change the save location. Go to “Options”, then “File Settings”, and set a new project folder path.
How To Back Up Fl Studio Projects?
To back up your projects, manually copy the project files to an external drive or cloud storage.
Do Fl Studio Projects Auto-save?
FL Studio has an auto-save feature. You can enable it in “Options”, then “General Settings”, to save projects automatically.
Conclusion
FL Studio projects are saved in the default project folder. You can change this location. It’s important to know where your projects are stored. This helps you find and organize your files easily. Regular backups also protect your work. Now, you can create music with peace of mind.

Happy music-making!
{ “@context”: “https://schema.org”, “@type”: “FAQPage”, “mainEntity”: [ { “@type”: “Question”, “name”: “Where are FL Studio projects stored?”, “acceptedAnswer”: { “@type”: “Answer”, “text”: “FL Studio projects are typically stored in the \”FL Studio Projects\” folder. This folder is located within the \”Documents\” directory on your computer.” } } , { “@type”: “Question”, “name”: “Can I change the FL Studio project save location?”, “acceptedAnswer”: { “@type”: “Answer”, “text”: “Yes, you can change the save location. Go to \”Options\”, then \”File Settings\”, and set a new project folder path.” } } , { “@type”: “Question”, “name”: “How to back up FL Studio projects?”, “acceptedAnswer”: { “@type”: “Answer”, “text”: “To back up your projects, manually copy the project files to an external drive or cloud storage.” } } , { “@type”: “Question”, “name”: “Do FL Studio projects auto-save?”, “acceptedAnswer”: { “@type”: “Answer”, “text”: “FL Studio has an auto-save feature. You can enable it in \”Options\”, then \”General Settings\”, to save projects automatically.” } } ] }As an Amazon Associate, Cleanestor earns from qualifying purchases at no additional cost to you.