
FL Studio can sometimes produce distorted sound. This issue frustrates many users.
Distortion happens for various reasons. It might be due to incorrect settings, faulty plugins, or hardware limitations. Understanding why your music sounds distorted is crucial for creating high-quality tracks. In this blog post, we’ll explore common causes of distortion in FL Studio.
We’ll also provide tips to fix these problems. Whether you’re a beginner or an experienced user, this guide will help you achieve clear, crisp sound in your projects. Let’s dive in and solve the mystery of distorted audio in FL Studio.
Credit: knowledge.beatsurfing.com
Common Causes
FL Studio is a powerful tool for music production. But sometimes, users face distorted sound. Understanding the common causes can help solve these issues. Let’s dive into some frequent problems.
Buffer Size Issues
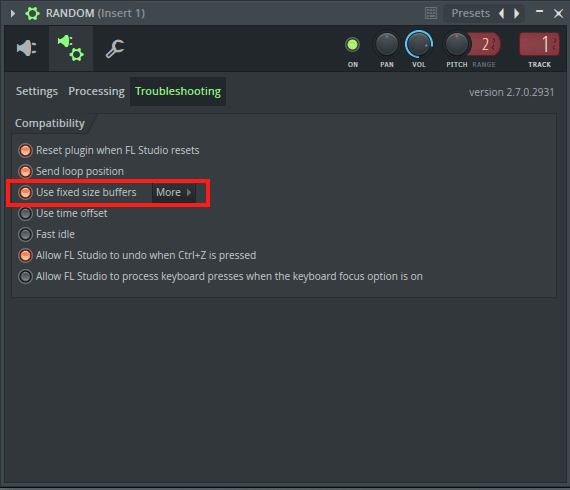
Buffer size impacts audio processing. A small buffer size can cause distortion. It happens because the computer cannot process audio fast enough. Increasing the buffer size can help. Go to the audio settings in FL Studio. Adjust the buffer size until the sound improves.
High Cpu Usage
High CPU usage can lead to distorted sound in FL Studio. This occurs when your computer is overloaded. Too many plugins or instruments can strain the CPU. Try reducing the number of active plugins. Close any unnecessary programs running in the background. This can free up CPU resources and improve sound quality.
Audio Interface Problems
Audio interface problems can cause FL Studio to sound distorted. The audio interface is crucial. It connects your computer to your audio hardware. Issues with it can lead to poor sound quality. Let’s explore some common audio interface problems.
Driver Conflicts
Driver conflicts are a common issue. They occur when multiple drivers clash. This can cause distorted sound. Ensure you have the latest drivers. Update your audio interface drivers regularly. This can help avoid conflicts. Check the manufacturer’s website for updates.
Connection Errors
Loose or faulty connections can also cause problems. Ensure all cables are secure. Check for any damage. Replace any faulty cables. Use high-quality cables to ensure good connections. A stable connection is key for clear audio.
Sample Rate Mismatch
One common issue that many FL Studio users encounter is distorted sound. A frequent cause of this problem is a sample rate mismatch. The sample rate defines how many samples per second the audio signal has. If the sample rate settings are incorrect, it can lead to distorted audio. Let’s explore this further by looking at project settings and audio device settings.
Project Settings
The project settings in FL Studio play a crucial role in sound quality. To ensure your project runs smoothly, check the sample rate in your project settings. Set it to match the sample rate of your audio interface. This step helps in preventing any mismatches that can cause distortion. Common sample rates include 44.1 kHz, 48 kHz, and 96 kHz.
To adjust this, go to the project settings menu. Find the sample rate option. Make sure it aligns with your audio device’s sample rate. This alignment is essential for clear and clean sound.
Audio Device Settings
Your audio device settings also impact sound quality. The sample rate in your audio device settings should match the project’s sample rate. Open the audio settings in FL Studio. Look for the section that lists your audio device. Check the sample rate setting here.
If you notice a mismatch, adjust it to match your project’s sample rate. This synchronization is vital for avoiding distortion. Remember to apply the changes and restart FL Studio. This ensures the new settings take effect and improve your sound quality.

Credit: www.youtube.com
Plugin Overload
Plugin overload is a common issue in FL Studio. Too many plugins can overwhelm the software. This leads to distorted sound. Understanding the causes helps to manage it better.
Excessive Effects
Using too many effects can strain FL Studio. Each effect plugin uses CPU power. Excessive effects can overload the system. This results in distorted audio output.
| Effect Type | CPU Usage |
|---|---|
| Reverb | High |
| Delay | Medium |
| EQ | Low |
To avoid distortion, use fewer effects. Adjust the settings to reduce CPU usage. Combine similar effects to lessen the load. This can improve sound quality.
Incompatible Plugins
Incompatible plugins can also cause distortion. Some plugins do not work well with FL Studio. They might not be optimized for the software. This results in poor performance and sound issues.
- Outdated Plugins
- Unsupported Formats
- Conflicting Plugins
Ensure all plugins are updated. Check for compatibility with FL Studio. Avoid using unsupported formats. Try to use plugins from trusted sources. This helps maintain smooth audio production.
By managing plugin overload, you can achieve better sound quality. Keep your system optimized for the best results.
Faulty Cables
Faulty Cables can be a major cause of distorted sound in FL Studio. If your audio sounds off, check your cables first. This simple step can save a lot of time and frustration.
Worn Out Cables
Over time, cables wear out. They bend and twist, causing internal damage. Even a tiny break inside can disrupt the signal. This results in distorted sound. Inspect your cables regularly. Look for signs of wear, such as frayed ends or exposed wires. Replace any damaged cables immediately.
Loose Connections
Loose connections are another common issue. A cable that is not plugged in securely can cause sound problems. Make sure all connections are tight. Check both ends of the cable. A loose connection can cause intermittent sound issues, which can be very frustrating.
| Issue | Solution |
|---|---|
| Worn Out Cables | Replace with new cables |
| Loose Connections | Tighten all connections |
By addressing these cable issues, you can improve your sound quality in FL Studio. Regular checks and maintenance go a long way.
Clipping And Peaking
Have you ever wondered why your music in FL Studio sounds distorted? One common reason is clipping and peaking. These occur when the audio signal exceeds the maximum limit that your software or hardware can handle. The result is an unpleasant, harsh sound. Understanding the causes can help you avoid these issues.
Volume Levels
Maintaining proper volume levels is crucial. If any individual track in your project is too loud, it can cause clipping. Reducing the volume of each track to a safe level is essential.
- Check the levels of each track.
- Ensure they do not exceed 0 dB.
- Use limiters to control peaks.
By keeping an eye on your volume levels, you can prevent distortion and ensure a cleaner sound.
Master Channel Issues
The master channel is the final output of your mix. If the master channel is clipping, the entire mix will sound distorted.
To avoid this, follow these steps:
- Check the master channel meter.
- Ensure it does not go into the red zone.
- Use a limiter or compressor on the master channel.
These steps can help keep your master channel clean and free from clipping.
| Problem | Solution |
|---|---|
| Track volume too high | Lower track volume |
| Master channel clipping | Use a limiter |
Understanding and managing clipping and peaking can significantly improve your music production in FL Studio. Keeping track of volume levels and addressing master channel issues are key steps to achieving a clear, professional sound.
Latency Problems
Many users experience sound distortion in FL Studio due to latency problems. Latency is the delay between playing a sound and hearing it. Several factors contribute to this issue, including ASIO settings and driver latency. Understanding these factors can help you reduce distortion and improve your music production.
Asio Settings
ASIO (Audio Stream Input/Output) settings play a crucial role in managing latency. These settings help control how your computer processes audio signals. Adjusting the buffer size in your ASIO settings can significantly impact latency. A smaller buffer size reduces latency but increases the load on your CPU. Conversely, a larger buffer size eases the CPU load but increases latency.
To adjust ASIO settings in FL Studio:
- Open FL Studio.
- Go to Options.
- Select Audio Settings.
- Choose your ASIO driver.
- Adjust the buffer size.
Experiment with different buffer sizes to find the optimal balance for your setup. Keep in mind, a setting that works for one project might not work for another.
Driver Latency
Driver latency is another critical factor that can cause distortion. The audio driver you use can affect how quickly audio is processed. ASIO drivers are generally preferred for their low latency. If you experience distortion, ensure you are using the latest ASIO driver for your sound card.
Here is a quick comparison of common audio drivers:
| Driver Type | Latency | Performance |
|---|---|---|
| ASIO | Low | High |
| WASAPI | Medium | Moderate |
| DirectSound | High | Low |
Switch to an ASIO driver if you are not already using one. This change can drastically reduce latency and improve sound quality. Always keep your drivers up to date for the best performance.

Credit: shop.output.com
System Configuration
Sound distortion in FL Studio can often be traced back to system configuration issues. Ensuring your system is well-maintained is crucial for smooth audio production. Let’s explore some key factors that might be causing these problems.
Outdated Drivers
One common issue is outdated drivers. Drivers are essential for your hardware to communicate with FL Studio. If your sound card drivers are old, it can lead to audio distortion. Check your drivers regularly. Update them to the latest version provided by the manufacturer.
Insufficient Ram
Insufficient RAM can also cause sound distortion. FL Studio needs enough memory to process audio files. If your system runs low on RAM, it struggles to keep up. This results in distorted sound. Make sure your system meets the minimum RAM requirements for FL Studio. Consider upgrading your RAM for better performance.
Frequently Asked Questions
Why Does Fl Studio Sound Distorted?
FL Studio can sound distorted due to high CPU usage, incorrect audio settings, or software conflicts. Lowering buffer size or updating drivers may help.
How Can I Fix Distortion In Fl Studio?
To fix distortion, adjust buffer size, update audio drivers, or reduce CPU load by closing unused plugins and applications.
Why Is My Fl Studio Audio Crackling?
Audio crackling in FL Studio is often caused by low buffer size, outdated drivers, or insufficient CPU power. Adjust settings to resolve it.
What Causes Clipping In Fl Studio?
Clipping occurs when audio levels exceed the maximum limit. Lowering volume levels or using a limiter plugin can prevent clipping.
Conclusion
Distorted sound in FL Studio can stem from various issues. Check your audio settings first. Ensure your buffer size is appropriate. Too small a buffer can cause distortion. Verify your plugins are up-to-date. Outdated plugins may cause problems. Also, check your CPU usage.

High CPU usage can lead to audio issues. Regularly update your FL Studio software. Updates often fix bugs and improve performance. By taking these steps, you can enjoy clear, high-quality sound in FL Studio. Happy music making!
{ “@context”: “https://schema.org”, “@type”: “FAQPage”, “mainEntity”: [ { “@type”: “Question”, “name”: “Why does FL Studio sound distorted?”, “acceptedAnswer”: { “@type”: “Answer”, “text”: “FL Studio can sound distorted due to high CPU usage, incorrect audio settings, or software conflicts. Lowering buffer size or updating drivers may help.” } } , { “@type”: “Question”, “name”: “How can I fix distortion in FL Studio?”, “acceptedAnswer”: { “@type”: “Answer”, “text”: “To fix distortion, adjust buffer size, update audio drivers, or reduce CPU load by closing unused plugins and applications.” } } , { “@type”: “Question”, “name”: “Why is my FL Studio audio crackling?”, “acceptedAnswer”: { “@type”: “Answer”, “text”: “Audio crackling in FL Studio is often caused by low buffer size, outdated drivers, or insufficient CPU power. Adjust settings to resolve it.” } } , { “@type”: “Question”, “name”: “What causes clipping in FL Studio?”, “acceptedAnswer”: { “@type”: “Answer”, “text”: “Clipping occurs when audio levels exceed the maximum limit. Lowering volume levels or using a limiter plugin can prevent clipping.” } } ] }As an Amazon Associate, Cleanestor earns from qualifying purchases at no additional cost to you.