Yes, you can plug your guitar into GarageBand. This setup lets you record and edit your guitar sounds directly on your computer.
GarageBand is a powerful tool for musicians. It offers a variety of features to help you create music. Connecting your guitar to GarageBand can open up a world of possibilities. Whether you’re a beginner or a pro, this software has something for you.
You can experiment with different sounds, effects, and recording techniques. All you need is the right equipment and a bit of know-how. In this blog post, we will explore how to connect your guitar to GarageBand. We will also discuss some tips and tricks to get the best sound from your setup. Let’s get started!
Introduction To Garageband
Are you a guitar enthusiast looking to record and create music on your computer? GarageBand is an excellent choice for beginners and professionals alike. It is a powerful digital audio workstation (DAW) that allows you to produce high-quality tracks. Before diving into the specifics of plugging your guitar into GarageBand, let’s first understand what GarageBand is and its key features.
What Is Garageband?
GarageBand is a digital audio workstation developed by Apple. It comes pre-installed on macOS and iOS devices, making it accessible to a wide audience. This software allows users to create music or podcasts with ease.
It offers a simple and user-friendly interface. Even beginners can quickly get started with their music projects. Whether you play guitar, keyboard, or drums, GarageBand supports a variety of instruments.
Key Features
GarageBand is packed with features that cater to both novice and experienced musicians. Below are some of its key features:
- Virtual Instruments: GarageBand provides a wide range of virtual instruments, including guitars, keyboards, and drums.
- Loops and Samples: The software includes an extensive library of loops and samples that you can use in your projects.
- Multitrack Recording: Record multiple tracks simultaneously, which is great for creating layered music.
- Audio Effects: Add effects like reverb, echo, and distortion to enhance your sound.
- Editing Tools: Edit your recordings with precision using the built-in editing tools.
- Drummer Feature: Create realistic drum tracks with the Drummer feature, which adapts to your music style.
- Integration with Other Apple Apps: Easily integrate GarageBand with other Apple apps like Logic Pro X for more advanced features.
These features make GarageBand an excellent tool for music production. Whether you are recording a simple guitar riff or a full band, GarageBand has you covered.

Credit: www.youtube.com
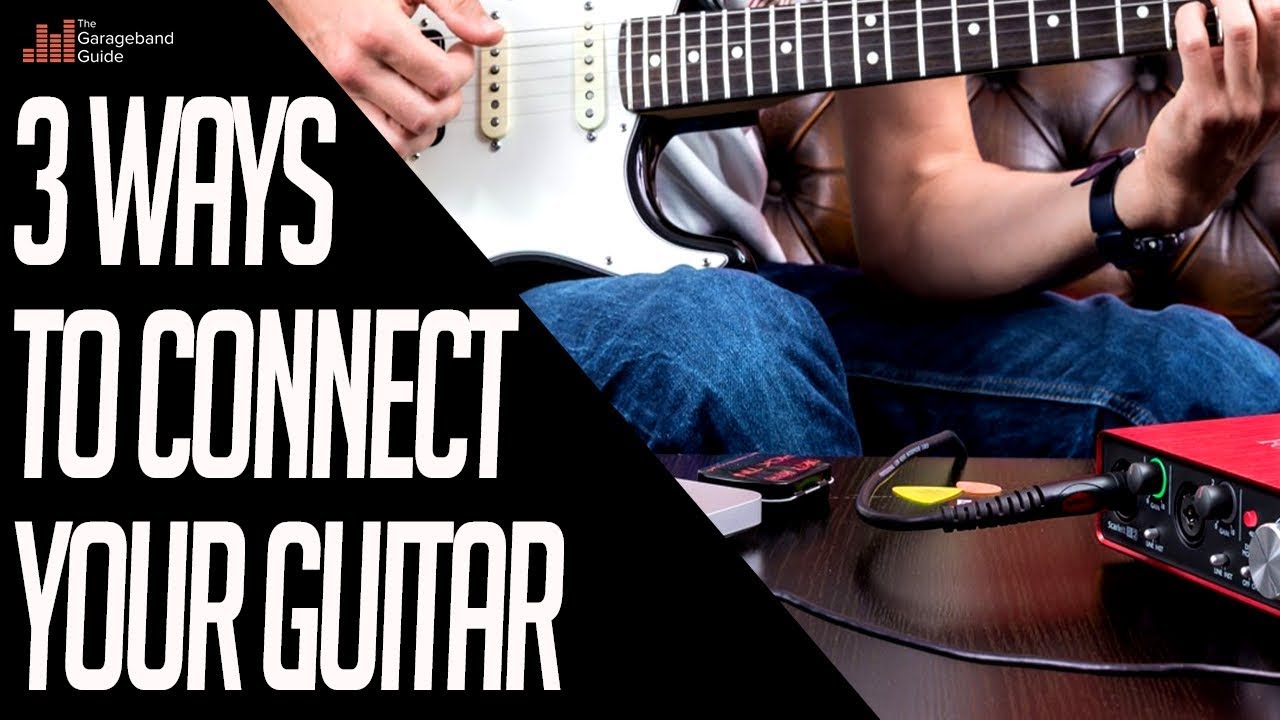
Connecting Your Guitar
Plugging your guitar into Garageband is possible. Use an audio interface to connect your guitar to your computer. This allows you to record and edit your music easily.
Connecting your guitar to GarageBand opens up a world of creative possibilities. Whether you are a beginner or an experienced musician, GarageBand offers many tools to enhance your sound. This guide will help you get started with ease.
Necessary Equipment
Before you connect your guitar, gather a few essential items. You will need a guitar, an audio interface, and a guitar cable. An audio interface converts your guitar’s analog signal into a digital one. This is crucial for GarageBand to process your sound. Ensure your audio interface is compatible with your computer.
Step-by-step Guide
Follow these steps to connect your guitar to GarageBand.
1. Connect your guitar to the audio interface using the guitar cable.
2. Plug the audio interface into your computer’s USB port.
3. Open GarageBand on your computer.
4. Create a new project by selecting “New Project” from the File menu.
5. Choose the “Guitar” option from the available instruments.
6. Select your audio interface as the input source in GarageBand’s preferences.
Now, strum your guitar and check the sound levels. Adjust the input gain on the audio interface to avoid distortion.
You are now ready to record and explore the features GarageBand offers. Enjoy creating music!
Choosing The Right Interface
Choosing the right interface is key to plugging your guitar into Garageband. The interface acts as a bridge between your guitar and the software. This ensures your guitar’s sound is captured accurately and with high quality. Let’s explore the various options available.
Audio Interface Options
There are several audio interface options to consider. Each offers unique features to suit different needs. Here’s a breakdown of the most popular types:
| Interface Type | Features | Best For |
|---|---|---|
| USB Audio Interface | Easy to use, portable, affordable | Beginners, Home Studio |
| FireWire Audio Interface | Low latency, high speed | Professional Studio |
| Thunderbolt Audio Interface | Ultra-fast, high performance | High-end Professional Studio |
Usb Vs. Analog
Choosing between USB and analog interfaces depends on your needs. Here are the key differences:
- USB Interfaces: These are digital, easy to use, and connect directly to your computer. They are ideal for home studios and beginners.
- Analog Interfaces: These offer a more traditional approach. You may need additional gear such as preamps. Best for those seeking a classic sound.
Understanding the differences between USB and analog can help you make an informed decision. This ensures you get the best sound quality for your recordings.
Setting Up Garageband
Setting up GarageBand for recording your guitar is simple and fun. With a few steps, you can start creating music in no time. This guide will walk you through the setup process. Follow these steps to get started.
Configuring Preferences
First, open GarageBand on your Mac. Click on the ‘GarageBand’ menu. Select ‘Preferences’ to open the settings window. In the ‘Audio/MIDI’ tab, choose your audio interface. Make sure your guitar is connected to the interface. Set the input and output devices to your interface. Adjust the input volume to an appropriate level.
Creating A New Project
Click on ‘File’ and select ‘New Project’ to start a new session. Choose ‘Empty Project’ and click ‘Choose’. In the new window, select ‘Audio’ and click ‘Create’. Name your project and choose a location to save it. Now your project is ready for recording.
Click on the ‘+’ button to add a new track. Choose ‘Audio’ and select ‘Input 1’ or ‘Input 2’, depending on your setup. Make sure the ‘Monitoring’ option is enabled. This allows you to hear your guitar through the headphones. Now you are set to record and create music.
Recording Your Guitar
Are you curious about how to record your guitar using GarageBand? This digital audio workstation (DAW) is perfect for guitar enthusiasts. It allows you to capture your guitar’s sound in high quality. This guide will help you get started with recording your guitar in GarageBand.
Adjusting Input Levels
Before you begin recording, it’s essential to adjust the input levels. This ensures your guitar sounds clear and undistorted. Follow these steps:
- Connect your guitar to your computer using an audio interface.
- Open GarageBand and create a new project.
- Select the track you want to record on.
- Click on the Smart Controls button.
- Adjust the input volume slider until the level is optimal.
Make sure the levels do not hit the red zone. This prevents clipping and distortion. A good level is when your signal peaks around -6dB.
Using Click Tracks
A click track is a metronome that helps you stay in time. It is useful for maintaining a consistent tempo.
To use a click track in GarageBand, follow these steps:
- Open your project and click on the Metronome button.
- Adjust the tempo by clicking on the tempo display.
- Enter your desired BPM (beats per minute).
Playing along with a click track ensures your recording is in sync. It also makes editing and layering other instruments easier.
Using Effects And Amps
Using effects and amps in GarageBand can transform your guitar sound. You can achieve tones from mellow blues to heavy metal. Dive into the endless possibilities with GarageBand’s built-in effects and third-party plugins.
Built-in Effects
GarageBand comes with a variety of built-in effects. These include reverb, delay, and distortion. You can easily add these effects to your guitar track. Here’s a simple way to do it:
- Open GarageBand and create a new project.
- Choose the “Guitar” option.
- Select the track and click on the “Smart Controls” button.
- Choose from the list of built-in effects and adjust the settings.
You can combine multiple effects for a unique sound. The process is intuitive and beginner-friendly. Experimenting with these effects can help you find your perfect tone.
Third-party Plugins
For more advanced options, third-party plugins are a great choice. These plugins offer a wider range of effects and amps. Popular plugins include AmpliTube, Guitar Rig, and Bias FX. To use a third-party plugin:
- Download and install the plugin on your computer.
- Open GarageBand and create a new project.
- Go to the “Plugins” section in the “Smart Controls” window.
- Select the third-party plugin from the list.
Many of these plugins offer presets, making it easy to get started. Adjusting the settings can help you craft your own signature sound. With third-party plugins, the possibilities are endless.
Troubleshooting Common Issues
Plugging your guitar into Garageband can be simple. But sometimes, you may face common issues. Let’s address some of these problems. This will help you make music smoothly.
Latency Problems
Latency is the delay between playing a note and hearing the sound. This can be frustrating. Here are steps to fix latency:
- Open Garageband settings.
- Go to “Audio/MIDI” tab.
- Select “Reduce Latency When Monitoring”.
- Lower the “Buffer Size”.
This should reduce the delay. If the problem persists, check your computer’s performance. Closing other applications can also help.
No Sound Output
If there is no sound output, follow these steps:
- Check your guitar cable connection.
- Ensure the input source is correct in Garageband.
- Go to “Preferences” and select “Audio/MIDI”.
- Make sure the right device is selected under “Input Device”.
Sometimes, the issue is with the volume settings. Ensure the volume is not muted.
| Check | Details |
|---|---|
| Connection | Ensure cable is securely connected. |
| Input Source | Select the correct input source in settings. |
| Volume | Ensure volume is not muted or too low. |
Following these steps should resolve most issues with no sound output.
Credit: www.youtube.com
Tips For Better Sound
Plugging your guitar into Garageband can be a game-changer for musicians. But getting the best sound can be tricky. Here are some tips to help you optimize your tone and mix your tracks better.
Optimizing Tone
Start with a clean signal. Check your cables and connections. Use high-quality cables to avoid unwanted noise. Adjust your guitar’s volume and tone knobs before recording. Experiment with Garageband’s built-in amp models. Find the one that suits your music style. You can also tweak the settings to match your preferences.
Use pedals wisely. Garageband offers virtual pedals. These can help shape your sound. Try different combinations to see what works best. Keep it simple at first. Too many effects can muddy your sound. Record short sections to test your settings. Listen back and make adjustments as needed.
Mixing Techniques
Balance is key. Start by setting the levels of each track. Make sure nothing is too loud or too quiet. Use panning to create space in your mix. Place different instruments in different parts of the stereo field. This will make your mix sound more dynamic.
Add effects sparingly. Reverb and delay can add depth. But too much can overwhelm your mix. Use EQ to carve out space for each instrument. Remove frequencies that clash with each other. This will make each part of your mix clearer.
Finally, listen on different devices. Check your mix on headphones, speakers, and even your phone. This helps ensure your mix sounds good everywhere. Keep practicing and experimenting. Your skills will improve over time.
Frequently Asked Questions
Can I Connect My Guitar To Garageband?
Yes, you can connect your guitar to GarageBand. Use an audio interface or a USB guitar cable.
What Equipment Do I Need?
You need a guitar, an audio interface, and a compatible cable. GarageBand will recognize the input.
How Do I Record My Guitar In Garageband?
Connect your guitar, select the input source, and create a new audio track. Hit record and play.
Can I Use Effects In Garageband?
Yes, GarageBand offers various built-in effects and amp simulations. Customize your sound using these options.
Conclusion
Plugging your guitar into Garageband is simple and rewarding. With the right gear, you can create amazing music at home. Follow the steps, and you’ll be recording in no time. Experiment with different sounds and effects. Enjoy the process and let your creativity shine.

Garageband offers many tools for musicians. So, grab your guitar, connect it, and start making music today. Happy recording!
As an Amazon Associate, Cleanestor earns from qualifying purchases at no additional cost to you.