Yes, you can hydro-dip an electric guitar to customize its design. The process involves dipping the guitar into a water-soluble film with your chosen pattern.
Customizing your electric guitar can give it a fresh, unique look that reflects your personal style. Hydro-dipping, also known as water transfer printing, allows for an array of creative designs ranging from camouflage to psychedelic patterns. It’s a trendy DIY method loved by guitar enthusiasts eager to stand out visually.
Not only does it offer an aesthetic upgrade, but it’s also a fun project that adds a personalized touch to your instrument. Such customization techniques are popular among musicians who want their gear to make a visual statement almost as powerful as the music they play. Remember, while hydro-dipping is a cool way to customize, it requires precision and the right materials to achieve professional-looking results.
Introduction To Hydro-dipping And Electric Guitars
Introduction to Hydro-Dipping and Electric Guitars: Picture this – an electric guitar that captures the spotlight with its mesmerizing color patterns, turning each performance into a visual extravaganza. This fusion of art and music is made possible through the magic of hydro-dipping, a technique that has been embraced by guitar enthusiasts looking to amplify their instrument’s aesthetics. Combining this unique customization process with the distinctive charm of electric guitars opens up a realm of possibilities for personalization, allowing musicians to not only sound unique but also look unique.
Overview Of Hydro-dipping Process
Hydro-dipping, also known as water transfer printing, is an innovative method to apply printed designs onto three-dimensional surfaces. This process involves the following steps:
- Preparation: The item is prepped by sanding, cleaning, and applying a base coat.
- Floating the Film: A polyvinyl alcohol film with the chosen pattern is laid on the surface of a water-filled tank.
- Activation: A chemical activator is sprayed on the film to dissolve it into a liquid ink and to make it stick to the object.
- Dipping: The guitar is carefully dipped into the tank, enveloping it with the film, which wraps around all contours.
- Rinsing: After dipping, the item is rinsed to remove any residue.
- Drying and Sealing: The item is dried and a clear top coat is applied to seal and protect the design.
The Art Of Customizing Electric Guitars
Electric guitars are not just musical instruments; they are canvases for expression. Customization extends beyond the technical tweaks and sonic modifications; it’s about etching the player’s personality onto the instrument. Hydro-dipping lends itself perfectly to this kind of personal expression due to its versatility in patterns and designs – delivering everything from psychedelic swirls to lifelike graphics. Musicians can select designs that resonate with their stage persona or music genre, creating guitars that are as unique as their sound.
Potential Benefits Of Hydro-dipping For Guitar Aesthetics
There’s more to hydro-dipping electric guitars than meets the eye. The benefits include:
- Incredible Versatility: An endless array of designs means endless possibilities to reflect a guitarist’s style or brand.
- Durability: Hydro-dipping not only enhances the guitar’s look but also adds a protective layer, defending against scratches and wear.
- Value Addition: A hydro-dipped guitar stands out in the crowd, potentially increasing the instrument’s value and desirability.
- Unique Identity: Custom designs guarantee that no two guitars are alike, giving each a distinct identity and story.

Credit: www.pinterest.com
Preparation For Hydro-dipping An Electric Guitar
Preparation for Hydro-Dipping an Electric Guitar is a critical step in the process of personalizing your instrument with this innovative technique. Known for its ability to apply intricate graphics and patterns onto three-dimensional objects, hydro-dipping has become popular among guitar enthusiasts seeking a unique look for their instruments. The following guide outlines essential steps to ensure your electric guitar is primed and ready for a stunning transformation.
Disassembling The Guitar
Before your electric guitar can embrace its new design, it needs to be fully disassembled. This is to protect the internal electronics and hardware from water exposure and to ensure a flawless application of the hydro-dip pattern. Start with:
- Removing the strings.
- Taking off the guitar’s neck, if possible.
- Unscrewing and removing all the hardware including tuners, bridge, pickups, and knobs.
- Carefully detaching the electronic components and wiring – a clear photo beforehand can help remember their placement.
Keep all the small parts and screws in a labeled container to avoid confusion during reassembly.
Preparing The Hydro-dipping Basin And Materials
The basin used for hydro-dipping should be large enough to fully immerize the guitar body without obstruction. In addition, you’ll need:
- A water temperature gauge to ensure the ideal conditions for the film to dissolve properly.
- Hydro-dipping film in the pattern of your choice rolled out and cut to size.
- A pair of scissors to trim the film.
- A film activator, which allows the pattern to transfer onto the primer.
- Protective gloves to keep your hands safe from the chemicals.
Fill the basin with warm water, adhering to the temperature suggested for your specific hydro-dip film.
Surface Preparation And Primer Application
Ensuring the guitar body is properly prepared is vital for the hydro-dipping process to be successful. Firstly, sand down the surface of the guitar to create a smooth canvas for primer adherence. Next:
- Clean the body with a degreaser to remove any residue or oils.
- Apply a primer to the guitar body. This should be appropriate for both the material of the guitar and the type of hydro-dipping film you’re using.
- Allow the primer to dry thoroughly according to product recommendations.
Once the primer is dry, the guitar is now prepped and ready for the creative plunge into hydro-dip design!
The Hydro-dipping Process Explained
Ever wondered how to add a splash of creativity to your electric guitar? Hydro-dipping, a technique that has taken the custom design world by storm, allows you to apply complex patterns to three-dimensional objects, including electric guitars. This innovative method requires precision and patience but results in a stunning, one-of-a-kind finish that stands out on stage. Dive in as we break down the hydro-dipping process into easy-to-follow steps and troubleshoot some common issues you might encounter along the way.
Creating The Hydro-dip Film Pattern
The journey to a beautifully crafted guitar begins with the hydro-dip film. Here’s how you can start:
- Select a design: Choose a hydro-dip film from various patterns that resonate with your style. These films are available in numerous graphics, ranging from camouflage to psychedelic art.
- Prepare the film: Cut the film to fit the size of your guitar body. Make sure the surface is clean, as impurities can affect the adhesion of the pattern.
- Activate the film: Using a specific activator spray, coat the film evenly. This dissolves the film into a liquid ink and activates the pattern for dipping.
The Technique: Dipping The Guitar Body
With the film ready, it’s time to dip your guitar:
- Prepare the guitar: Remove all hardware and electronics from the guitar body and sand it down for a smooth surface. Apply a base coat if required by the design.
- Dip the body: Once the film floats on the surface of the water, gently lay the guitar body onto the film. Make sure to do it at an angle to avoid air bubbles.
- Rinse and seal: After dipping, rinse off the residue with water. Once dry, apply a clear topcoat to protect the design and give it a glossy finish.
Troubleshooting Common Hydro-dipping Problems
Encountering issues? Let’s address some usual suspects:
| Problem | Solution |
|---|---|
| Air Bubbles: | Ensure a smooth dip and avoid rushing. If bubbles form, use a pin to pop them before the film adheres. |
| Creases: | Creases occur when the film overlaps. Keep the film flat and taut when laying it on the water surface. |
| Blurring: | This can result from excessive activator. Apply it evenly and avoid over-spraying to maintain the clarity of the pattern. |

Credit: m.youtube.com
Post-dipping Steps And Quality Assurance
After you’ve taken the plunge with hydro-dipping your electric guitar, some critical post-dipping steps must be followed to ensure a stellar and durable result. Quality assurance is non-negotiable as this is what separates a visually-stunning, long-lasting finish from one that’s prone to peeling or fading. Let’s dive into the processes of rinsing, drying, and applying protective layers, followed by stringent quality checks.
Rinsing And Drying The Guitar
Immediately after hydro-dipping, your guitar deserves a gentle yet thorough rinse. This step removes any residual activator and PVA (polyvinyl alcohol) film.
- Gently rinse the guitar with cool water to wash away all the excess materials.
- Be careful to avoid high pressure that could damage the freshly applied ink pattern.
- Once thoroughly rinsed, pat the guitar dry with a clean, soft cloth, avoiding any smearing.
- Allow the guitar to fully air dry for a minimum of 30 minutes to ensure all moisture has evaporated.
Applying Protective Clear Coats
With the guitar dry, it’s time to add protection to that beautiful finish. A clear coat serves as armor against the rigors of use and the elements.
- Begin by applying a thin, even clear coat to seal the design, providing a base for additional layers.
- Allow this base coat to cure for the time specified by the manufacturer—usually around 24 hours.
- Add two or three more coats, sanding lightly between each with fine-grit sandpaper to ensure a smooth finish.
- The final layer should be the heaviest, ensuring a glossy and protective seal, which must cure for an extended period, often up to a week.
Quality Control: Ensuring An Even Finish
Quality control is paramount to both the feel and longevity of your guitar’s custom design. An even finish signifies a job well done.
| Quality Check Area | Details to Inspect |
|---|---|
| Surface Smoothness | Check for bumps, dips, or texture inconsistencies. |
| Evenness of Coat | Verify that the clear coat is uniform without drips or streaks. |
| Finish Integrity | Ensure the surface is free of dust particles or fibers embedded in the finish. |
| Color Consistency | Look for any discoloration, cloudiness, or bubbling in the design. |
Any issues discovered during the quality check may require sanding back and reapplying clear coats. Only when the guitar passes all these checks can it be considered complete and ready for play.
In summary, achieving a flawless hydro-dipped electric guitar finish is all about attention to detail in the post-dipping phase. Rinsing and drying set the stage, while clear coat applications fortify the artwork. With rigorous quality control, this extraordinary personalization technique leads to guitars that are not just instruments, but visual masterpieces.
Reassembling And Final Touches
With your electric guitar now boasting a stunning hydro-dipped design, the journey from a visual concept to a playable piece of art nears completion. The final phase, ‘Reassembling and Final Touches’, restores your transformed instrument to its former glory, but with a new outer shell that resonates your personal style. Let’s walk through the essential steps to reassemble your guitar with precision, ensuring that the aesthetics don’t overshadow the instrument’s functionality and sound quality.
Reattaching Guitar Hardware
Reattaching the guitar hardware is a meticulous process, important not just for the look but also for the instrument’s performance. Start by carefully mounting the tuning machines, ensuring each one is aligned properly and secured tightly. The bridge, tailpiece, and pickups follow, each requiring a steady hand to re-screw to the body. Don’t rush; making sure every piece is back in its rightful place is vital for the guitar’s intonation and string alignment.
Ensuring Electronics And Playability
The heart of an electric guitar lies in its electronics. The reassembly process requires reconnecting wires to the pickups and output jack, as well as ensuring the potentiometers and switches function seamlessly. A multimeter helps confirm the electronics are operational, preventing any surprises during your next jam session. Additionally, the neck and action setup are critical to a guitar’s playability, meaning adjustments should be made to the truss rod, saddle height, and intonation for optimal string tension and pitch accuracy.
Final Assessment And Presentation Of The Finished Product
Reviewing the guitar in its fully assembled state is thrilling. Check every detail, from the smoothness of the hardware edges to the snug fit of each component. A successful hydro-dip project culminates in not only a visually appealing guitar but one that sounds exceptional too. Test the sound quality by playing a few chords and runs, listening for any buzz or electrical issues. Once satisfied, it’s time to step back and admire the spectacular fusion of art and music that is your newly hydro-dipped electric guitar – ready to take center stage and captivate audiences.
Do’s And Don’ts Of Hydro-dipping Electric Guitars
Unlocking the potential for a unique design on your electric guitar through hydro-dipping is an adventure into personalization. Whether you’re a musician looking for a signature look or a hobbyist wanting to spice up your instrument, mastering the Do’s and Don’ts of Hydro-Dipping Electric Guitars is crucial. Like any art, it requires a blend of creativity and caution, and ensuring you adhere to these guidelines can lead to spectacular results.
Best Practices For A Successful Hydro-dip
- Comprehensive Cleaning: Begin by thoroughly cleaning your guitar. Any debris or oils can mar the dipping process, leading to imperfections in the final design.
- Disassembly is Key: Remove all hardware, electronics, and strings. Hydro-dipping applies to the body alone, and protecting functional components is essential.
- Select Suitable Materials: Use paints and primers compatible with your guitar’s material and the hydrographic film for enduring results.
- Practice Makes Perfect: Test your technique on a similar surface before committing to your guitar body. This ensures familiarity with the behavior of the film in the water.
- Even Coating: Maintain a consistent spray angle and speed while applying the activator to avoid blotches or incomplete designs.
- Seal the Deal: Apply a clear-coat finish to protect your design from wear and tear, enhancing durability.
Common Pitfalls To Avoid In Hydro-dipping
- Ignoring Prep Work: Every step from sanding to base-coating is pivotal, skipping any can result in a compromised finish.
- Rushing the Process: Allow proper drying times between each step. Patience is a virtue that pays off in hydro-dipping.
- Inadequate Environment: High humidity or temperatures can affect the process. Aim for a controlled environment.
- Poor Film Placement: An incorrect placement can cause air bubbles or wrinkles, leading to an uneven design.
- Excess Handling: Limit how much you handle the guitar post-dip. The design is vulnerable before the clear-coat application.
Maintaining Your Hydro-dipped Guitar Over Time
| Maintenance Task | Frequency |
|---|---|
| Wipe down with a clean, dry cloth | After each use |
| Regular check-ups for signs of wear | Monthly |
| Polishing with guitar-safe products | Bi-annually |
| Professional inspection to maintain integrity | Annually |
Remember to always use products designed for musical instruments on your hydro-dipped guitar. This ensures the longevity of both the design and the functionality of your guitar. Avoid exposing the guitar to extreme temperatures or direct sunlight for prolonged periods, and when cleaning, steer clear of harsh chemicals that could damage the clear coat.
Gallery Of Hydro-dipped Guitars
Welcome to the Gallery of Hydro-Dipped Guitars, where artistry meets melody, creating a chorus of visual and auditory splendor. If the soul of music lies within the rhythm, then the personality of a guitar resides in its appearance. Hydro-dipping, an innovative method of applying printed designs to three-dimensional surfaces, provides endless opportunities for guitar customization, transforming ordinary instruments into extraordinary masterpieces. Here, you’ll feast your eyes on a collection that not only dazzles the spectator but also inspires musicians and artists alike.
Showcasing a Variety of Hydro-Dipped Designs
Showcasing A Variety Of Hydro-dipped Designs
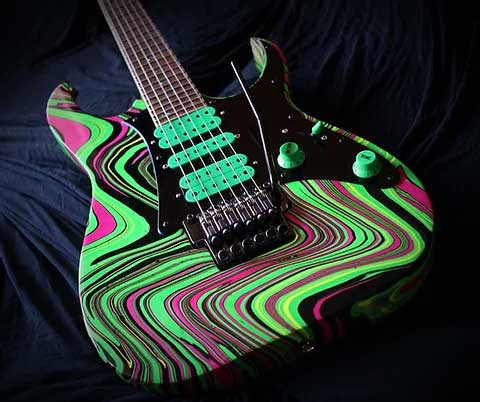
The versatility of hydro-dipping enables guitars to wear their owner’s creativity on their sleek surfaces. From vivid abstract patterns to detailed graphic imagery, each piece in our gallery exemplifies the finesse of this technique. Witness designs ranging from the psychedelic swirls perfect for the rock enthusiast, to the subtle, understated single-color finishes suited for the jazz connoisseur.
Inspirations and Ideas for Guitar Customization
Inspirations And Ideas For Guitar Customization
Seeking inspiration for your next guitar project? Our gallery isn’t just a display; it’s a treasure trove of ideas. Envision classic motifs, such as paisley or flames, tailored to fit the curves of a Stratocaster, or imagine your Les Paul adorned with a one-of-a-kind art nouveau piece. Let these guitars fuel your creativity and guide your vision for a personalized axe.
Interviews with Artists and Luthiers Specializing in Hydro-Dipping
Interviews With Artists And Luthiers Specializing In Hydro-dipping
In their own words, the skilled hands behind the magic unravel their experiences with hydro-dipping guitars. Through exclusive interviews, artists and luthiers share insights on the processes, challenges, and rewards of this unique art form. They discuss not only the technical aspects but also the passion that drives them to turn electric guitars into stunning works of art.
- Tips on Maintenance: How to preserve your hydro-dipped guitar’s vibrancy.
- Behind-the-Scenes: A glimpse into a day in the life of a hydro-dipping artist.
- Trend Analysis: The evolution of patterns and preferences over the years.
Conclusion: The Impact Of Hydro-dipping On Guitar Customization
The art of personalizing electric guitars has reached new heights with the advent of hydro-dipping. This innovative technique has revolutionized the world of guitar customization, allowing musicians and enthusiasts to transform their instruments into unique pieces of art. In this conclusion, we dive into the profound impact hydro-dipping has on guitar customization, reflecting on where this trend might lead in terms of aesthetics and its wider implications within the music industry.
Summarizing The Hydro-dipping Process
Hydro-dipping, also known as water transfer printing, is a method that involves immersing the guitar body into water with a floating sheet of pre-printed film. This film dissolves upon contact and leaves ink on the surface, which adheres to the guitar when activated by a chemical agent. The entire process not only ensures a vivid and crisp design but also a durable finish that resists wear and tear. Here’s a quick rundown of the steps:
- Preparation of the guitar by sanding and applying a base coat.
- Laying out the hydrographic film on the water’s surface in the dipping tank.
- Spraying the activator and dipping the guitar smoothly.
- Rinsing the guitar to remove residue, then applying a clear topcoat.
The Future Of Guitar Aesthetics And Customization
The realm of guitar customization is continually evolving, with hydro-dipping at the forefront. This process enables endless aesthetic possibilities, from intricate patterns to photo-realistic designs, thereby empowering creativity among artists and manufacturers. With advancements in materials and techniques, the future is bright for guitar aesthetics. Upcoming trends might include:
- Eco-friendly dipping solutions.
- Increased precision with robotic dipping arms.
- Integration of 3D textures and mixed media.
Guitars are likely to transcend their traditional appearance, becoming a canvas for personal expression as much as a musical instrument.
How Hydro-dipping Influences The Music Industry
Hydro-dipping has a multi-faceted influence on the music industry, enhancing artist branding and fan engagement. Customized guitars become an extension of the musician’s identity, often becoming iconic within fan communities. They fuel the merchandise market, with replicas and related artwork being highly sought after. Moreover, the process itself could open up new business models for both large manufacturers and small custom shops, tapping into the market of personalized instruments. In essence, hydro-dipping is not just decorating guitars; it’s shaping the culture of music itself.
Credit: guitargearfinder.com
Frequently Asked Questions For Can You Hydro-dip An Electric Guitar
Can I Hydro Dip A Guitar?
Yes, you can hydro dip a guitar to customize its appearance with unique patterns and colors, provided the electronic components are adequately protected beforehand.
What Cannot Be Hydro Dipped?
Materials that cannot withstand submersion in water or exposure to the base coat and activator chemicals used in hydro dipping, such as unsealed wood, extremely absorbent materials, or some electronics, are unsuitable for hydro dipping.
How Do I Change The Color Of My Electric Guitar?
To change the color of your electric guitar, disassemble it carefully. Sand the body to remove the old finish. Apply primer, let it dry, then spray on your chosen color followed by clear coat. Let it cure properly before reassembling.
Can You Spray Paint An Electric Guitar?
Yes, you can spray paint an electric guitar. Ensure it’s disassembled and the surface is prepped for best results. Use even strokes for a smooth finish, then let it dry completely.
Conclusion
Embracing the hydro-dipping method can transform your electric guitar into a personalized art piece. It’s a straightforward and fun process, provided safety and preparations are prioritized. With creativity unleashed, your unique guitar will not only stand out visually but could also become a centrepiece of your musical expression.

So grab your supplies, and let’s make waves in the world of guitar customization.
As an Amazon Associate, Cleanestor earns from qualifying purchases at no additional cost to you.