Yes, the Arturia Minilab works with FL Studio. You can use it to create and control music within this popular DAW.
The Arturia Minilab is a compact MIDI controller. It offers a range of features that make it ideal for both beginners and advanced users. FL Studio is a widely used digital audio workstation. It’s known for its user-friendly interface and powerful capabilities.
Combining the Minilab with FL Studio can enhance your music production experience. You can map the Minilab’s knobs, pads, and keys to control various functions in FL Studio. This integration can streamline your workflow and make music creation more intuitive. In this post, we will explore how to set up and use the Arturia Minilab with FL Studio effectively.
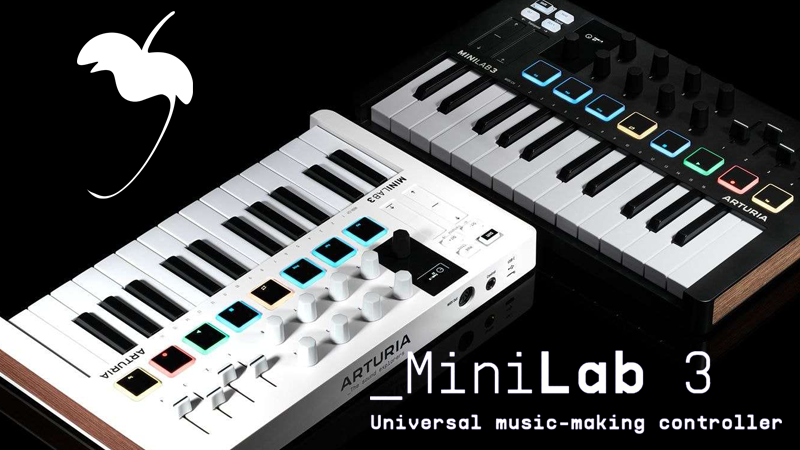
Introduction To Arturia Minilab
The Arturia Minilab is a compact MIDI controller. It is popular among music producers. Many users wonder if it works well with FL Studio. This blog post will explore this. But first, let’s introduce the Arturia Minilab.
Key Features
The Arturia Minilab offers many features. It has 25 velocity-sensitive keys. It includes 16 rotary knobs. There are also 8 touch-sensitive pads. These pads are backlit. The controller also has pitch and modulation strips. Users can connect it to a computer via USB. It is compatible with both Mac and PC.
Design And Build Quality
The Arturia Minilab has a sleek design. It is compact and portable. It fits easily in a backpack. The build quality is solid. It feels sturdy and durable. The keys are responsive. The knobs and pads are well-made. The controller has a professional look. It is perfect for on-the-go music production.
Overview Of Fl Studio
FL Studio is a popular digital audio workstation (DAW) used by music producers worldwide. It offers a wide range of features that help create high-quality music. Many musicians wonder if Arturia Minilab works with FL Studio. Understanding FL Studio’s main features and user interface is crucial to answering this question.
Main Features
FL Studio boasts a variety of powerful features. Its standout feature is the step sequencer. It allows users to create patterns quickly and easily. The piano roll is another key feature. It provides an intuitive way to compose melodies and harmonies. FL Studio also supports VST plugins, expanding its functionality. The mixer is highly versatile, offering multiple effects and routing options. Automation is seamless, enabling dynamic changes in sound. The DAW also includes a wide range of instruments and effects. These tools are essential for creating professional music.
User Interface
FL Studio’s user interface is user-friendly. It has a visually appealing design. The main window features several sections. The Channel Rack is where you create and arrange patterns. The Playlist is used to organize your project. The Mixer handles all audio routing and effects. The Browser provides easy access to files and plugins. The piano roll is accessible from the Channel Rack. It makes composing and editing notes straightforward. The interface is customizable to suit personal preferences. This helps improve workflow and productivity.
Compatibility Check
When using new music gear, checking compatibility with your software is key. This section dives into the compatibility of Arturia Minilab with FL Studio.
System Requirements
Before connecting your Arturia Minilab, ensure your system meets the necessary requirements:
- Operating System: Windows 7 or later, macOS 10.10 or later
- Processor: Intel Core i5 or equivalent
- RAM: Minimum 4 GB
- Free Disk Space: At least 2 GB
Supported Devices
The Arturia Minilab is compatible with a range of devices and software:
- FL Studio: Compatible with versions 20.0 and later
- USB Ports: Requires a standard USB 2.0 port
- MIDI Controllers: Fully supports MIDI integration
Connecting your Arturia Minilab to FL Studio is straightforward. Follow these steps:
- Connect the Minilab via USB to your computer.
- Open FL Studio and go to the MIDI settings.
- Select the Minilab from the list of available devices.
- Enable input and output for the Minilab.
- Start creating music using your Minilab controller.
The Arturia Minilab offers seamless integration with FL Studio. It enhances your music production experience with its compact design and powerful features.
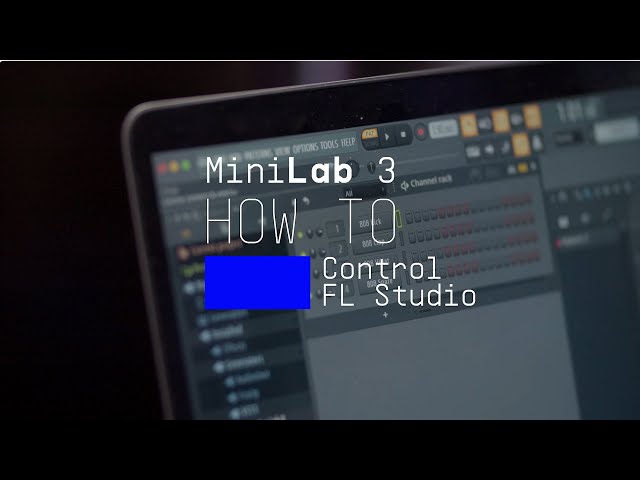
Connecting Arturia Minilab To Fl Studio
Connecting the Arturia Minilab to FL Studio can open a world of musical possibilities. This powerful combination lets you create, control, and produce music with ease. The process is straightforward and can be done in a few steps.
Initial Setup
To get started, follow these simple steps:
- Install the necessary drivers: Download and install the latest drivers from the Arturia website.
- Connect the Minilab: Use a USB cable to connect your Arturia Minilab to your computer.
- Open FL Studio: Launch FL Studio on your computer.
- Access the MIDI settings: In FL Studio, go to Options > MIDI Settings.
- Select the Minilab: Under Input, find and select Arturia Minilab. Enable it by checking the box next to it.
- Set the controller type: In the Controller type dropdown, select Generic Controller.
After completing these steps, your Arturia Minilab should be ready to use with FL Studio.
Troubleshooting Connection Issues
If you encounter any issues, try these solutions:
- Check the USB connection: Ensure the USB cable is securely connected to both the Minilab and the computer.
- Restart the software: Close and reopen FL Studio to refresh the connection.
- Update drivers: Make sure you have the latest drivers installed from the Arturia website.
- Test with another software: Try using the Minilab with another software to rule out hardware issues.
- Reconfigure MIDI settings: Double-check the MIDI settings in FL Studio to ensure everything is correctly set up.
These steps should help resolve most common connection issues. Enjoy your seamless music production experience.
Configuring Midi Settings
The Arturia Minilab is a versatile MIDI controller, and pairing it with FL Studio can enhance your music production workflow. Configuring MIDI settings correctly is crucial to make the most out of this combination. This section will guide you through the essential steps to ensure your Minilab works seamlessly with FL Studio.
Adjusting Preferences
To begin, open FL Studio and navigate to the Options menu. Select MIDI Settings. Here, you will find a list of connected MIDI devices. Ensure your Arturia Minilab is listed. If it’s not, check your USB connection and try again.
Under the Input section, find your Minilab and enable it. Make sure to select it as your controller type from the dropdown menu. This allows FL Studio to recognize the specific features of your Minilab.
Customizing Controls
Next, you need to customize the controls to fit your workflow. In the same MIDI Settings window, click on the Link Note On button. Press a key or turn a knob on your Minilab. This should link the control to the selected parameter in FL Studio.
To map different functions, use the Remote Control settings. Right-click a control in FL Studio, select Link to Controller, and then move the desired control on your Minilab.
You can also save your settings as a template. This way, you won’t have to reconfigure them each time you start a new project. Go to File > Save As and choose a name for your template.
These steps ensure your Arturia Minilab is fully integrated with FL Studio, providing a smooth and efficient production experience.
Mapping Controls In Fl Studio
Mapping controls in FL Studio can elevate your music production experience. The Arturia Minilab is a popular MIDI controller. It offers many ways to interact with FL Studio. This section will guide you through mapping controls. You will learn how to assign knobs and faders and create custom presets.
Assigning Knobs And Faders
Assigning knobs and faders in FL Studio is straightforward. First, connect your Arturia Minilab to your computer. Open FL Studio and make sure the Minilab is recognized. Go to the Options menu and select MIDI Settings. You will see the Minilab listed as a MIDI device.
Next, choose the control you want to map. Right-click on the control in FL Studio, then select Link to Controller. Move the knob or fader on the Minilab. FL Studio will automatically link the control. Repeat these steps for other knobs and faders. This lets you customize your workflow quickly.
Creating Custom Presets
Creating custom presets can save time. Open the Arturia MIDI Control Center software. It comes with the Minilab. Connect your Minilab to your computer and launch the software. You will see a list of factory presets. Select one to edit or start with a blank preset.
Begin by mapping the controls. Click on a control in the software. Assign it to a function in FL Studio. Customize each control to fit your needs. Save your preset once you are done. You can load this preset whenever you need it. This allows for quick and easy recall of your settings.
Mapping controls and creating custom presets can streamline your workflow. It can also enhance your creativity. Take the time to set up your Arturia Minilab in FL Studio. You will find it a valuable tool for music production.
Using Arturia Minilab With Fl Studio
Using Arturia Minilab with FL Studio opens up a world of possibilities for music creators. The Minilab is a compact and versatile MIDI controller. It’s perfect for both beginners and experienced producers. With FL Studio, you can record, edit, and perform music with ease.
Recording Midi
Recording MIDI with the Arturia Minilab in FL Studio is straightforward. Connect the Minilab to your computer using a USB cable. Open FL Studio, and the software should recognize the controller immediately. You can then assign the Minilab’s knobs and pads to various functions in FL Studio. This makes recording and editing MIDI data simple and intuitive.
To start recording, select a MIDI track and press the record button. Play your notes or drum patterns on the Minilab. FL Studio will capture your performance in real-time. You can then edit the MIDI data to correct any mistakes. Or, you can add new ideas to your recording.
Live Performance Tips
The Arturia Minilab is also great for live performances. Its compact size makes it easy to transport. You can set up quickly at any venue. Assign different sounds to the Minilab’s pads and keys. This allows you to switch between instruments seamlessly during your performance.
Use the knobs to control effects and filters. This adds a dynamic element to your live set. Practicing your set beforehand is essential. This ensures a smooth performance. Using the Minilab with FL Studio can take your live shows to the next level.
Credit: www.image-line.com
Advanced Techniques
Exploring the advanced techniques with the Arturia Minilab and FL Studio can enhance your music production. These techniques include using VST plugins, automation, and effects. Each method can elevate your tracks and make the process more efficient.
Using Vst Plugins
VST plugins expand the Minilab’s potential in FL Studio. They allow you to access a broad range of instruments and effects. Integrate your Minilab with various VSTs to create unique sounds.
To use VST plugins:
- Open FL Studio.
- Navigate to the plugin database.
- Select and load your desired VST plugin.
- Map the Minilab’s controls to the VST parameters.
Mapping the controls can be done by right-clicking on a parameter and selecting “Link to controller”. Then, move the Minilab knob or slider you wish to assign. This allows for real-time manipulation of sounds.
Automation And Effects
Automation is key for dynamic and evolving tracks. The Minilab’s knobs and sliders can control automation points in FL Studio. This means you can change parameters like volume, panning, or filter cutoffs over time.
To set up automation:
- Select the parameter you want to automate.
- Right-click and choose “Create Automation Clip”.
- Adjust the automation clip in the playlist.
- Use the Minilab to tweak the automation in real-time.
Effects such as reverb, delay, and distortion can add depth and texture to your tracks. Using the Minilab to control these effects provides hands-on manipulation. This can lead to more expressive and dynamic music production.
To add and control effects:
- Load an effect plugin on a mixer track.
- Assign the effect parameters to the Minilab controls.
- Adjust the effects while playing your track.
These advanced techniques enable a more interactive and creative workflow. The Minilab paired with FL Studio offers endless possibilities for music production.
Common Issues And Fixes
Connecting the Arturia Minilab to FL Studio can be a smooth process. Yet, sometimes users face common issues. This section addresses common problems and their fixes. Follow these tips to enhance your music production experience.
Latency Problems
Latency is a common problem. It causes delays between pressing a key and hearing the sound. Here are some quick fixes:
- Check your audio driver settings. Use ASIO drivers for better performance.
- Lower the buffer size in FL Studio. This reduces the delay.
- Ensure your USB cable is connected properly. Sometimes, a faulty cable can cause latency.
By addressing these points, you can reduce latency issues effectively.
Software Crashes
Another common issue is software crashes. These can disrupt your workflow. Here are some steps to fix this:
- Ensure your FL Studio and Arturia Minilab firmware are up to date.
- Close any unnecessary applications running in the background. They can consume resources.
- Check for any plugin conflicts. Sometimes, third-party plugins can cause crashes.
Following these steps can help you avoid crashes. Keep your system optimized for the best performance.
Credit: support.arturia.com
Credit: www.youtube.com
Frequently Asked Questions
Does Arturia Minilab Work With Fl Studio?
Yes, Arturia Minilab is fully compatible with FL Studio. You can easily map its controls to functions within the software.
How Do I Set Up Arturia Minilab In Fl Studio?
To set up, connect the Minilab via USB. Open FL Studio, go to MIDI settings, and select the Minilab as your input device.
Can I Use Arturia Minilab With Other Daws?
Yes, Arturia Minilab is compatible with most DAWs. You can use it with Ableton Live, Logic Pro, and others.
What Features Does Arturia Minilab Offer For Fl Studio?
Arturia Minilab offers customizable knobs, pads, and keys. These controls can be mapped to different functions in FL Studio for enhanced workflow.
Conclusion
The Arturia Minilab works seamlessly with FL Studio. Its integration enhances your music production. The compact design makes it easy to use. Many users appreciate its versatile features. It helps in creating professional-quality tracks. Connecting it to FL Studio is simple.

You can start making music quickly. Overall, it’s a great tool for any music producer. Whether you’re a beginner or expert, it fits your needs. Try it out and see the difference in your workflow. You won’t be disappointed with this MIDI controller.
{ “@context”: “https://schema.org”, “@type”: “FAQPage”, “mainEntity”: [ { “@type”: “Question”, “name”: “Does Arturia Minilab work with FL Studio?”, “acceptedAnswer”: { “@type”: “Answer”, “text”: “Yes, Arturia Minilab is fully compatible with FL Studio. You can easily map its controls to functions within the software.” } } , { “@type”: “Question”, “name”: “How do I set up Arturia Minilab in FL Studio?”, “acceptedAnswer”: { “@type”: “Answer”, “text”: “To set up, connect the Minilab via USB. Open FL Studio, go to MIDI settings, and select the Minilab as your input device.” } } , { “@type”: “Question”, “name”: “Can I use Arturia Minilab with other DAWs?”, “acceptedAnswer”: { “@type”: “Answer”, “text”: “Yes, Arturia Minilab is compatible with most DAWs. You can use it with Ableton Live, Logic Pro, and others.” } } , { “@type”: “Question”, “name”: “What features does Arturia Minilab offer for FL Studio?”, “acceptedAnswer”: { “@type”: “Answer”, “text”: “Arturia Minilab offers customizable knobs, pads, and keys. These controls can be mapped to different functions in FL Studio for enhanced workflow.” } } ] }As an Amazon Associate, Cleanestor earns from qualifying purchases at no additional cost to you.