Calibrating studio monitors is essential for accurate sound. It ensures your mixes translate well across different systems.
Studio monitors are vital for any audio production setup. Without proper calibration, your mixes may sound great in your studio but terrible elsewhere. Calibration helps achieve a balanced sound, reflecting true audio quality. This process involves adjusting levels, positioning monitors correctly, and using reference tracks.
Proper calibration creates a reliable listening environment. This guide will walk you through the steps needed to calibrate your studio monitors effectively. By the end, you will know how to set up your monitors for the best sound possible. Let’s dive into the world of audio calibration and enhance your listening experience.
Introduction To Studio Monitor Calibration
Studio monitor calibration is essential for accurate sound reproduction. Calibrating your studio monitors ensures you hear your audio tracks as intended. This process helps eliminate room acoustics and speaker placement issues. Let’s dive into the importance of calibration and common calibration issues.
Importance Of Calibration
Calibration provides a true representation of your audio. It ensures your mixes sound consistent across different playback systems. Proper calibration can lead to better decision-making during the mixing process. Your mixes will translate well to other environments.
Without calibration, your mixes may sound good in your studio but poor elsewhere. This can lead to frustration and extra work. Accurate calibration is crucial for achieving professional-quality mixes.
Common Calibration Issues
Incorrect speaker placement is a common issue. Monitors should be at ear level and form an equilateral triangle with your listening position. Another issue is room acoustics. Reflections from walls, ceilings, and floors can distort sound. Acoustic treatment can help mitigate these reflections.
Volume levels can also cause problems. Monitors should be calibrated to a consistent volume level. Too loud or too soft can affect your perception of the mix. Using a sound level meter can help maintain consistent volume levels.

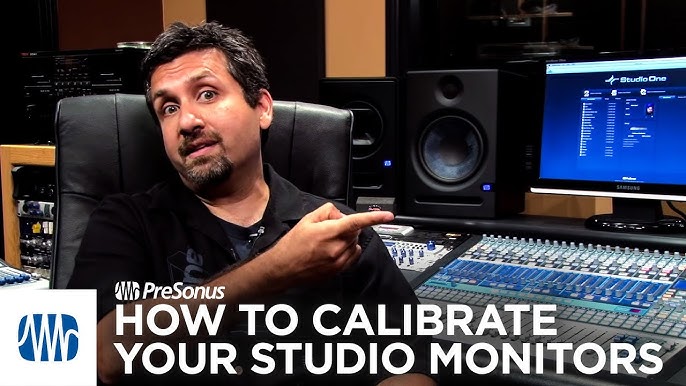
Credit: audiohertz.com
Necessary Tools And Equipment
Calibrating studio monitors is essential for achieving accurate sound reproduction. The process ensures your audio mixes sound consistent across different playback systems. To calibrate your studio monitors, you need specific tools and equipment. These tools help measure and adjust your monitors for the best audio performance.
Calibration Software
Calibration software is crucial for the calibration process. This software helps you analyze the audio output of your monitors. It provides detailed information about frequency response, phase, and other critical parameters. The software often includes guides and tutorials to help you through the calibration process. Some popular options include Room EQ Wizard (REW) and Sonarworks Reference. Each software has its own features, so choose one that fits your needs.
Measurement Microphone
A measurement microphone is another essential tool. It captures the sound emitted from your studio monitors. This microphone must be highly accurate to provide precise measurements. A popular choice is the Behringer ECM8000. This microphone is designed specifically for audio measurement tasks. Place the microphone at your listening position for the most accurate results. Ensure it is set up correctly according to the software instructions.
Setting Up Your Studio
Calibrating studio monitors is key to getting clear, accurate sound. Before calibration, you need to set up your studio properly. Proper setup enhances sound quality and reduces the need for major adjustments later.
Optimal Speaker Placement
First, place your monitors on sturdy stands or a desk. Make sure they are at ear level. This ensures direct sound reaches your ears. Next, position the monitors in an equilateral triangle with your listening position. This means the distance between the monitors and your ears should be the same.
Avoid placing monitors too close to walls or corners. This can cause sound reflections and bass buildup. If you must place them near a wall, use acoustic treatment to absorb reflections. Aim to keep your monitors at least 3 feet away from walls for the best sound quality.
Room Acoustics Considerations
Room acoustics play a big role in sound clarity. Hard surfaces like walls and floors reflect sound, causing echoes and reverb. Use acoustic panels, bass traps, and diffusers to control these reflections. Place acoustic panels on walls at first reflection points. This is where sound from the monitors first hits the walls. Use bass traps in corners to absorb low-frequency buildup.
Carpets, rugs, and curtains can also help dampen sound. These materials absorb high frequencies, reducing harshness. Consider placing a thick rug under your desk and heavy curtains over windows.
Monitor the room’s temperature and humidity. Extreme conditions can affect your equipment and sound quality. Keep your studio environment stable for the best results.
Credit: www.youtube.com
Initial Monitor Settings
Setting up studio monitors correctly is crucial. It ensures accurate sound reproduction. Proper calibration starts with initial monitor settings. These settings lay the foundation for a balanced audio experience. Let’s explore the essential steps for this process.
Volume Level Adjustment
Begin with adjusting the volume level. Set the monitor’s volume control to a neutral position. This is usually around the middle mark. Avoid setting the volume too high or too low. Use a consistent reference level for all monitors. This helps maintain uniformity in sound output. A sound level meter can be useful here. It ensures precise volume matching across monitors.
Equalizer Settings
Next, focus on the equalizer settings. Most monitors have built-in EQ controls. Start with a flat EQ setting. This means no frequency boosts or cuts. Listen to a reference track. Identify any inconsistencies in the sound. Adjust the EQ settings to correct these. Be cautious with changes. Small adjustments can make a big difference. Aim for a balanced, natural sound.
Using Calibration Software
Calibrating studio monitors can be a game-changer for your audio work. Using calibration software makes the process easier and more accurate. This software helps in setting the right levels and frequencies for your monitors. Let’s dive into how you can use this software effectively.
Software Installation
First, choose a reliable calibration software. Download it from the official website. Follow the installation steps carefully. Most software provides a step-by-step guide. Ensure your computer meets the software requirements. Install any necessary drivers. Restart your computer after installation. This ensures the software runs smoothly.
Running Calibration Tests
Open the installed software. Connect your studio monitors to your computer. Ensure they are placed correctly in your studio. The software will guide you through the calibration process. Follow the on-screen instructions. The software will play various tones. It measures your monitor’s response. Adjust your monitor settings as advised by the software. Repeat the test if needed.
Once done, save your calibration settings. Your studio monitors are now calibrated. Enjoy better sound quality and more accurate mixes.
Analyzing Calibration Results
Analyzing the calibration results of your studio monitors is crucial. It helps ensure accurate sound reproduction. This process involves interpreting the frequency response and identifying problem areas. Proper analysis leads to better mix decisions.
Interpreting Frequency Response
Frequency response shows how your studio monitors handle different frequencies. Look at the graph for peaks and dips. Peaks mean the sound is louder at certain frequencies. Dips mean the sound is quieter. A flat line is ideal. It means all frequencies are balanced. Adjust settings to achieve a flat response. This ensures your mixes sound good on all systems.
Identifying Problem Areas
Identify problem areas by examining the frequency response graph. Peaks and dips highlight issues. High peaks at specific frequencies can muddy your sound. Deep dips can cause you to overcompensate. Note these areas and adjust your monitor settings. You might need to move your monitors or add acoustic treatment. Fixing these issues leads to clearer sound.
Making Necessary Adjustments
Calibrating studio monitors is essential for accurate sound. Adjustments ensure you hear true audio. This process improves mixing and mastering. Let’s dive into key adjustments.
Tweaking Speaker Position
Speaker position impacts sound quality. Place monitors at ear level. Ensure the tweeters are at ear height. This provides the best sound clarity.
Set monitors in an equilateral triangle. Your head and speakers form the triangle. This setup ensures balanced sound. Avoid placing monitors near walls. Walls can cause bass buildup.
Room Treatment Options
Room acoustics affect monitor accuracy. Use acoustic panels to absorb sound. Panels reduce echo and reverb. Place them on walls and ceilings.
Bass traps handle low frequencies. Place them in corners. They control bass buildup. Rugs and curtains also help. They reduce reflections and improve clarity.
Final Calibration Check
After setting up your studio monitors, the final calibration check is crucial. This step ensures your monitors deliver accurate sound. Proper calibration helps create better mixes and recordings. Let’s explore the steps involved in this process.
Re-running Tests
Re-run all tests after initial calibration. This step confirms the accuracy of your setup. Use a reliable test signal, like pink noise or a sine wave. Analyze the results to spot any issues.
Adjust your monitor settings based on these results. Focus on frequency response and level balance. Ensure both monitors are balanced. Check for any unwanted room reflections or resonances.
| Test Type | Purpose | Tools Needed |
|---|---|---|
| Pink Noise | Check frequency response | Audio Analyzer |
| Sine Wave | Identify resonances | Sine Wave Generator |
| Level Balance | Ensure even output | Sound Level Meter |
Confirming Improvements
After adjustments, confirm your improvements. Play a variety of test tracks. Listen for any anomalies or imbalances. Test with different genres and sounds. This ensures your monitors handle all types of audio well.
Compare your new calibration with the initial setup. Notice any differences in clarity and balance. Ensure your monitors are now providing a true representation of your mix.
- Play test tracks
- Listen for anomalies
- Test with different genres
Repeat the process if needed. Achieving the best sound takes time and patience. Your final calibration check is complete when you are satisfied with the results.
Maintaining Calibration
Maintaining calibration for your studio monitors ensures consistent audio quality. Proper maintenance involves regular checks and updating calibration settings. This guide will help you keep your monitors in top condition.
Regular Checks
Check your studio monitors’ calibration regularly. Set a schedule to inspect them. Monthly checks are ideal. Listen for any audio inconsistencies. Pay attention to any changes in sound quality. Note any issues and address them quickly.
Updating Calibration Settings
Update your calibration settings when needed. Changes in your studio environment can affect sound. Adjust settings to match these changes. Use calibration software if available. Follow the software’s instructions carefully. This ensures accurate calibration.
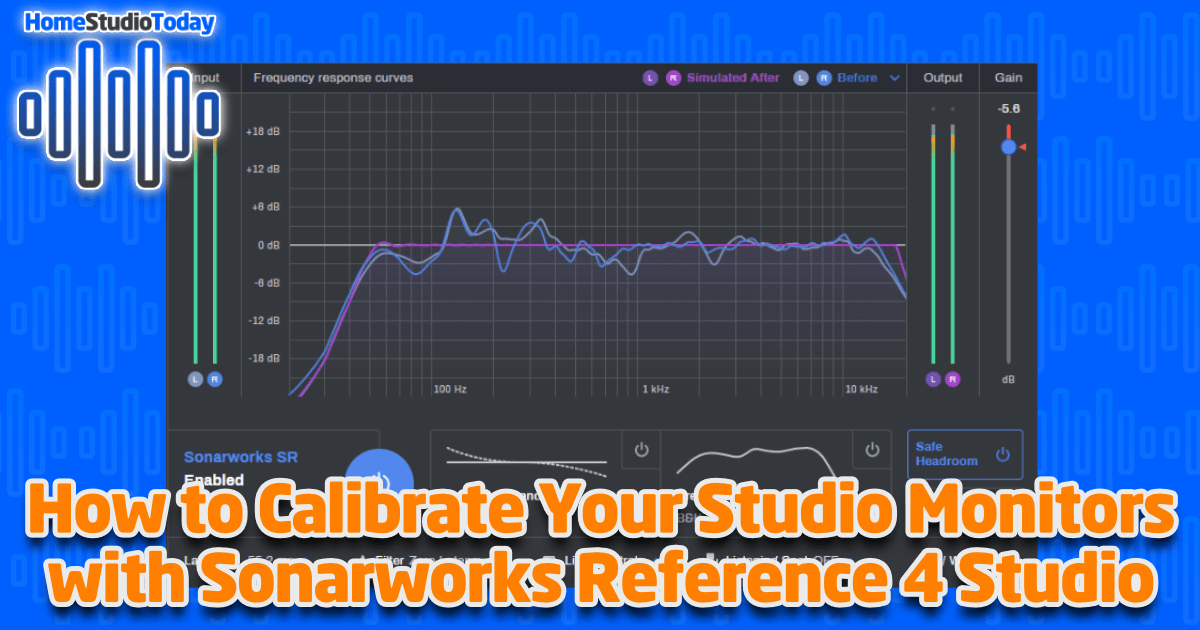
Credit: www.homestudiotoday.com
Frequently Asked Questions
Why Calibrate Studio Monitors?
Calibrating studio monitors ensures accurate sound reproduction. This helps in creating mixes that translate well across different playback systems.
How Often To Calibrate Studio Monitors?
Calibrate your studio monitors every 6 months. This maintains consistent sound quality and compensates for any changes in your studio environment.
What Tools Needed To Calibrate Monitors?
You need an SPL meter, pink noise generator, and calibration software. These tools help achieve precise sound levels.
Can I Calibrate Monitors Myself?
Yes, you can calibrate monitors yourself. Follow a step-by-step guide and use the right tools for accuracy.
Conclusion
Calibrating studio monitors is crucial for accurate sound. Follow the steps carefully. Adjust your monitors based on your room. Use reference tracks to verify your settings. Test different genres to ensure balance. Regular checks maintain optimal performance. Enjoy better sound quality and more precise mixes.

Happy calibrating!
{ “@context”: “https://schema.org”, “@type”: “FAQPage”, “mainEntity”: [ { “@type”: “Question”, “name”: “Why calibrate studio monitors?”, “acceptedAnswer”: { “@type”: “Answer”, “text”: “Calibrating studio monitors ensures accurate sound reproduction. This helps in creating mixes that translate well across different playback systems.” } } , { “@type”: “Question”, “name”: “How often to calibrate studio monitors?”, “acceptedAnswer”: { “@type”: “Answer”, “text”: “Calibrate your studio monitors every 6 months. This maintains consistent sound quality and compensates for any changes in your studio environment.” } } , { “@type”: “Question”, “name”: “What tools needed to calibrate monitors?”, “acceptedAnswer”: { “@type”: “Answer”, “text”: “You need an SPL meter, pink noise generator, and calibration software. These tools help achieve precise sound levels.” } } , { “@type”: “Question”, “name”: “Can I calibrate monitors myself?”, “acceptedAnswer”: { “@type”: “Answer”, “text”: “Yes, you can calibrate monitors yourself. Follow a step-by-step guide and use the right tools for accuracy.” } } ] }As an Amazon Associate, Cleanestor earns from qualifying purchases at no additional cost to you.