Testing studio monitors is crucial for achieving accurate sound in your recordings. Proper testing ensures you get the best audio quality for your projects.
Studio monitors are essential tools for music producers and sound engineers. They offer a true representation of the audio, helping you make precise adjustments. Without proper testing, you may not realize the full potential of your monitors. You might miss out on crucial details in your mix.
Testing helps you understand how your monitors perform in different environments. It involves checking frequency response, clarity, and balance. This guide will walk you through the steps to test your studio monitors effectively. This ensures you get the best sound quality in your recordings.
Credit: www.audiotestkitchen.com
Introduction To Studio Monitors
Studio monitors are essential tools for any music producer or sound engineer. These speakers provide a flat frequency response, ensuring accurate sound reproduction. You can hear every detail in your mix. This helps you make informed decisions during the production process.
Unlike regular speakers, studio monitors do not color the sound. They reveal flaws in your audio that other speakers might hide. This makes them ideal for mixing and mastering. Understanding their purpose and testing them accurately is crucial for achieving the best results.
Purpose Of Studio Monitors
Studio monitors serve a specific purpose in the audio production process. They offer an unaltered and precise audio output. This allows you to catch mistakes and improve your mix. Accuracy is key in creating professional-sounding music.
They help you balance different elements in your track. Vocals, instruments, and effects all need to sit well together. With studio monitors, you can ensure that your mix translates well on all playback systems. From car speakers to earbuds, your music will sound great everywhere.
Importance Of Accurate Testing
Accurate testing of studio monitors is vital. It helps you understand their true performance. You need to know how they respond to different frequencies. This knowledge helps you make better mixing decisions.
Testing involves checking their frequency response, distortion levels, and stereo imaging. Each aspect affects how you perceive your mix. By thoroughly testing your studio monitors, you ensure they meet your needs. This leads to better mixes and ultimately better music production.
Setting Up Your Studio Monitors
Setting up your studio monitors correctly ensures you get the best sound. Proper placement and connection are key. Let’s dive into the steps for setting up your studio monitors.
Choosing The Right Location
The location of your studio monitors affects sound quality. Choosing the right location is crucial. Follow these tips:
- Place monitors at ear level.
- Position monitors in an equilateral triangle with your listening spot.
- Keep them away from walls to avoid sound reflections.
- Ensure the room is symmetrical to balance the sound.
Here’s a simple table to illustrate the placement:
| Placement Tip | Description |
|---|---|
| Ear Level | Place monitors so tweeters are at ear height. |
| Equilateral Triangle | Your head and the two monitors form an equilateral triangle. |
| Away from Walls | Keep at least 12 inches from walls to avoid reflections. |
| Symmetrical Room | Ensure room is balanced to evenly distribute sound. |
Connecting To Audio Interface
Connecting your studio monitors to an audio interface is the next step. Here’s a quick guide:
- Turn off all equipment before connecting.
- Connect balanced cables (XLR or TRS) to the audio interface outputs.
- Plug the other end into the studio monitors.
- Power on the audio interface and then the monitors.
Ensure all connections are secure. This prevents any unwanted noise or interference. Follow these steps and you’ll have your studio monitors ready for testing.
Essential Testing Equipment
Testing studio monitors requires specific equipment to ensure accurate results. The right tools help you measure sound quality and performance effectively. This section covers essential testing equipment you need.
Required Cables And Adapters
You’ll need various cables and adapters to connect your studio monitors. XLR cables are essential for balanced connections. They help reduce noise interference. TRS cables are also important. They provide balanced connections similar to XLR. RCA cables are useful for unbalanced connections. They are often used with consumer audio equipment. Adapters may also be necessary. For example, XLR to TRS adapters can be handy. Make sure you have a variety of them.
Audio Testing Software
Audio testing software is crucial for analyzing your studio monitors. REW (Room EQ Wizard) is a popular choice. It helps measure frequency response and room acoustics. Another good option is Sonarworks. It offers calibration tools to improve accuracy. Consider using software like Audacity. It’s free and useful for basic audio tests. Ensure your software is compatible with your system. It should provide clear and precise data. This helps you make informed adjustments.

Credit: www.production-expert.com
Room Acoustics
Room acoustics play a critical role in testing studio monitors. The sound you hear is not only from the monitors but also from how it interacts with the room. Proper room acoustics ensure you get an accurate representation of the audio. Without it, you may face issues like sound reflections and bass build-up.
Treating The Room
First, identify problematic areas in your room. Corners, walls, and ceilings often reflect sound. Use acoustic panels to absorb these reflections. Bass traps can help manage low-frequency sounds. Place them in corners where bass tends to accumulate. Diffusers scatter sound waves. This helps in preventing echoes. Place them on the walls behind your listening position.
Understanding Acoustic Reflections
Sound reflections can alter your perception of audio. Direct sound comes straight from the monitors. Reflected sound bounces off surfaces before reaching your ears. This can cause phase issues and muddled audio. To test for reflections, clap your hands and listen for echoes. If you hear any, you need more treatment. Use a mirror to find reflection points. Sit in your listening position. Have someone move the mirror along the walls. When you see the monitors in the mirror, place treatment there.
Initial Listening Test
Testing studio monitors is crucial for ensuring the best sound quality. An initial listening test helps gauge their performance. This test lays the foundation for a detailed evaluation. It involves playing familiar tracks and identifying sound issues. Let’s dive into each step.
Playing Reference Tracks
Select a few well-mixed songs you know well. These tracks should cover various genres. Play them at a moderate volume. Listen for clarity, balance, and detail. Use high-quality audio files for accurate results. These tracks will reveal the monitors’ true capabilities.
Identifying Sound Issues
Pay attention to any sound irregularities. Listen for distortions, muffled sounds, or excessive bass. Check if the highs, mids, and lows are well-balanced. Note any issues with the stereo image. This helps identify weak spots in the monitors. Trust your ears. They are your best tool in this process.
Frequency Response Testing
Testing the frequency response of studio monitors is crucial. It ensures the accuracy of sound reproduction. This process helps identify any anomalies or colorations in the audio. Proper testing ensures your mixes translate well to other listening environments. Let’s dive into the details of frequency response testing.
Using Pink Noise
Pink noise is a popular tool for testing frequency response. It contains equal energy per octave. This makes it easier to identify frequency imbalances. Play pink noise through your monitors. Listen closely to hear if any frequencies stand out or fade away. This will help you identify any inconsistencies.
Analyzing Frequency Spectrum
Analyzing the frequency spectrum gives a visual representation of sound. Use a spectrum analyzer to see the output of your monitors. This tool helps you spot any peaks or dips in the frequency range. Adjust your monitors or room setup based on the analysis.
Ensure your room is acoustically treated. This minimizes external influences on your test results. Accurate frequency response testing leads to better mixing decisions. Your final mix will sound more balanced across different playback systems.
Stereo Imaging And Panning
Understanding stereo imaging and panning is crucial for testing studio monitors. It helps in achieving a balanced and accurate sound reproduction. Proper stereo imaging allows you to place instruments and vocals precisely within the sound field. This ensures a clear and immersive listening experience. Let’s explore how to test these aspects effectively.
Testing Stereo Field
To test the stereo field, play a track with well-defined panning. Sit in the sweet spot, equidistant from each monitor. Listen for the placement of each instrument. They should sound distinct and positioned correctly from left to right.
Use a stereo test track which includes:
- Wide panned elements
- Centralized sounds
- Elements that move across the stereo field
Evaluating Mono Compatibility
Ensuring good mono compatibility is also essential. It guarantees that your mix sounds good on mono devices like smartphones. Here’s how to evaluate it:
- Switch your audio to mono.
- Listen for any significant volume drops.
- Check if any instruments disappear or sound phasey.
If the mix changes drastically, it indicates poor mono compatibility. Adjust your mix and check again.
Remember, testing both stereo imaging and mono compatibility ensures your music translates well on all playback systems.
Long-term Maintenance
Studio monitors are an essential part of any audio setup. Keeping them in good condition requires regular maintenance. This ensures they perform well over the long term. Proper care can extend their lifespan and keep the sound quality top-notch.
Regular Cleaning
Regular cleaning is vital to maintain the performance of your studio monitors. Dust and dirt can affect the sound quality. Use a soft, dry cloth to wipe the surfaces. For stubborn spots, a slightly damp cloth can be used. Avoid using harsh chemicals as they can damage the finish.
- Clean the speaker cones gently.
- Do not press too hard to avoid damage.
- Use compressed air to remove dust from hard-to-reach areas.
Also, pay attention to the connectors and ports. Dust can accumulate and affect the connections. Use a small brush or a can of compressed air to clean them.
Calibration And Recalibration
Calibration ensures your studio monitors produce accurate sound. Over time, factors like room changes and equipment aging can affect calibration. Regular recalibration is needed to maintain sound accuracy.
- Use a reliable calibration tool.
- Follow the manufacturer’s instructions for the best results.
- Recalibrate every few months or after significant changes in your studio.
Proper calibration involves adjusting the frequency response and levels. Some advanced monitors have built-in calibration tools. Others may require external software or hardware.
Here is a simple table to summarize the calibration steps:
| Step | Action |
|---|---|
| 1 | Set up the calibration tool |
| 2 | Measure the frequency response |
| 3 | Adjust the levels |
| 4 | Verify the calibration |
By maintaining a regular cleaning and calibration schedule, your studio monitors will continue to deliver high-quality sound. This keeps your audio projects sounding their best.
Troubleshooting Common Issues
When testing studio monitors, you might face several issues. These common problems can impact your sound quality. Identifying and fixing them is crucial for accurate audio monitoring. This section will guide you through troubleshooting common issues like hum and buzz, and phase problems.
Dealing With Hum And Buzz
Hum and buzz can be distracting. They often stem from electrical interference. Follow these steps to identify and fix them:
- Check Connections: Ensure all cables are properly connected. Loose or damaged cables can cause noise.
- Ground Loops: Ground loops are a common cause of hum. Use a ground loop isolator to eliminate this issue.
- Power Sources: Avoid plugging your monitors into the same outlet as other high-powered devices. This can reduce electrical noise.
- Cable Quality: Invest in high-quality, shielded cables to reduce interference.
Addressing Phase Problems
Phase problems can cause weak or hollow sound. They occur when audio signals are out of sync. Here’s how to address phase issues:
- Check Polarity: Ensure your monitor cables are connected correctly. Reversed polarity can cause phase issues.
- Monitor Placement: Place your monitors equidistant from your listening position. Unequal distances can lead to phase problems.
- Mono Test: Play a mono signal through your monitors. The sound should be clear and centered. If not, adjust your setup.
Addressing these common issues will help you achieve accurate sound. Keep your studio monitors in top condition for the best audio experience.
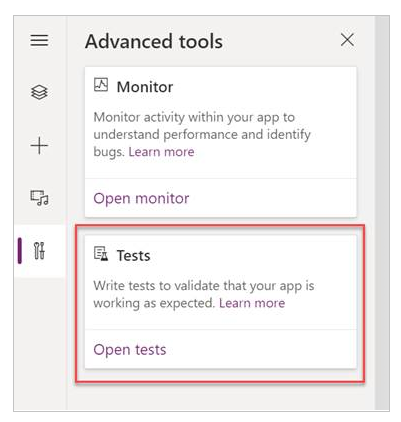
Credit: learn.microsoft.com
Frequently Asked Questions
How Do You Test Studio Monitors?
To test studio monitors, play a variety of tracks. Listen for clarity, balance, and accuracy. Ensure there’s no distortion.
What Equipment Do You Need To Test Studio Monitors?
You’ll need an audio interface, cables, and high-quality audio files. Use a reliable playback system for accurate results.
Why Is It Important To Test Studio Monitors?
Testing ensures your monitors produce accurate sound. This is crucial for mixing and mastering music professionally.
What Should You Listen For When Testing?
Focus on frequency response, clarity, and stereo imaging. Check for any distortion or inconsistencies in sound.
Conclusion
Testing studio monitors doesn’t have to be complex. Start with proper placement. Use reference tracks to gauge sound quality. Trust your ears; they are your best tool. Regularly switch between monitors and headphones. Take notes on what you hear. Adjust settings as needed.

Practice makes perfect. Keep testing until you’re satisfied. This process ensures your mixes sound great everywhere. Happy testing!
{ “@context”: “https://schema.org”, “@type”: “FAQPage”, “mainEntity”: [ { “@type”: “Question”, “name”: “How do you test studio monitors?”, “acceptedAnswer”: { “@type”: “Answer”, “text”: “To test studio monitors, play a variety of tracks. Listen for clarity, balance, and accuracy. Ensure there’s no distortion.” } } , { “@type”: “Question”, “name”: “What equipment do you need to test studio monitors?”, “acceptedAnswer”: { “@type”: “Answer”, “text”: “You’ll need an audio interface, cables, and high-quality audio files. Use a reliable playback system for accurate results.” } } , { “@type”: “Question”, “name”: “Why is it important to test studio monitors?”, “acceptedAnswer”: { “@type”: “Answer”, “text”: “Testing ensures your monitors produce accurate sound. This is crucial for mixing and mastering music professionally.” } } , { “@type”: “Question”, “name”: “What should you listen for when testing?”, “acceptedAnswer”: { “@type”: “Answer”, “text”: “Focus on frequency response, clarity, and stereo imaging. Check for any distortion or inconsistencies in sound.” } } ] }As an Amazon Associate, Cleanestor earns from qualifying purchases at no additional cost to you.